21 releases (12 breaking)
Uses new Rust 2024
| 0.14.4 | Mar 23, 2025 |
|---|---|
| 0.14.2 | Jan 24, 2025 |
| 0.14.0 | Dec 21, 2024 |
| 0.13.0 | Jul 21, 2024 |
| 0.5.0 | Jun 28, 2023 |
#137 in Images
25 downloads per month
1MB
3K
SLoC
Syno Photo Frame
Synology Photos and Immich full-screen slideshow for Raspberry Pi.
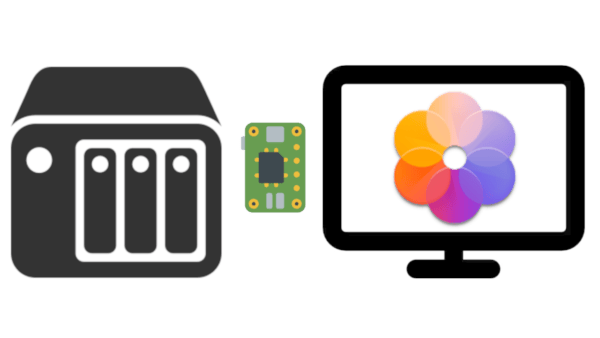
Features include speed control, transition effects, and a blurry background fill.

If you like the project, give it a star ⭐, or consider becoming a
:)
Why?
I developed this app for a DIY digital photo frame project using a Raspberry Pi connected to a monitor (it runs great on Pi Zero 2). The goal was to fetch photos directly from my Synology NAS over LAN.
Why not use Synology Photos in a web browser directly? There are two reasons. First, the current version of Synology Photos web app (1.7.x at the time of writing) does not allow slideshow speed adjustments and changes photos every 3 or 4 seconds - way too fast for a photo frame. Second, running a full web browser is more resource-demanding than a simple static image app, which matters when using a Raspberry Pi, especially in the Zero variant.
Setup
Synology Photos (NAS)
Assuming the Synology Photos package is installed on DSM:
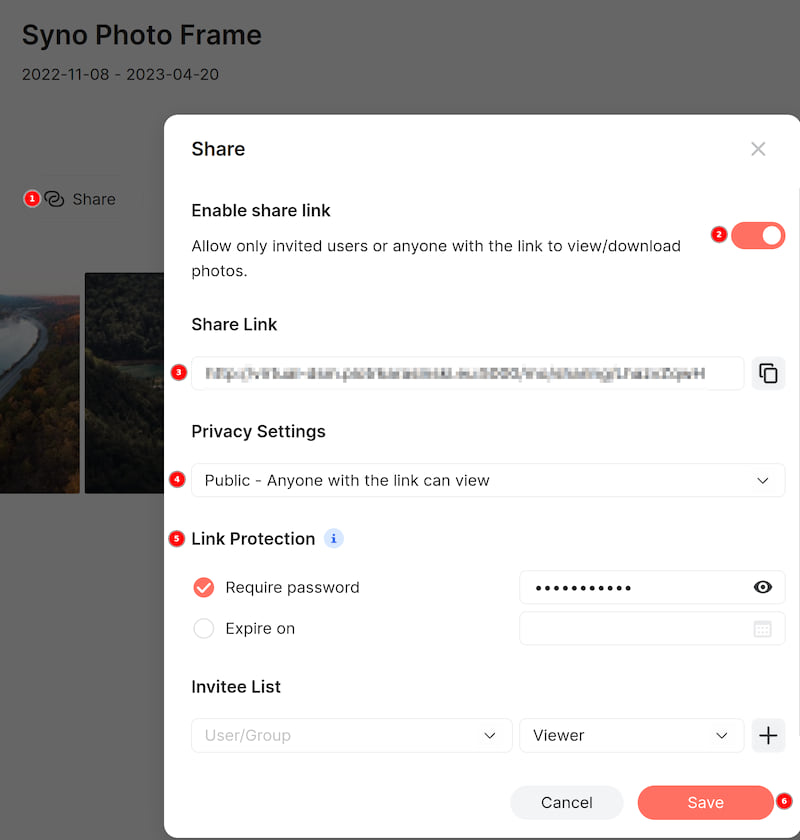
- Create an album in Synology Photos and add photos to it (note the distinction between an "album" and a "folder").
- Click the "Share" button in the album.
- Check the "Enable share link" option.
- Copy/write down the Share Link - you'll need it when setting up the app on Raspberry Pi later on.
- Set Privacy Settings to one of the "Public" options.
- Optionally, enable Link Protection. If a password is set, you will
need to provide it using the
--passwordoption when running the app on Raspberry Pi. In the case of accessing Synology Photos over the internet or an untrusted LAN, I recommend making sure your share link uses the HTTPS (not HTTP) scheme to prevent exposing the password. - Click Save.
Limitations
- Accessing Synology Photos via a Quick Connect link is not currently supported.
- Upper limit on number of photos in an album is set to 5000.
- Video playback is not supported
Alternative: Immich
Alternatively, instead of using Synology Photos, photos can also be hosted on Immich server. Create an album in Immich, add photos to it, and create a share link (click the "Share" button in the album). Optionally set a password (the same recommendation as with Synology Photos about using HTTPS scheme when accessing the server over the internet applies). Copy/write down the link - you'll need it when setting up the app on Raspberry Pi later on.
Limitations
- Video playback is not supported
Raspberry Pi
Let's assume that you're starting with a fresh installation of Raspberry Pi OS Lite, the network has been set up (so you can access Synology Photos or Immich server), and you can access the command line on your Pi.
Option 1: Install From Debian Package
Releases contains pre-built .deb packages for arm64 Linux architecture, which should work on Raspberry Pi 3 and up, as well as Zero 2 (assuming the 64bit version of Raspbian OS Bookworm is installed).
- Check the architecture with
dpkg --print-architecture; it should print "arm64". - Check the installed version of Debian with
lsb_release -cand make sure it says "bookworm".
For other platforms (including older versions of Debian, such as "bullseye"), you must build the project from source - see Option 2: Build From Source.
-
Download the
syno-photo-frame_X.Y.Z_arm64.debpackage from Releases. -
Update the system:
sudo -- sh -c ' \ apt update && \ apt upgrade -y' -
cdto the directory where the package has been downloaded and install the app:sudo apt install ./syno-photo-frame_*_arm64.deb
Option 2: Build From Source
Note: These instructions assume a Debian-based Linux distribution, but adjusting them should make it possible to build the app for almost any platform where Rust and SDL are available.
-
Install Rust if you have not already (or use the Alternative: Build With Docker approach).
-
Install build dependencies:
sudo -- sh -c ' \ apt update && \ apt upgrade -y && \ apt install -y \ libsdl2-dev \ libssl-dev' -
Install the app from crates.io (you can use the same command to update the app when a new version gets published):
cargo install syno-photo-frame
When building is finished, the binary is then located at
$HOME/.cargo/bin/syno-photo-frame and should be available on your
$PATH.
Alternatively, clone the git repository and build the project with (in the cloned directory):
cargo build --release
The binary is then located at target/release/syno-photo-frame.
Alternative: Build With Docker
If you don't want to install Rust or the build dependencies for some reason but have Docker available, you can build the binary and/or Debian package in a container using the provided Dockerfile. See instructions in the file to build the app this way.
Run
Display the help message to see various available options:
syno-photo-frame --help
Run the app:
syno-photo-frame {sharing link to Synology Photos or Immich album}
If everything works as expected, press Ctrl-C to kill the app.
Optional Stuff
Increase the Swap Size on Raspberry Pi Zero
A 100 MB swap file may be too small when running on low-memory systems such as Pi Zero. See Increasing Swap on a Raspberry Pi.
Auto-start
To start the slideshow automatically on boot, you can add it to crontab:
crontab -e
Add something like this at the end of crontab:
@reboot sleep 5 && /bin/syno-photo-frame https://{share_link} >> /tmp/syno-photo-frame.log 2>&1
Remember to replace your share link with a real one and adjust the
binary path depending on the installation method (dpkg or from
crates.io). A short sleep is required to not start before some
services (network) are up - try to increase it if errors occur. The
above command redirects error messages to a log file
/tmp/syno-photo-frame.log.
For other (untested) alternatives, see e.g. this article.
Startup-Shutdown Schedule
A proper digital photo frame doesn't run 24/7. Shutdown can be scheduled in software only, but for startup, you'll need a hardware solution, e.g. for Raspberry Pi Zero, I'm using Witty Pi 4 Mini.
Auto Brightness
For my digital photo frame project, I attached a light sensor to Pi's GPIO to adjust the monitor's brightness automatically depending on ambient light. TSL2591 is an example of such sensor. Check out my auto-brightness-rpi-tsl2591 project to add automatic brightness control to your digital photo frame.
Start from a Random Photo and in Random Order
By default, photos are displayed in the order of the shooting date. If
the album is very large, and the startup-shutdown schedule is short,
potentially the slideshow might never reach some of the later photos
in the album. The --random-start option solves this problem by
starting the slideshow at a randomly selected photo, then continuing
normally (in the order of the shooting date). Adding this option to
the startup schedule will start at a different photo every time.
Alternatively, use --order random to display photos in a completely
random order.
Change the Transition Effect
Use the --transition (or -t) option to select the type of
transition effect for changing photos. Use --help option to display
valid values.
Customize the Splash-Screen
You can replace the default image displayed during loading of the
first photo. Use the --splash option to point the app to a .jpeg
file location.
Dependencies
~28–42MB
~761K SLoC