3 stable releases
| 1.0.2 | Mar 16, 2023 |
|---|---|
| 0.1.2 |
|
| 0.1.1 |
|
| 0.1.0 |
|
#894 in Images
45 downloads per month
29KB
236 lines
Table of contents
Description
A crate that allows you to convert an image to a string that can be displayed in a Space Engineers LCD panel.
This project uses Semantic Versioning (tries to).
Preface
You can skip this part.
I would like to mention Whip's Image Converter by Whiplash141 for the inspiration and the method of converting a color to a Space Engineers LCD panel character. I don't know where he found how to do that. I made this for 5 reasons:
- I wanted to learn Rust.
- His program is slower.
- His program is (IMO) a little overcomplicated.
- His program only runs on Windows.
- This is a reusable crate version, whereas he only has an executable.
I don't mean those in a bad way, but it's the truth. Except for #3, that's subjective. But I mean, who needs to choose a dithering method? However, I applaud him for making a special case for every panel variation in the game when it comes to resizing the image. I took the easy way out with aspect ratios.
Example results
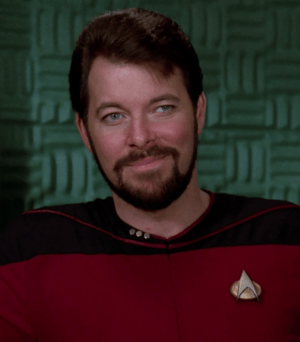
Original image (image of actor Jonathan Frakes portraying the fictional character "William Thomas Riker" from the franchise Star Trek: The Next Generation):
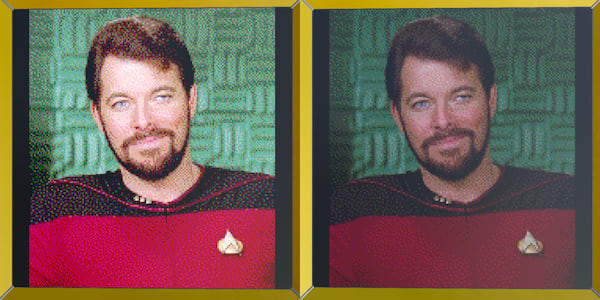
Undithered version as seen in Space Engineers:

Dithered version as seen in Space Engineers:
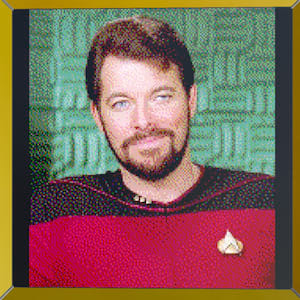
In these screenshots, the undithered version looks darker than the dithered version, but that is only because of the in-game lighting. I took the screenshots on different panels at different times in the game's day/night cycle. You can see that the surrounding yellow blocks are also darker in the undithered screenshot.
Usage
- Obtain a
DynamicImageusing the image crate. - Resize the image using
resizedfunction. The aspect ratio is important! It determines the dimensions of the image in-game.
For example, for a Wide LCD panel, you would need a2:1aspect ratio. That is, awidth_aspect_ratioof 2 and aheight_aspect_ratioof 1. If you want to preserve the aspect ratio of the original image (don't stretch it), set thepreserve_aspect_ratioargument totrue. - Call the
image_to_se_stringfunction with the resized image. Setting theditherargument totrueis highly recommended, as your image will look badly otherwise. - Now that you have the string, you need to configure your panel. Set the font size to the lowest possible value (0.1)
and the font to
Monospace.
Further configurations
Removing the default padding
By default, Space Engineers has a 2% text padding for all panels. This means whatever text is on the panel will be moved down/up (depends on the rotation) and to the right/left (depends on the alignment). For text, this can be nice, but for images, you probably want to remove this, since it ends up covering some edge pixels because it moves them off the screen.
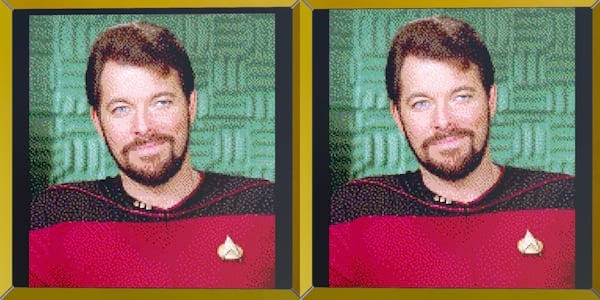
Comparison (top panel has default padding, bottom panel doesn't):
Changing the text alignment
Imagine you have a portrait (greater height over width) that you want to display, but you don't want to stretch it to fit the panel. In that case, if you were to display it on a square panel, there would be a big black gap on the right (since the default is left aligned and your image is thinner than the panel). You can change the alignment to center the image, therefore having an equivalent gap on each side of the panel.
Comparison (top panel is aligned to the left, bottom panel isn't):
Changing the color tone
Normally, when you want text that is of a different color than white, you just change the color of the panel. This works even with an image, even if the image "text" already has a color. Changing the color affects the tone of the image.
Our image looks a little too bright in-game. Using the color sliders, we can lower the value of each RGB component. In this case, I lowered them to all be at 100 from the default 255 (effectively lowering the brightness), and I think it looks much closer to the original.
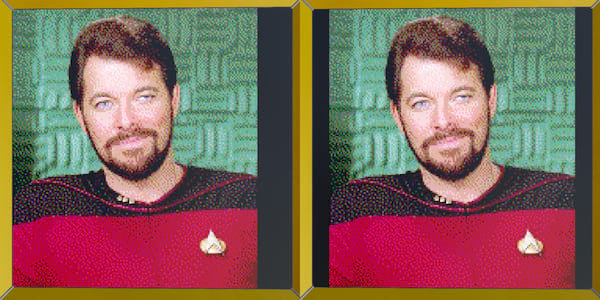
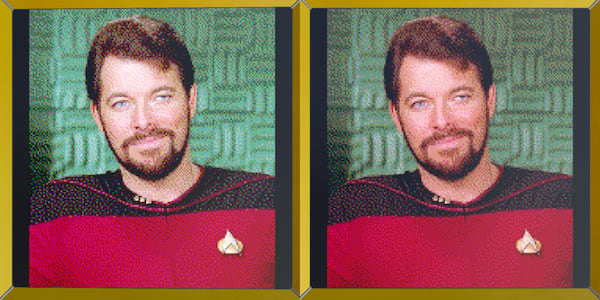
Comparison (top panel doesn't have any color modifications, bottom panel color is set to 100 throughout all RGB components):
You can obviously change each individual RGB component. For example, increasing the red component can often make images (specifically of people or landscapes) look more "lively". Let's combine this with the previous method. This time, the red component is set to 220, but green and blue to 180. We lowered all of them, but made red stand out.
Comparison (top panel doesn't have any color modifications, bottom panel has a red component value of 220, but a green and blue value of 180):
Final comparison
Following the simple steps above, you can get your panel to resemble the original image much more. Take a look at this comparison (top image is the original image, bottom left is the default panel configuration, bottom right is the tweaked panel):
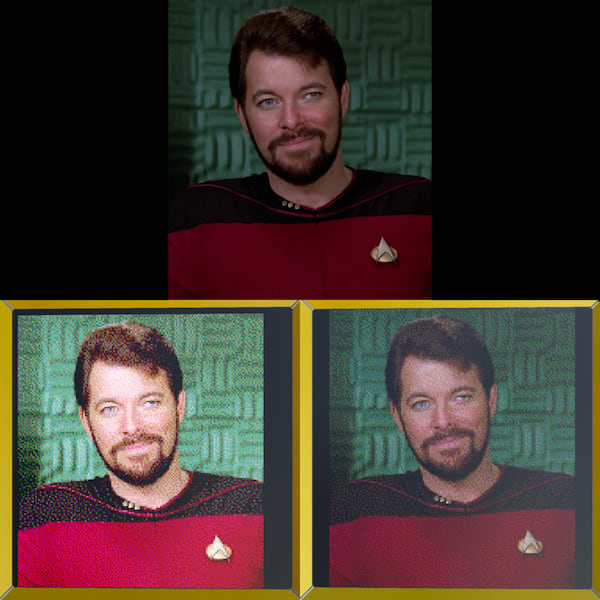
Notice the absence of the gap on the left and top of the panel, and the closer color resemblance to the original image.
Code example
This is a simple example binary program that does nothing more but ask the user all the necessary information to convert an image to a Space Engineers LCD panel. You can improve on this, such as copying the output string to the user's clipboard instead of creating a new file to store the string, or optimize the code. I'm only a Rust beginner.
# Cargo.toml

[package]
# Package info

[dependencies]
# The versions below might not be up to date, but they will work for the program below.
image = "0.24.0"
image_to_space_engineers_lcd = "0.1.3"
// main.rs

use std::fs::{File};
use std::io;
use std::io::{Write};

/// Utility function.
fn read_line() -> String {
  let mut buffer = String::new();

  match io::stdin().read_line(&mut buffer) {
    Ok(_) => {},
    Err(e) => panic!("Failed to read line. Error: {:#?}", e),
  }

  return buffer;
}

fn main() {
  println!("Enter the image path:");
  let path = read_line();
  let trimmed_path = path.trim(); // Just in case extra spaces get lost in there.
  let source = image::open(trimmed_path).unwrap();

  println!("Enter the panel ratio (width:height, for example, a Wide LCD Panel would be 2:1):");
  let aspect_ratios_raw = read_line();
  let aspect_ratios: Vec<&str> = aspect_ratios_raw.trim().split(':').collect();
  let width_aspect_ratio: u32 = aspect_ratios[0].parse().unwrap();
  let height_aspect_ratio: u32 = aspect_ratios[1].parse().unwrap();

  // Let's assume that we want to dither and don't want to stretch the image.
  let resized = image_to_space_engineers_lcd::resized(&source, width_aspect_ratio, height_aspect_ratio, true);
  let output_string = image_to_space_engineers_lcd::image_to_se_string(&resized, true, true);
  let output_path = trimmed_path.to_owned() + "_space_engineers_text.txt";
  let mut file = File::create(&output_path).unwrap();

  file.write_all(output_string.as_ref()).unwrap();
  file.flush().unwrap();

  println!("The output file can be found at {}. Open it and select everything and copy it (CTRL + A, CTRL + C). Press enter to exit...", output_path);
  read_line();
How it works
Space Engineers panels can only display text or a limited selection of built-in textures,
but if you set the font to Monospace, special characters will be rendered with a specific color.
You can find the method for converting a color to this special character in the source of the to_se_char function.
That is what allows us to render images instead of text, but Space Engineers also has a limited color palette and panel size.
We need to resize the image first, specifically to a width of 178 * width_aspect_ratio and a height of 178 * height_aspect_ratio.
When it comes to the color palette, it means that if simply take each pixel of an image and then convert it to that special character with no other processing, the end result will be affected by color banding, and pretty badly too. You can see for yourself in the example results, just compare the ugly undithered image and the dithered image.
That is why we need to also apply dithering to the image. In this case, I chose the Floyd-Steinberg dithering method, as it is one that produces excellent results while keeping things simple. So, the process goes like this:
- Take image
- Resize image
- Dither image
- Create string
- Get pixels in image and push a Space Engineers-compatible version to the string
- Return string
Unless of course you choose the image_to_se_string
function which doesn't dither the image, resulting in the aforementioned horrible looking image in the example results.
It is faster, yes, but the difference is miniscule.
I only left it public because there might some very special case when you might not want to dither the image.
Dependencies
~5MB
~62K SLoC