16 stable releases
| 1.5.4 | Apr 11, 2025 |
|---|---|
| 1.5.2 | Feb 14, 2025 |
| 1.5.0 | Sep 16, 2024 |
| 1.4.2 | Jun 5, 2024 |
| 0.1.0 | Jan 17, 2023 |
#59 in Hardware support
385 downloads per month
590KB
1K
SLoC
ch57x-keyboard-tool Macro Keyboard Configuration Utility
Table of Contents
What is this?
This keyboard configuration utility is for programming small keyboards, such as the one shown below:
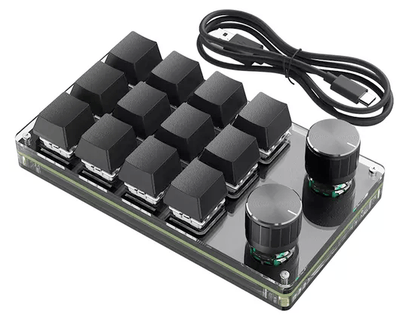
Such macro keyboards are popular on AliExpress, and sellers often include software for programming, but:
- It requires Windows
- It is very ugly and inconvenient
- It can only program one key at a time
- It does not expose all keyboard features
There are several modifications of such keyboards with different numbers of buttons and knobs (see the photos of supported keyboards) and with/without Bluetooth.
Both wired and wireless keyboards are supported.
⚠️ However, the keyboard must be connected to the computer with a USB cable when programming.
Supported keyboards
This utility has been reported to work with:
- 3×4 with 2 knobs (Bluetooth version)
- 3×3 with 2 knobs
- 3x2 with 1 knob
- 3x1 with 1 knob with limitations
- 4x1 without knobs
Keyboard with following vendor/product IDs are supported: 1189:8890, 1189:8840, 1189:8842 (hexadecimal).
For more details, refer to the Supported Macro Keyboards section.
Installation
There are two ways to download the keyboard utility: getting a prebuilt release or building it yourself.
Prebuilt release
Simply download the latest release from GitHub.
Or build it yourself
- Install the cargo utility using rustup:
- Brew:
brew install rustup-init && rustup-init - Linux:
curl --proto '=https' --tlsv1.2 -sSf https://sh.rustup.rs | sh - Windows: Download and run rustup-init.exe
- Brew:
- Execute
cargo install ch57x-keyboard-tool.
If you are on Windows
Install USBDK.
Usage
- Connect the keyboard to the computer with a USB cable.
- Create a configuration file based on the provided example-mapping.yaml.
- Validate the configuration file.
- Upload the configuration to the keyboard.
- Done! 🎉
Create configuration file
Edit existing example-mapping.yaml or (better) save modified copy under different name.
Example config file has extensive documentation inside.
You may also get list of supported key names using:
./ch57x-keyboard-tool show-keys
Validate the config file
./ch57x-keyboard-tool validate your-config.yaml
Upload the config to the keyboard
./ch57x-keyboard-tool upload your-config.yaml
Use 'sudo' if you get 'Access denied (insufficient permissions)':
sudo ./ch57x-keyboard-tool upload your-config.yaml
Change LED configuration
If your keyboard supports it, you can change the LED configuration:
# Turn off the LED
./ch57x-keyboard-tool led 0

# Set the LED to the first mode (likely "Steady on")
./ch57x-keyboard-tool led 1
Windows / PowerShell
Use Get-Content for input redirection:
Get-Content your-config.yaml | ./ch57x-keyboard-tool validate
FAQ
How to do ... on key press?
A common question/request is about automation, such as "How to run a script?", "emulate several keys", or "how to trigger an action with a key press?"
This tool does just one job: writes your key bindings into the keyboard and then exits.
It does not listen for key presses.
Automation based on key presses is not within the scope of this utility tool.
If you seek any automation, use third-party automation tools like BetterTouchTool.
- Choose a chord you do not usually use (like
alt-ctrl-shift-1). - Assign the chord to a key.
- Use a third-party automation tool to listen for this chord and have it perform the desired action.
- Done! 🎉
Can you implement ... feature?
I don't have detailed datasheet for these keyboards. So I can say whether something can implemented until you show me any software that can do it. Then it is teoretically possible to replicate behavior.
However, doing it requires either exact keyboard model in my hands or you to performa reverse engeneering.
Notes
Number of layers
All keyboards I have seen have three layers (three key configurations which may be switched). However, if your keyboard does not support layer switching, just keep a single layer in the configuration file.
Custom keyboard layouts
Note that you specify key to emulate press for, not character which is produced by pressing it. So if you use a custom keyboard layout, like Dvorak, you have to see how required key is labelled in QWERTY layout.
3x1 keys + 1 knob keyboard limitations
This modification does support key modifiers (like ctrl-, alt-, and cmd-) for the first key in sequence only.
So, you can use: ctrl-alt-del,1,2, but not ctrl-alt-del,alt-1,2.
macOS vs Windows keyboard keys
A friendly reminder that some keys have different names on macOS and Windows.
These keys have aliases for both platforms, you may use them interchangeably.
| Key Name | macOS Key | Windows Key |
|---|---|---|
| Command / Windows | cmd |
win |
| Option / Alt | opt |
alt |
Commands and options
ch57x-keyboard-tool [OPTIONS] <COMMAND>
Commands and their descriptions:
| Command | Description |
|---|---|
show-keys |
Display a list of all supported keys and modifiers |
validate |
Validate key mappings config from stdin |
upload |
Upload key mappings from stdin to the device |
led |
Select LED backlight mode |
help, -h, --help |
Print this message or the help of the given subcommand(s) |
Advanced options, you don't have to use this normally:
| Option | Description | Notes |
|---|---|---|
--vendor-id <VENDOR_ID> |
Vendor ID of the keyboard | Default: 4489 |
--product-id <PRODUCT_ID> |
Product ID of the keyboard | Default: 34960 |
--address <ADDRESS> |
Address of the keyboard |
⚠️ The ability to override the vendor/product ID does not mean that you can use this utility to program arbitrary keyboards!
Diagnostics
When reporting an issue, please include diagnostics such as the list of attached USB devices and the output of the keyboard and mouse monitoring tools.
How to find and list connected USB devices
macOS
system_profiler SPUSBDataType
or
ioreg -w0 -l -p IOUSB
Linux
lsusb -v
Windows
Get-PnpDevice | Where-Object { $_.Class -eq 'USB' } | Format-Table Name, DeviceID, Manufacturer, Status, Description -AutoSize
Monitoring generated keyboard and mouse events
The simplest and cross-platform way to monitor keyboard and mouse events is using the keyboard and mouse Python modules.
Monitoring keyboard:
pip3 install keyboard
sudo python3 -m keyboard
Monitoring mouse:
- The latest published 'mouse' module doesn't support macOS, so use the latest version from GitHub
git clone https://github.com/boppreh/mouse
cd mouse
python3 -m mouse
Supported macro keyboards
- Product ID: 0x8890, 0x8840
- Vendor ID: 0x1189 (Trisat Industrial Co., Ltd.)
- amazon.co.jp/dp/B0CF5L8HP3
Photos of supported keyboards
| Kind | Photo |
|---|---|
| 3x2 with 1 knob | 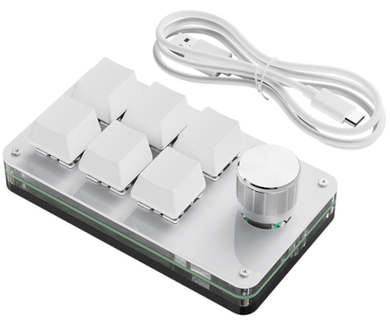 |
| 3x2 with 1 knob | 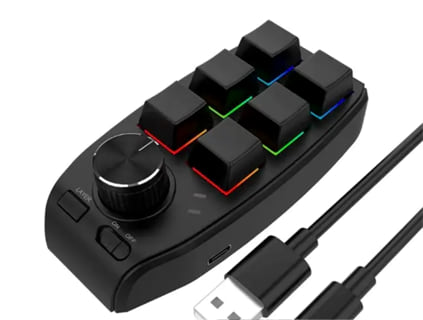 |
| 3x1 with 1 knob | 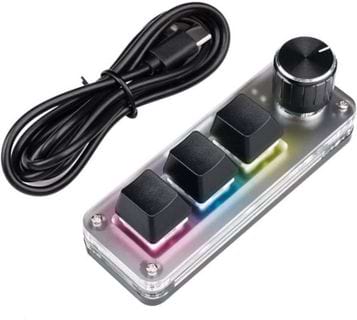 |
| 3×3 with 2 knobs |  |
| 4x3 with 3 knobs | 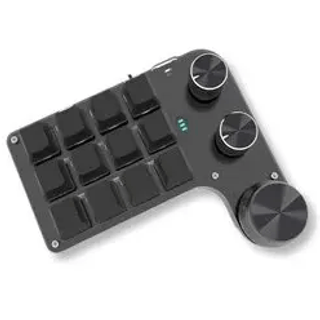 |
| 4×1 without knobs | 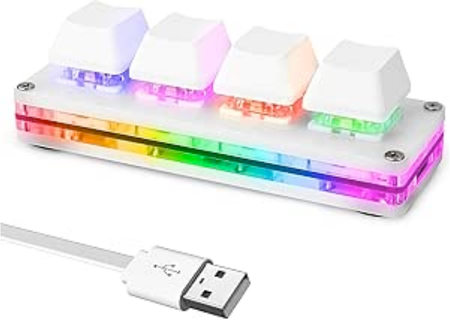 |
Dependencies
~12MB
~219K SLoC