5 releases
| 1.0.0-beta.3 | Jan 15, 2024 |
|---|---|
| 1.0.0-beta.2 | Jan 14, 2024 |
| 1.0.0-beta.1 | May 27, 2023 |
| 1.0.0-alpha | May 14, 2023 |
#95 in Science
94 downloads per month
Used in qhyccd-alpaca
265KB
5K
SLoC
ascom-alpaca-rs
This is a Rust implementation of the standard ASCOM Alpaca API for astronomy devices.
It implements main Alpaca API clients and servers, as well as transparent support for auto-discovery mechanism and ImageBytes encoding for camera images.
Usage
Compilation features
This crate defines two sets of compilation features that help to keep binary size & compilation speed in check by opting into only the features you need.
First set is along the client-server axis:
client: Enables client-side access to Alpaca-capable devices.server: Allows to expose your own devices as Alpaca servers.
The second set of features is based on the device type and enables the corresponding trait:
all-devices: Enables all of the below. Not recommended unless you're building a universal astronomy application.camera: Enables support for cameras via theCameratrait.covercalibrator: Enables [...] theCoverCalibratortrait.dome: EnablesDome.filterwheel: EnablesFilterWheel.focuser: EnablesFocuser.observingconditions: EnablesObservingConditions.rotator: EnablesRotator.switch: EnablesSwitch.telescope: EnablesTelescope.
Once you decided on the features you need, you can add this crate to your Cargo.toml. For example, if I'm implementing an Alpaca camera driver, I'd add the following to my Cargo.toml:
[dependencies]
ascom-alpaca = { version = "0.1", features = ["client", "camera"] }
Device methods
All the device type trait methods are async and correspond to the ASCOM Alpaca API. They all return ASCOMResult<...>.
The Device supertrait includes "ASCOM Methods Common To All Devices" from the Alpaca API, as well as a few custom metadata methods used for the device registration:
fn static_name(&self) -> &str: Returns the static device name.fn unique_id(&self) -> &str: Returns globally-unique device ID.
Implementing a device server
Since async traits are not yet natively supported on stable Rust, the traits are implemented using the async-trait crate. Other than that, you should implement trait with all the Alpaca methods as usual:
use ascom_alpaca::ASCOMResult;
use ascom_alpaca::api::{Device, Camera};
use async_trait::async_trait;

#[derive(Debug)]
struct MyCamera {
    // ...
}

#[async_trait]
impl Device for MyCamera {
    fn static_name(&self) -> &str {
        "My Camera"
    }

    fn unique_id(&self) -> &str {
        "insert GUID here"
    }

    // ...
}

#[async_trait]
impl Camera for MyCamera {
    async fn bayer_offset_x(&self) -> ASCOMResult<i32> {
        Ok(0)
    }

    async fn bayer_offset_y(&self) -> ASCOMResult<i32> {
        Ok(0)
    }

    // ...
}
Any skipped methods will default to the following values:
can_*feature detection methods - tofalse.Device::name- to the result ofDevice::static_name().Device::interface_version- to3(latest ASCOM interface version implemented by this crate).Device::supported_actions- to an empty list.- All other methods - to
Err(ASCOMError::NOT_IMPLEMENTED). It's your responsibility to consult documentation and implement mandatory methods.
Once traits are implemented, you can create a server, register your device(s), and start listening:
use ascom_alpaca::Server;
use ascom_alpaca::api::CargoServerInfo;
use std::convert::Infallible;

// ...implement MyCamera...

#[tokio::main]
async fn main() -> eyre::Result<Infallible> {
    let mut server = Server {
        // helper macro to populate server information from your own Cargo.toml
        info: CargoServerInfo!(),
        ..Default::default()
    };

    // By default, the server will listen on dual-stack (IPv4 + IPv6) unspecified address with a randomly assigned port.
    // You can change that by modifying the `listen_addr` field:
    server.listen_addr.set_port(8000);

    // Create and register your device(s).
    server.devices.register(MyCamera { /* ... */ });

    // Start the infinite server loop.
    server.start().await
}
This will start both the main Alpaca server as well as an auto-discovery responder.
Examples:
-
examples/camera-server.rs: A cross-platform example exposing your connected webcam(s) as AlpacaCameras.> env RUST_LOG=debug { cargo run --example camera-server --release } Finished release [optimized] target(s) in 0.60s Running `target\release\examples\camera-server.exe` 2023-05-27T15:21:43.336191Z DEBUG camera_server: Registering webcam webcam=Webcam { unique_id: "150ddacb-7ad9-4754-b289-ae56210693e8::0", name: "Integrated Camera", description: "MediaFoundation Camera", max_format: CameraFormat { resolution: Resolution { width_x: 1280, height_y: 720 }, format: MJPEG, frame_rate: 30 }, subframe: RwLock { data: Subframe { bin: Size { x: 1, y: 1 }, offset: Point { x: 0, y: 0 }, size: Size { x: 1280, y: 720 } } }, last_exposure_start_time: RwLock { data: None }, last_exposure_duration: RwLock { data: None }, valid_bins: [1, 2, 4] } 2023-05-27T15:21:43.339433Z DEBUG ascom_alpaca::server: Binding Alpaca server addr=[::]:8000 2023-05-27T15:21:43.342897Z INFO ascom_alpaca::server: Bound Alpaca server bound_addr=[::]:8000 2023-05-27T15:21:43.369040Z WARN join_multicast_groups{listen_addr=::}: ascom_alpaca::server::discovery: err=An unknown, invalid, or unsupported option or level was specified in a getsockopt or setsockopt call. (os error 10042) 2023-05-27T15:21:43.370932Z DEBUG join_multicast_groups{listen_addr=::}: ascom_alpaca::server::discovery: return=() 2023-05-27T15:21:43.371861Z DEBUG ascom_alpaca::server: Bound Alpaca discovery serverBinning is implemented by switching the webcam to other supported resolutions which are proportional to the original.
Long exposures are simulated by stacking up individual frames up to the total duration. This approach can't provide precise requested exposure, but works well enough otherwise.
-
star-adventurer-alpaca: A fork ofjsorrell/star-adventurer-alpacawhich implements the Alpaca API for the Star Adventurer mount over serial port. The original project has pretty extensive functionality and used manual implementation of the Alpaca API, so it was a good test case for porting to this library.
Accessing devices from a client
If you know address of the device server you want to access, you can access it directly via Client struct:
use ascom_alpaca::Client;

let client = Client::new("http://localhost:8000")?;

// `get_server_info` returns high-level metadata of the server.
println!("Server info: {:#?}", client.get_server_info().await?);

// `get_devices` returns an iterator over all the devices registered on the server.
// Each is represented as a `TypedDevice` tagged enum encompassing all the device types as corresponding trait objects.
// You can either match on them to select the devices you're interested in, or, say, just print all of them:
println!("Devices: {:#?}", client.get_devices().await?.collect::<Vec<_>>());
If you want to discover device servers on the local network, you can do that via the discovery::DiscoveryClient struct:
use ascom_alpaca::discovery::DiscoveryClient;
use ascom_alpaca::Client;
use futures::prelude::*;

// This holds configuration for the discovery client.
// You can customize prior to binding if you want.
let discovery_client = DiscoveryClient::new();
// This results in a discovery client bound to a local socket.
// It's intentionally split out into a separate API step to encourage reuse,
// for example so that user could click "Refresh devices" button in the UI
// and the application wouldn't have to re-bind the socket every time.
let mut bound_client = discovery_client.bind().await?;
// Now you can discover devices on the local networks.
bound_client.discover_addrs()
    // create a `Client` for each discovered address
    .map(|addr| Ok(Client::new_from_addr(addr)))
    .try_for_each(|client| async move {
        /* ...do something with devices via each client... */
        Ok::<_, eyre::Error>(())
    })
    .await?;
Or, if you just want to list all available devices and don't care about per-server information or errors:
bound_client.discover_devices()
    .for_each(|device| async move {
        /* ...do something with each device... */
    })
    .await;
Keep in mind that discovery is a UDP-based protocol, so it's not guaranteed to be reliable.
Also, same device server can be discovered multiple times if it's available on multiple network interfaces.
While it's not possible to reliably deduplicate servers, you can deduplicate devices by storing them in something like HashSet
or in the same Devices struct that is used for registering arbitrary devices on the server:
use ascom_alpaca::api::{Camera, Devices};
use ascom_alpaca::discovery::DiscoveryClient;
use ascom_alpaca::Client;
use futures::prelude::*;

let devices =
    DiscoveryClient::new()
    .bind()
    .await?
    .discover_devices()
    .collect::<Devices>()
    .await;

// Now you can iterate over all the discovered devices via `iter_all`:
for (typed_device, index_within_category) in devices.iter_all() {
    println!("Discovered device: {typed_device:#?} (index: {index_within_category})");
}

// ...or over devices in a specific category via `iter<dyn Trait>`:
for camera in devices.iter::<dyn Camera>() {
    println!("Discovered camera: {camera:#?}");
}
Examples:
-
examples/discover.rs: A simple discovery example listing all the found servers and devices. -
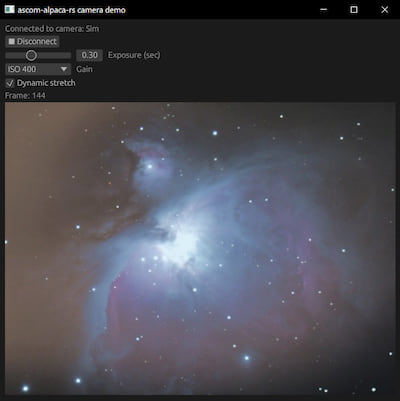
examples/camera-client.rs: A cross-platform GUI example showing a live preview stream from discovered Alpaca cameras.Includes support for colour, monochrome and Bayer sensors with automatic colour conversion for the preview.
Logging and tracing
This crate uses tracing framework for logging spans and events, integrating with the Alpaca ClientID, ClientTransactionID and ServerTransactionID fields.
You can enable logging in your app by using any of the subscriber crates.
For example, tracing_subscriber::fmt will log all the events to stderr depending on the RUST_LOG environment variable:
tracing_subscriber::fmt::init();
Testing
Since this is a library for communicating to networked devices, it should be tested against real devices at a higher level.
In particular, if you're implementing an Alpaca device, make sure to run ConformU - ASCOM's official conformance checker - against your device server.
License
Licensed under either of
- Apache License, Version 2.0 (LICENSE-APACHE-2.0)
- MIT license (LICENSE-MIT)
Dependencies
~7–39MB
~580K SLoC