1 unstable release
| new 0.1.0 | May 8, 2025 |
|---|
#1810 in Development tools
Used in 2 crates
(via snipt-cli)
190KB
4K
SLoC
Snipt
![]()
![]()
🚀 Overview
snipt is a powerful text snippet expansion tool that boosts your productivity by replacing short text shortcuts with longer content. Just type a prefix (like :) followed by your shortcut, and snipt automatically expands it into your predefined text.
✨ Key Features
- Custom Text Snippets: Define shortcut aliases for frequently used text
- System-Wide Expansion: Works in any application where you can type
- Modern TUI: Beautiful terminal interface for managing snippets
- Background Daemon: Silent monitoring of keyboard input for expansion
- Cross-Platform: Works seamlessly on Linux, macOS, and Windows
- Clipboard Integration: Quickly copy expansions to clipboard
- Script Execution: Execute shell scripts and commands with
!prefix - Parameterized Snippets: Create dynamic snippets with parameters
- Text Transformations: Transform text with case conversion, formatting, and more
- URL Commands: Execute web requests and process responses
- Code Snippets: Store and expand code snippets with syntax highlighting
- Date and Time: Insert formatted dates and times
- File Operations: Create projects and perform file operations
- System Information: Get system stats and information
- Network Tools: Make HTTP requests and process responses
- CSV Processing: Convert CSV to markdown tables and other formats
📦 Installation
From Source
# 1. Install Rust if needed (https://rustup.rs/)
curl --proto '=https' --tlsv1.2 -sSf https://sh.rustup.rs | sh

# 2. Clone and build snipt
git clone https://github.com/snipt/snipt.git
cd snipt
cargo build --release

# 3. Install the binary (optional)
cargo install --path .
🎮 Usage
Starting snipt
# Launch interactive UI
snipt

# Start the daemon (required for expansion)
snipt start
Managing Snippets
# Add a snippet
snipt add --shortcut hello --snippet "Hello, world!"

# Add interactively
snipt new

# View and manage all snippets
snipt list

# Remove a snippet
snipt delete --shortcut hello

# Update existing snippet
snipt update --shortcut hello --snippet "Hello there, world!"
Using Snippets
Snipt supports two types of triggers:
-
Colon Trigger (
:): For simple text expansion:hello # Expands to "Hello, world!" (if you've created this snippet) -
Exclamation Trigger (
!): For executing scripts and transformations!now # Inserts current date and time (if you've created this snippet) !uppercase(hello) # Transforms to "HELLO" (if you've created this snippet)
Important Note: All snippets, including text transformations and commands, must be created first using
snipt addorsnipt newbefore they can be used. The examples above assume you have already created these snippets. See the "Managing Snippets" section below for how to create your own snippets.
Parameterized Snippets
Create dynamic snippets with parameters:
# Add a parameterized snippet
snipt add --shortcut "greet(name)" --snippet "Hello, ${name}!"

# Usage
!greet(John)  # Expands to "Hello, John!"
Script Execution
Execute shell scripts and commands:
# Add a script snippet
snipt add --shortcut "sys-info" --snippet "#!/bin/bash\necho '=== System Information ==='\necho 'Hostname: $(hostname)'"

# Usage
!sys-info  # Executes the script and inserts output
Text Transformations
Transform text with built-in functions. Remember to create these snippets first:
# First, create the transformation snippets
snipt add --shortcut "uppercase" --snippet "#!/bin/bash\necho \"$1\" | tr '[:lower:]' '[:upper:]'"
snipt add --shortcut "lowercase" --snippet "#!/bin/bash\necho \"$1\" | tr '[:upper:]' '[:lower:]'"
snipt add --shortcut "titlecase" --snippet "#!/bin/bash\necho \"$1\" | sed 's/.*/\L&/; s/[a-z]*/\u&/g'"

# Then you can use them like this:
!uppercase(hello)  # HELLO
!lowercase(HELLO)  # hello
!titlecase(hello world)  # Hello World
Monitoring & Control
# Check daemon status
snipt status

# Stop the daemon
snipt stop
💡 How Expansion Works
Once the daemon is running, type your prefix followed by a shortcut anywhere on your system:
:hello
This instantly expands to "Hello, world!" (or your custom text).
🖥️ Terminal User Interface
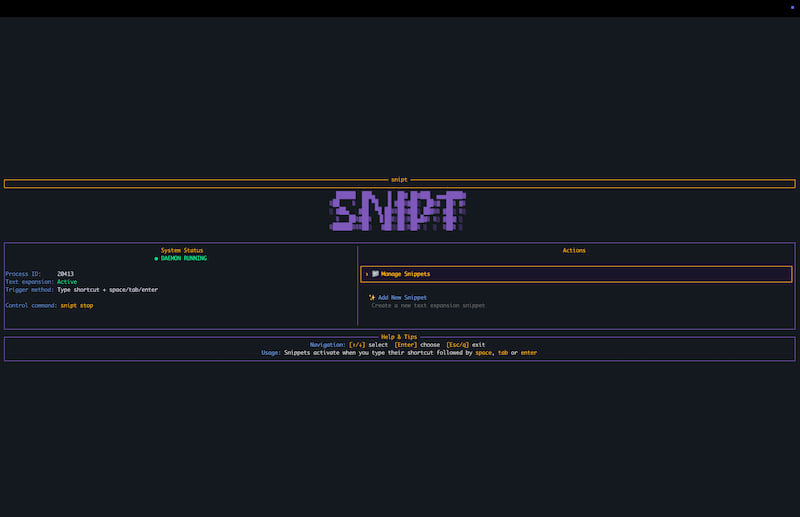
Launch the beautiful terminal UI with either snipt or snipt list.
Navigation
| Key | Action |
|---|---|
| ↑/↓ | Navigate through snippets |
| Tab | Switch between tabs |
| Enter | Copy to clipboard |
| / | Search snippets |
| Ctrl+D | Delete selected snippet |
| Esc/q | Exit |
⚙️ Configuration
snipt stores your data in ~/.snipt/:
snipt.json: Your snippet databasesnipt-daemon.pid: Process ID of running daemon
🧩 Architecture
snipt consists of several components:
- Core Library: Handles snippet management, persistence, and expansion
- Daemon: Background process that listens for keyboard events
- CLI: Command-line interface for controlling snipt
- TUI: Terminal user interface for snippet management
- Server: HTTP API for potential GUI clients
- Execution Engine: Handles script execution and text transformations
- Storage: Manages snippet persistence and configuration
- Keyboard: Handles system-wide keyboard monitoring
- Clipboard: Manages clipboard operations
🔨 Requirements
- Rust 1.56+
- Core dependencies: rdev, clap, serde, crossterm, ratatui, enigo, arboard
System Dependencies
Linux (Ubuntu/Debian)
sudo apt-get update
sudo apt-get install -y libx11-dev libxi-dev libxtst-dev pkg-config libxdo-dev
Linux (Fedora/RHEL)
sudo dnf install libX11-devel libXi-devel libXtst-devel pkg-config libxdo-devel
Linux (Arch Linux)
sudo pacman -S libx11 libxi libxtst pkg-config xdotool
Linux (openSUSE)
sudo zypper install libX11-devel libXi-devel libXtst-devel pkg-config libxdo-devel
Note: These dependencies are required for X11 window system integration and keyboard monitoring functionality.
🤝 Contributing
Contributions are welcome! Please feel free to:
- Fork the repository
- Create a feature branch
- Submit a pull request
📜 License
MIT
Built with ❤️ using Rust
Dependencies
~7–37MB
~588K SLoC