10 stable releases
| 1.1.4 | Aug 12, 2024 |
|---|---|
| 1.1.3 | Aug 7, 2024 |
| 1.0.4 | Jul 29, 2024 |
#169 in Images
530 downloads per month
55KB
1K
SLoC
Image Colorizer
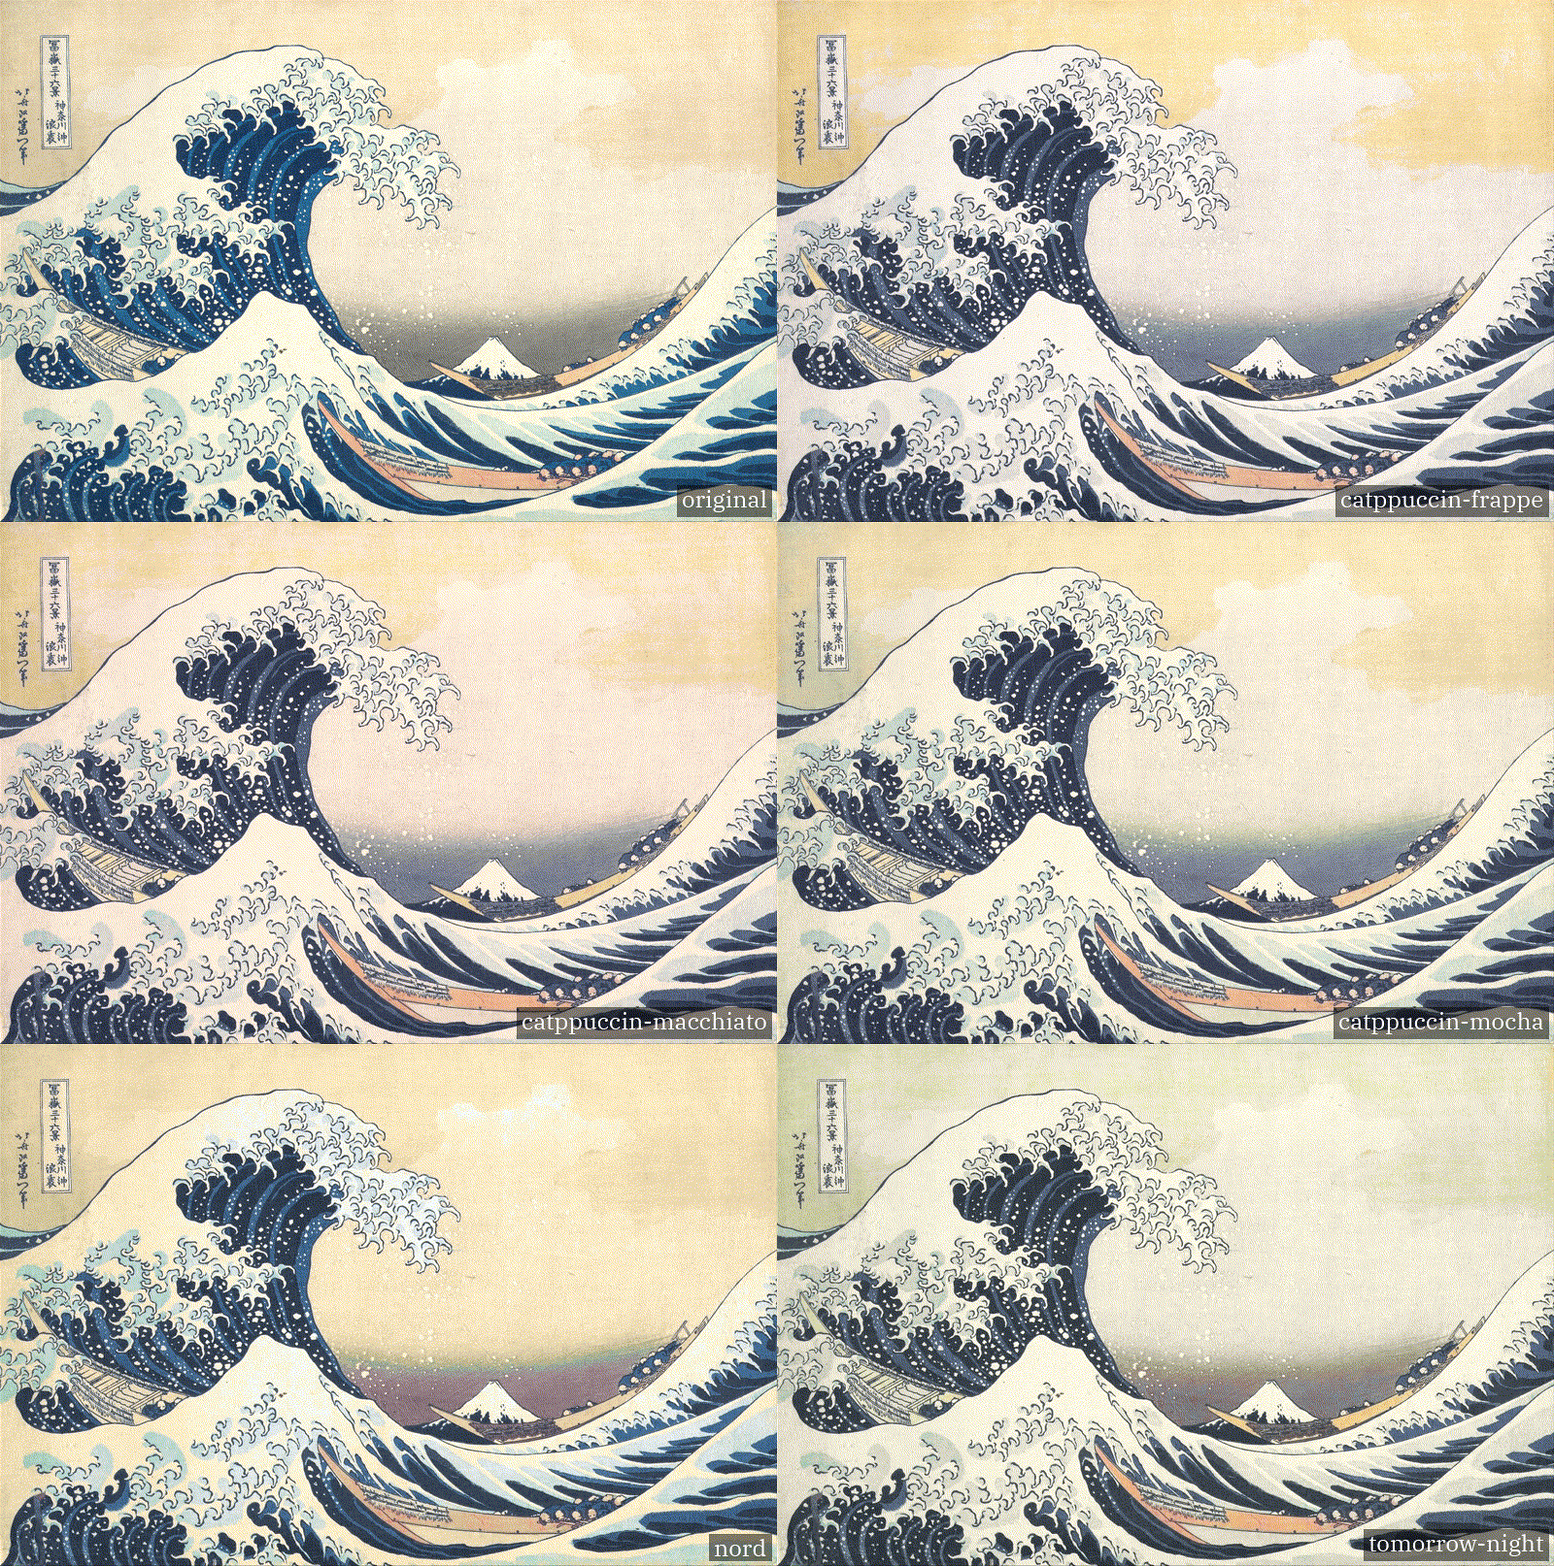
Never settle for images outside your colorscheme again! Now 🔥B l a z i n g F a s t🔥 thanks to 🦀Rust and 🖥️WGSL
Install
AUR
paru -Syu image-colorizer # Or whatever AUR helper you use. yay, pikaur, etc
Cargo
cargo install image-colorizer
I am currently working on adding support for other package managers, such as the brew, deb, etc.
Quick Start
Single Image
image-colorizer input_image1.jpg # Outputs input_image1_{colorscheme}.jgp
Multiple Images
image-colorizer -o ./processed_images input_image1.jpg input_image2.png
Features
- 🔥 GPU-accelerated image processing using WebGPU Shading Language (WGSL)
- 🎨 Support for custom color schemes
- 🥷 Minimal artifacting through advanced color blending techniques
- 🤹 Parallel processing of multiple images
Prerequisites
Before you begin, ensure you have a GPU that supports WebGPU
Usage
To use the Image Colorizer, run the following command:
image-colorizer [OPTIONS] <IMAGE_PATHS>...
Options
-b, --blend-factor <FACTOR>: Set the blend factor (0.0-1.0)--interpolation-threshold <THRESHOLD>: Set the interpolation threshold (0.0-100.0)-d, --dither-amount <AMOUNT>: Set the dither amount (0.0-1.0)--spatial-averaging-radius <RADIUS>: Set the spatial averaging radius (0-100)-c, --config <CONFIG_FILE>: Specify a custom config file-o, --output <OUTPUT_DIR>: Set the output directory-h, --help: Print help information
Configuration
You can customize the colorizer's behavior by creating a configuration file. The default location for the config file is ~/.config/colorizer/config.toml. Here's an example configuration:
blend_factor = "0.9"
colorscheme = "kanagawa"
interpolation_threshold = "2.5"
dither_amount = "0.1"
spatial_averaging_radius = "10"
You can also create custom color schemes by adding a TOML file with the color values in the ~/.config/colorizer/ directory.
How It Works
he Image Colorizer uses a sophisticated combination of CPU and GPU processing to efficiently transform images. Here's a detailed overview of the process:
graph TD
    A[Load Colorscheme] -->|CPU| B[Interpolate Colorscheme]
    B --> C[Load Image]
    C --> D[Initialize GPU]
    D --> E[Pass Image to GPU]
    E --> F[Find Closest Colors]
    F --> G[Apply Dithering]
    G --> H[Pass Image back to CPU]
    H --> I[Create Summed Area Table SAT]
    I --> J[Pass SAT to GPU]
    J --> K[Perform Spatial Averaging]
    K --> L[Transfer Luminance from Original]
    L --> M[Pass Final Image to CPU]
    M --> N[Save Processed Image]
- The colorscheme is loaded and interpolated on the CPU to fill gaps in color space.
- The input image is loaded via CPU.
- The GPU is initialized with WebGPU.
- The image data is transferred to the GPU.
- For each pixel, the closest color from the interpolated color scheme is found.
- Dithering is applied to reduce color banding.
- The processed image is passed back to the CPU.
- A Summed Area Table (SAT) is created for efficient spatial averaging.
- The SAT is passed back to the GPU.
- Spatial averaging is performed using the SAT.
- Luminance is transferred from the original image to preserve detail.
- The final processed image is transferred back to the CPU.
- The resulting image is saved to disk.
Contributing
Contributions are welcome! Please feel free to submit a Pull Request.
License
This project is licensed under the MIT License - see the LICENSE.md file for details.
Dependencies
~21–54MB
~819K SLoC
