1 unstable release
| 0.3.2 | Dec 8, 2024 |
|---|---|
| 0.3.0 |
|
| 0.2.1 |
|
| 0.1.20 |
|
| 0.1.0 |
|
#184 in Game dev
790KB
16K
SLoC
Hotline
![]()
![]()
![]()
Hotline is a graphics engine and live coding tool that allows you to edit code, shaders, and render configs without restarting the application. It provides a client application which remains running for the duration of a session. Code can be reloaded that is inside the dynamic plugins and render configs can be edited and hot reloaded through pmfx files.
There is a demo video showcasing the features in their early stages and an example workflow demonstration of how the geometry primitives were created. Some development has been live streamed on Twitch and archived on YouTube.
Features
- An easy to use cross platform graphics/compute/os api for rapid development.
- Hot reloadable, live coding environment (shaders, render configuration, code).
- Plugin architexture, flexible and extendible.
- os - Operating system API; window, input, etc.
- gfx - Concise low level graphics API.
- pmfx - High level, data driven, ergonomic graphics API.
- av - Hardware accelerated av decoding.
- imgui - Full featured dear ImGui implementation with viewports and docking.
- ecs - Entity component system using
bevy_ecs. - Client - Live reloading coding environment client application.
- Standalone Library - Use as a standalone library and integrate into your own applications.
- Examples - A focus on modern rendering examples (gpu-driven, multi-threaded, bindless).
Prerequisites
Currently Windows with Direct3D12 is the only supported platform, there are plans for macOS, Metal, Linux, Vulkan, WASM and WebGPU in future.
Using the Client
For the time being it is recommended to use the repository from GitHub if you want to use the example plugins or standalone examples. If you just want to use the library then crates.io is suitable. There are some difficulties with publishing data and plugins which I hope to iron out in time.
Building / Fetching Data
The hotline-data repository is required to build and serve data for the examples and the example plugins, it is included as a submodule of this repository, you can clone with submodules as so:
git clone https://github.com/polymonster/hotline.git --recursive
You can add the submodule after cloning or update the submodule to keep it in-sync with the main repository as follows:
git submodule update --init --recursive
Running The Client
You can run the binary client which allows code to be reloaded through plugins. There are some plugins already provided with the repository:
// build the hotline library and the client, fetch the hotline-data repository
cargo build

// build the data
hotline-data\pmbuild win32-data

// then build plugins
cargo build --manifest-path plugins/Cargo.toml

// run the client
cargo run client
Any code changes made to the plugin libs will cause a rebuild and reload to happen with the client still running. You can also edit the shaders where hlsl files make up the shader code and pmfx files allow you to specify pipeline state objects in config files. Any changes detected to pmfx shaders will be rebuilt and all modified pipelines or views will be rebuilt.
Building One-Liners
To make things more convenient during development and keep the plugins, client and lib all in sync and make switching configurations easily, you can use the bundled pmbuild in the hotline-data repository and use the following commands which bundle together build steps:
// show aavailable build profiles
hotline-data\pmbuild -help

// build release
hotline-data\pmbuild win32-release

// build debug
hotline-data\pmbuild win32-debug

// run the client
hotline-data\pmbuild win32-debug -run

// build and run the client
hotline-data\pmbuild win32-release -all -run
Building from Visual Studio Code
There are included tasks and launch files for vscode including configurations for the client and the examples. Launching the client from vscode in debug or release will build the core hotline lib, client, data and plugins.
Adding Plugins
Plugins are loaded by passing a directory to add_plugin_lib which contains a Cargo.toml and is a dynamic library. They can be opened interactively in the client using the File > Open from the main menu bar by selecting the Cargo.toml.
The basic Cargo.toml setup looks like this:
[package]
name = "ecs_examples"
version = "0.1.0"
edition = "2021"

[lib]
crate-type = ["rlib", "dylib"]

[dependencies]
hotline-rs = { path = "../.." }
You can provide your own plugin implementations using the Plugin trait. A basic plugin can hook itself by implementing a few functions:
impl Plugin<gfx_platform::Device, os_platform::App> for EmptyPlugin {
    fn create() -> Self {
        EmptyPlugin {
        }
    }

    fn setup(&mut self, client: Client<gfx_platform::Device, os_platform::App>)
        -> Client<gfx_platform::Device, os_platform::App> {
        println!("plugin setup");
        client
    }

    fn update(&mut self, client: client::Client<gfx_platform::Device, os_platform::App>)
        -> Client<gfx_platform::Device, os_platform::App> {
        println!("plugin update");
        client
    }

    fn unload(&mut self, client: Client<gfx_platform::Device, os_platform::App>)
        -> Client<gfx_platform::Device, os_platform::App> {
        println!("plugin unload");
        client
    }

    fn ui(&mut self, client: Client<gfx_platform::Device, os_platform::App>)
    -> Client<gfx_platform::Device, os_platform::App> {
        println!("plugin ui");
        client
    }
}

// the macro instantiates the plugin with a c-abi so it can be loaded dynamically.
hotline_plugin![EmptyPlugin];
ecs
There is a core entity component system plugin which builds on top of bevy_ecs. It allows you to supply your own systems and build schedules dynamically. It is possible to load and find new ecs systems in different dynamic libraries. You can register and instantiate demos which are collections of setup, update and render systems.
Registering Demos
Systems can be imported dynamically from different plugins, in order to do so they need to be hooked into a function which can be located dynamically by the ecs plugin. You can implement a function called get_demos_<lib_name>, which returns a list of available demos inside a plugin named <lib_name>.
/// Register demo names
#[no_mangle]
pub fn get_demos_ecs_examples() -> Vec<String> {
    demos![
        "primitives",
        "draw_indexed",
        "draw_indexed_push_constants",

        // ..
    ]
}
You can then provide an initialisation function named after the demo this returns a ScheduleInfo for which systems to run:
/// Init function for primitives demo
#[no_mangle]
pub fn primitives(client: &mut Client<gfx_platform::Device, os_platform::App>) -> ScheduleInfo {
    // load resources we may need
    client.pmfx.load(&hotline_rs::get_data_path("shaders/debug").as_str()).unwrap();

    // fill out info
    ScheduleInfo {
        setup: systems![
            "setup_primitives"
        ],
        update: systems![
            "update_cameras",
            "update_main_camera_config"
        ],
        render_graph: "mesh_debug"
    }
}
The setup, update and render systems are tagged with the attribute macro #[export_update_fn], #[export_render_fn] or #[export_compute_fn].
Setup Systems
You can supply setup systems to add entities and set up a scene, these will be executed once at startup and then anytime when a dynamic code reload happens the world will be cleared and the setup systems will be re-executed. This allows changes to setup systems to appear in the live client. You can add multiple setup systems and they will be executed concurrently.
#[no_mangle]
#[export_update_fn]
pub fn setup_cube(
    mut device: ResMut<DeviceRes>,
    mut commands: Commands) {

    let pos = Mat4f::from_translation(Vec3f::unit_y() * 10.0);
    let scale = Mat4f::from_scale(splat3f(10.0));

    let cube_mesh = hotline_rs::primitives::create_cube_mesh(&mut device.0);
    commands.spawn((
        Position(Vec3f::zero()),
        Velocity(Vec3f::one()),
        MeshComponent(cube_mesh.clone()),
        WorldMatrix(pos * scale)
    ));

    Ok(())
}
Update Systems
You can also supply your own update systems to animate and move your entities.
#[no_mangle]
#[export_update_fn]
fn update_cameras(
    app: Res<AppRes>,
    main_window: Res<MainWindowRes>,
    mut query: Query<(&mut Position, &mut Rotation, &mut ViewProjectionMatrix), With<Camera>>
) -> Result<(), {
    let app = &app.0;
    for (mut position, mut rotation, mut view_proj) in &mut query {
        // ..
    }
}
Render Systems
You can specify render graphs in pmfx that set up views, which get dispatched into render functions. All render systems run concurrently on the CPU, the command buffers they generate are executed in an order determined by the pmfx render graph and it's dependencies.
#[no_mangle]
#[export_render_fn]
pub fn render_meshes(
    pmfx: &Res<PmfxRes>,
    view: &pmfx::View<gfx_platform::Device>,
    mesh_draw_query: Query<(&WorldMatrix, &MeshComponent)>) -> Result<(), hotline_rs::Error> {

    let fmt = view.pass.get_format_hash();
    let mesh_debug = pmfx.get_render_pipeline_for_format(&view.view_pipeline, fmt)?;
    let camera = pmfx.get_camera_constants(&view.camera)?;

    view.cmd_buf.set_render_pipeline(&mesh_debug);
    view.cmd_buf.push_render_constants(0, 16 * 3, 0, gfx::as_u8_slice(camera));

    // make draw calls
    for (world_matrix, mesh) in &mesh_draw_query {
        view.cmd_buf.push_render_constants(1, 16, 0, &world_matrix.0);
        view.cmd_buf.set_index_buffer(&mesh.0.ib);
        view.cmd_buf.set_vertex_buffer(&mesh.0.vb, 0);
        view.cmd_buf.draw_indexed_instanced(mesh.0.num_indices, 1, 0, 0, 0);
    }

    // end / transition / execute
    view.cmd_buf.end_render_pass();
    Ok(())
}
Compute Systems
Compute systems work similarly to render systems. They get passed a pmfx::ComputePass which has information about the compute workload that has been specified in pmfx files. The dispatch_compute function in the ecs_examples could be used for many purposes without needing to supply any new code because it allows generic dispatched based data that is configured in the pmfx file.
#[no_mangle]
#[export_compute_fn]
pub fn dispatch_compute(
    pmfx: &Res<PmfxRes>,
    pass: &pmfx::ComputePass<gfx_platform::Device>
) -> Result<(), hotline_rs::Error> {

    let pipeline = pmfx.get_compute_pipeline(&pass.pass_pipline)?;
    pass.cmd_buf.set_compute_pipeline(&pipeline);

    let using_slot = pipeline.get_pipeline_slot(0, 0, gfx::DescriptorType::PushConstants);
    if let Some(slot) = using_slot {
        for i in 0..pass.use_indices.len() {
            let num_constants = gfx::num_32bit_constants(&pass.use_indices[i]);
            pass.cmd_buf.push_compute_constants(
                0,
                num_constants,
                i as u32 * num_constants,
                gfx::as_u8_slice(&pass.use_indices[i])
            );
        }
    }

    pass.cmd_buf.set_heap(pipeline, &pmfx.shader_heap);

    pass.cmd_buf.dispatch(
        pass.group_count,
        pass.numthreads
    );

    Ok(())
}
System Execute Order
By default all systems in a particular group will be executed asyncronsly and the groups will be executed in-order, there are some predefined, core system sets:
SystemSets::Update- Use this to animate and move entities, perform logic adn so forth.SystemSets::Batch- Use this to batch data such as baking world matrices, culling or update buffers ready for rendering.SystemSets::Render- Used to render entities and make draw calls.
Any render functions are automatically added to the Render system set, but you can choose to create your own sets or add things into the pre-defined SystemSets. There are some core oprations which will happen but you can define your own and order execution as follows:
// custom base set
#[no_mangle]
#[export_update_fn(in_set(MyCustsomSet::CustomUpdate))]
fn update_cameras() {
    // ..
}

#[no_mangle]
#[export_update_fn(after(MyCustsomSet::CustomUpdate))]
fn update_batch() {
    // ..
}

// in base set after render
#[no_mangle]
#[export_update_fn(in_set(MyCustsomSet::PostStep).before(SystemSets::Render))]
fn finalise() {
    // ..
}
Serialising Plugin Data
You can supply your own serialisable plugin data that will be serialised with the rest of the user_config and can be grouped with your plugin and reloaded between sessions.
/// Seriablisable user info for maintaining state between reloads and sessions
#[derive(Serialize, Deserialize, Default, Resource, Clone)]
pub struct SessionInfo {
    pub active_demo: String,
    pub main_camera: Option<CameraInfo>
}

// the client provides functions which can serialise and deserialise this data for you
fn update_user_config(&mut self) {
    // find plugin data for the "ecs" plugin
    self.session_info = client.deserialise_plugin_data("ecs");

    //.. make updates to your data here

    // write back session info which will be serialised to disk and reloaded between sessions
    client.serialise_plugin_data("ecs", &self.session_info);
}
Using as a library
You can use hotline as a library inside the plugin system or on its own to use the low level abstractions and modules to create windowed applications with a graphics api backend. You can easily add to your projects using cargo and install the package from crates.io.
Basic Application
A quick example of a basic application setup:
// include prelude for convenience
use hotline_rs::prelude::*;

pub fn main() -> Result<(), hotline_rs::Error> {
    // Create an Application
    let mut app = os_platform::App::create(os::AppInfo {
        name: String::from("triangle"),
        window: false,
        num_buffers: 0,
        dpi_aware: true,
    });

    // Double buffered
    let num_buffers = 2;

    // Create an a GPU Device
    let mut device = gfx_platform::Device::create(&gfx::DeviceInfo {
        render_target_heap_size: num_buffers,
        ..Default::default()
    });

    // Create main window
    let mut window = app.create_window(os::WindowInfo {
        title: String::from("triangle!"),
        ..Default::default()
    });

    /// Create swap chain
    let swap_chain_info = gfx::SwapChainInfo {
        num_buffers: num_buffers as u32,
        format: gfx::Format::RGBA8n,
        ..Default::default()
    };
    let mut swap_chain = device.create_swap_chain::<os_platform::App>(&swap_chain_info, &window)?;

    /// Create a command buffer
    let mut cmd = device.create_cmd_buf(num_buffers);

    // Run main loop
    while app.run() {
        // update window and swap chain
        window.update(&mut app);
        swap_chain.update::<os_platform::App>(&mut device, &window, &mut cmd);

        // build command buffer and make draw calls
        cmd.reset(&swap_chain);

        // Render command can go here
        // ..

        cmd.close()?;

        // execute command buffer
        device.execute(&cmd);

        // swap for the next frame
        swap_chain.swap(&device);
    }

    // must wait for the final frame to be completed so it is safe to drop GPU resources.
    swap_chain.wait_for_last_frame();
    Ok(());
}
os
The os API provides an abstraction of operating system related functionality. You can use this to create windows, file dialogs and obtain user input.
// create window
let mut app = os_platform::App::create(os::AppInfo {
    name: String::from("triangle"),
    window: false,
    num_buffers: 0,
    dpi_aware: true,
});

// get mouse input
let drag = app.get_mouse_pos_delta();
let wheel = app.get_mouse_wheel();
let buttons = app.get_mouse_buttons();

// keyboard input
let keys = app.get_keys_down();
if keys['A' as usize] {
    // held 'A'
}

let keys = client.app.get_keys_pressed();
let toggle = if keys['B'] {
    // pressed 'B'
}

// open file dialog for 'txt' files
if let Ok(files) = os_platform::App::open_file_dialog(os::OpenFileDialogFlags::FILES, vec![".txt"]) {
    if !files.is_empty() {
        player.set_source(files[0].to_string())?;
    }
}
gfx
The gfx module provides a modern graphics API loosely following Direct3D12 with Vulkan and Metal compatibility in mind. If you are familiar with those API's it should be straight forward, but here is a quick example of how to do some render commands:
// create a buffer
let info = gfx::BufferInfo {
    usage: gfx::BufferUsage::Vertex,
    cpu_access: gfx::CpuAccessFlags::NONE,
    format: gfx::Format::Unknown,
    stride: std::mem::size_of::<Vertex>(),
    num_elements: 3,
};
let vertex_buffer = device.create_buffer(&info, Some(gfx::as_u8_slice(&vertices)))?;

// create shaders and a pipeline
let vsc_filepath = hotline_rs::get_data_path("shaders/triangle/vs_main.vsc");
let psc_filepath = hotline_rs::get_data_path("shaders/triangle/ps_main.psc");

let vsc_data = fs::read(vsc_filepath)?;
let psc_data = fs::read(psc_filepath)?;

let vsc_info = gfx::ShaderInfo {
    shader_type: gfx::ShaderType::Vertex,
    compile_info: None
};
let vs = device.create_shader(&vsc_info, &vsc_data)?;

let psc_info = gfx::ShaderInfo {
    shader_type: gfx::ShaderType::Vertex,
    compile_info: None
};
let fs = device.create_shader(&psc_info, &psc_data)?;

// create the pipeline itself with the vs and fs
let pso = device.create_render_pipeline(&gfx::RenderPipelineInfo {
    vs: Some(&vs),
    fs: Some(&fs),
    input_layout: vec![
        gfx::InputElementInfo {
            semantic: String::from("POSITION"),
            index: 0,
            format: gfx::Format::RGB32f,
            input_slot: 0,
            aligned_byte_offset: 0,
            input_slot_class: gfx::InputSlotClass::PerVertex,
            step_rate: 0,
        },
        gfx::InputElementInfo {
            semantic: String::from("COLOR"),
            index: 0,
            format: gfx::Format::RGBA32f,
            input_slot: 0,
            aligned_byte_offset: 12,
            input_slot_class: gfx::InputSlotClass::PerVertex,
            step_rate: 0,
        },
    ],
    pipeline_layout: gfx::PipelineLayout::default(),
    raster_info: gfx::RasterInfo::default(),
    depth_stencil_info: gfx::DepthStencilInfo::default(),
    blend_info: gfx::BlendInfo {
        alpha_to_coverage_enabled: false,
        independent_blend_enabled: false,
        render_target: vec![gfx::RenderTargetBlendInfo::default()],
    },
    topology: gfx::Topology::TriangleList,
    patch_index: 0,
    pass: swap_chain.get_backbuffer_pass(),
})?;

// build command buffer and make draw calls
cmd.reset(&swap_chain);

// manual transition handling
cmd.transition_barrier(&gfx::TransitionBarrier {
    texture: Some(swap_chain.get_backbuffer_texture()),
    buffer: None,
    state_before: gfx::ResourceState::Present,
    state_after: gfx::ResourceState::RenderTarget,
});

// render pass approach is used, swap chain automatically creates some for us
cmd.begin_render_pass(swap_chain.get_backbuffer_pass_mut());
cmd.set_viewport(&viewport);
cmd.set_scissor_rect(&scissor);

// set state for the draw
cmd.set_render_pipeline(&pso);
cmd.set_vertex_buffer(&vertex_buffer, 0);
cmd.draw_instanced(3, 1, 0, 0);
cmd.end_render_pass();

// manually transition
cmd.transition_barrier(&gfx::TransitionBarrier {
    texture: Some(swap_chain.get_backbuffer_texture()),
    buffer: None,
    state_before: gfx::ResourceState::RenderTarget,
    state_after: gfx::ResourceState::Present,
});

// execute command buffer
cmd.close()?;
device.execute(&cmd);

// swap for the next frame
swap_chain.swap(&device);
pmfx
The pmfx module builds on top of the gfx module to make render configuration more ergonomic, data driven and quicker to develop with. You can use the API and pmfx data to configure render pipelines in a data driven way. The pmfx-shader repository has more detailed information and is currently undergoing changes and improvements but it now supports a decent range of features.
You can supply jsn config files to specify render pipelines, textures (render targets), views (render pass with cameras) and render graphs. Useful defaults are supplied for all fields and combined with jsn inheritance it can aid creating many different render strategies with minimal repetition.
textures: {
    main_colour: {
        ratio: {
            window: "main_window",
            scale: 1.0
        }
        format: RGBA8n
        usage: [ShaderResource, RenderTarget]
        samples: 8
    }
    main_depth(main_colour): {
        format: D24nS8u
        usage: [ShaderResource, DepthStencil]
        samples: 8
    }
}
views: {
    main_view: {
        render_target: [
            "main_colour"
        ]
        clear_colour: [0.45, 0.55, 0.60, 1.0]
        depth_stencil: [
            "main_depth"
        ]
        clear_depth: 1.0
        viewport: [0.0, 0.0, 1.0, 1.0, 0.0, 1.0]
        camera: "main_camera"
    }
    main_view_no_clear(main_view): {
        clear_colour: null
        clear_depth: null
    }
}
pipelines: {
    mesh_debug: {
        vs: vs_mesh
        ps: ps_checkerboard
        push_constants: [
            "view_push_constants"
            "draw_push_constants"
        ]
        depth_stencil_state: depth_test_less
        raster_state: cull_back
        topology: TriangleList
    }
}
render_graphs: {
    mesh_debug: {
        grid: {
            view: "main_view"
            pipelines: ["imdraw_3d"]
            function: "render_grid"
        }
        meshes: {
            view: "main_view_no_clear"
            pipelines: ["mesh_debug"]
            function: "render_meshes"
            depends_on: ["grid"]
        }
        wireframe: {
            view: "main_view_no_clear"
            pipelines: ["wireframe_overlay"]
            function: "render_meshes"
            depends_on: ["meshes", "grid"]
        }
    }
}
When pmfx is built, shader source is generated along with an info file that contains useful reflection information to be used at runtime. Based on shader inputs and usage, descriptor layouts and vertex layouts are automatically generated.
av
The av API can be used to decode and playback audio and video streams with hardware accelleration. Video frames are decoded into native GPU texture formats with no CPU copy overhead.
// create a player
let mut player = av_platform::VideoPlayer::create(&dev).unwrap();

// load a video and play
player.set_source("video.mp4")?;
player.play()?;

// ..
let mut player_open = true;
while app.run() {

    // poll update
    player.update(&mut dev)?;

    if player.is_ended() {
        // .. handle case where video is ended
    }

    // get texture
    if let Some(video_tex) = &player.get_texture() {
        let size = player.get_size();

        // .. render
    }
}
imgui
Dear ImGui support with docking and viewports (multiple windows) through the imgui module. The widget API is not fully complete in safe Rust. I have been adding these on a case by case basis as I need them.
// create imgui instance
let font_path = asset_path
    .join("data/fonts/roboto_medium.ttf")
    .to_str()
    .unwrap()
    .to_string();

let mut imgui_info = imgui::ImGuiInfo {
    device: &mut dev,
    swap_chain: &mut swap_chain,
    main_window: &win,
    fonts: vec![imgui::FontInfo {
        filepath: font_path,
        glyph_ranges: None
    }],
};
let mut imgui = imgui::ImGui::create(&mut imgui_info).unwrap();

while app.run() {

    // ..

    // imgui
    imgui.new_frame(&mut app, &mut win, &mut dev);

    // button with size
    imgui.button_size(font_awesome::strs::EYE, 32.0, 0.0);

    // same line checkbox
    imgui.same_line();
    let mut dd = self.session_info.debug_draw_flags.contains(DebugDrawFlags::GRID);
    if imgui.checkbox("Grid", &mut dd) {
        if dd {
            self.session_info.debug_draw_flags |= DebugDrawFlags::GRID;
        }
        else {
            self.session_info.debug_draw_flags &= !DebugDrawFlags::GRID;
        }
    }

    // combo
    let (_, selected) = imgui.combo_list("Camera", &camera_types, &selected);

    imgui.render(&mut app, &mut win, &mut dev, &mut cmdbuffer, &Vec::new());
}
Examples
There are a few standalone examples of how to use the lower level components of hotline (gfx, app, av). You can build and run these as follows:
// build examples
cargo build --examples

// make sure to build data
hotline-data\pmbuild win32-data

// run a single sample
cargo run --example triangle
Triangle
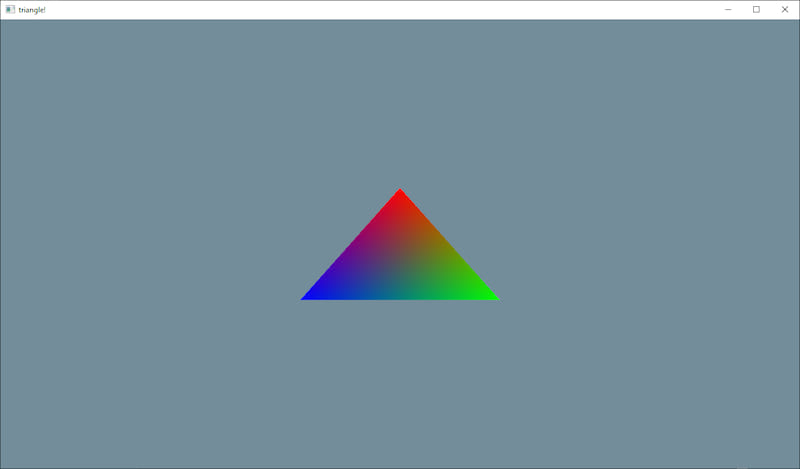
This is a standalone example, outside of the ecs system. It directly uses the gfx API to set up and render a triangle. This gives a good overview of the low-level graphics setup and can serve as a first port of call for any porting work to other platforms.
Bindless

The second standalone example is used to test render targets, compute shaders, image loading, and bindless texture sampling. A few render passes are configured and compute shader writes to a read-write texture before everything is composited to screen in 4 quadrants.
Bindful

This example shows how a bindful rendering model is possible in place of or side by side with a bindless rendering model
ImGui Demo

Test for implementing and verifying the imgui backend - this demonstrates the entire feature set of imgui with docking, viewports and mouse cursors.
Play Video
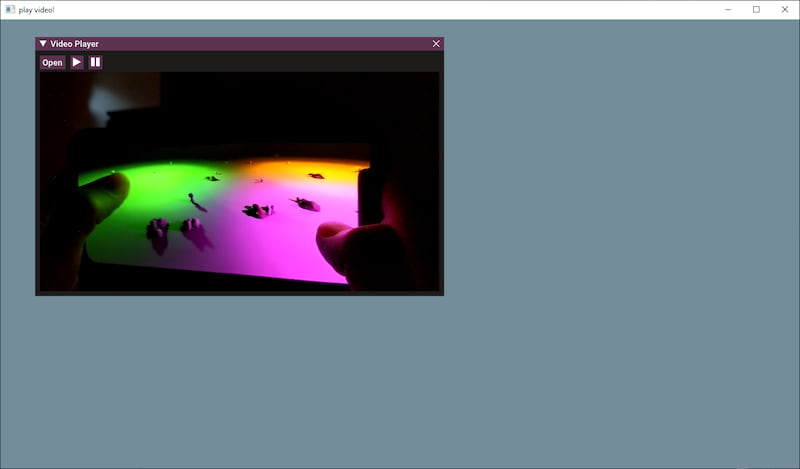
A standalone example of video playback, it allows you to load a video file from disk so it can be used to test compatibility of different video formats. The current implementation uses windows media foundation and Direct3D12 device to perform video decoding. The av API provides access to decoded video frames as a native gfx::Texture and performs all decoding on the GPU.
Resource Tests
This provides a testbed for loading different resource types, it loads some compressed texture formats and displays them to the screen to verify the texture build pipeline and the texture loading pipeline. It also tests the copy_texture_region API by copying a texture file specified in a pmfx into an empty texture also declared inside the pmfx config. This sample can be used in future as more resources are added.
Ecs Examples
More advanced examples are implemented using the ecs and plugin system. You can build and run them as follows:
hotline-data\pmbuild win32-debug -all -run
The source code can be located in this directory and the shaders / pmfx configs are located in the hotline-data repository.
Draw
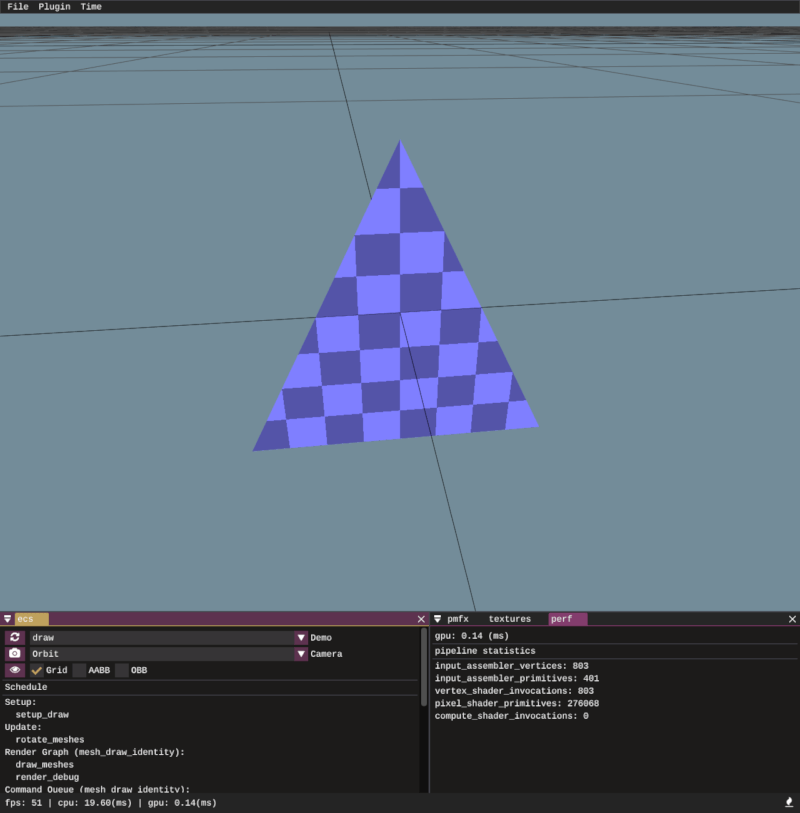
The first and most basic ecs driven example draws a triangle mesh entity using cmd_buf.draw_instanced call. This is a non-indexed draw call and just there to serve as a test for the draw_instanced function. Push constants are used to push the camera matrices but the mesh itself is drawn from raw vertex data.
Draw Indexed
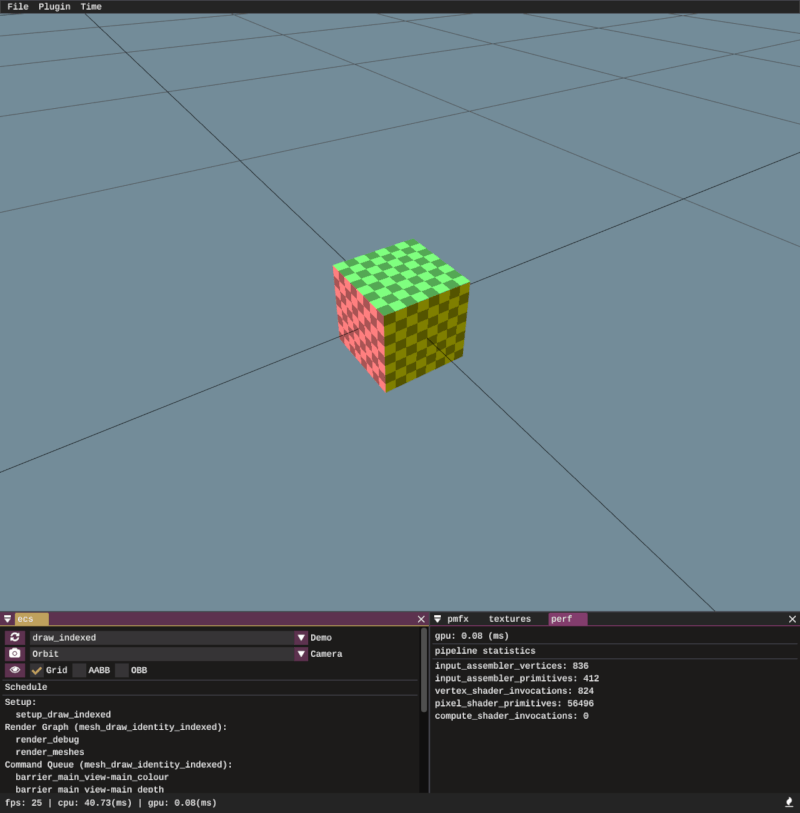
Similar to the draw_instanced call but this time we draw a cube mesh with draw_indexed_instanced with an index buffer. All of the meshes created as part of the [primitives] API come with index buffers and once I get round to implementing a model loader, they will also have index buffers so draw_indexed_instanced will likely be used more than draw_instanced, but it's necessary to support and test both of them.
Draw Push Constants
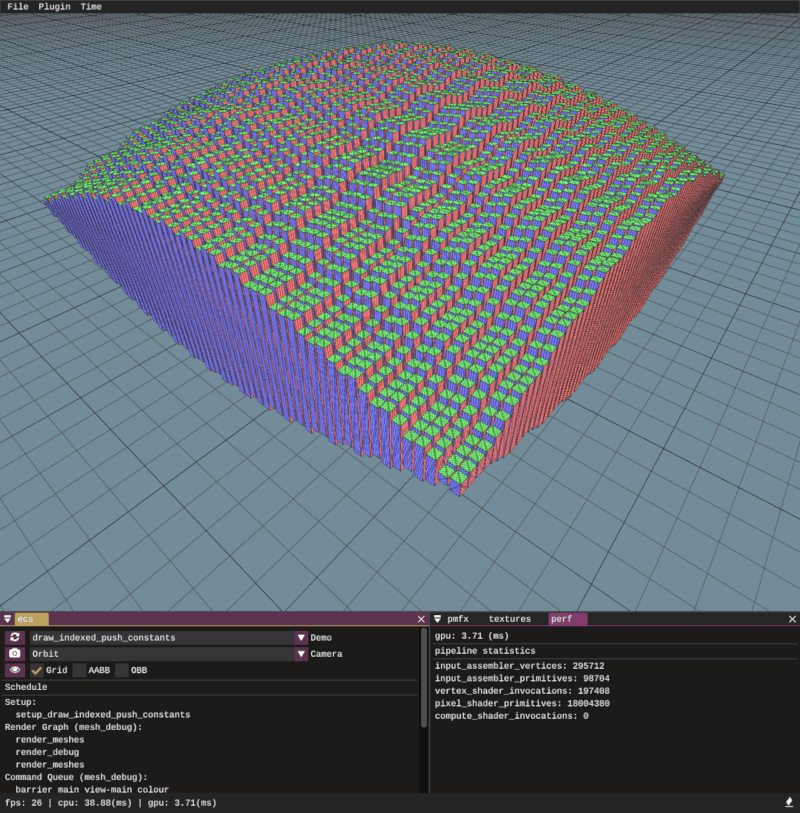
Building on from the draw indexed example, this one adds extra per-entity draw information of a world matrix to position them.
Draw Indirect
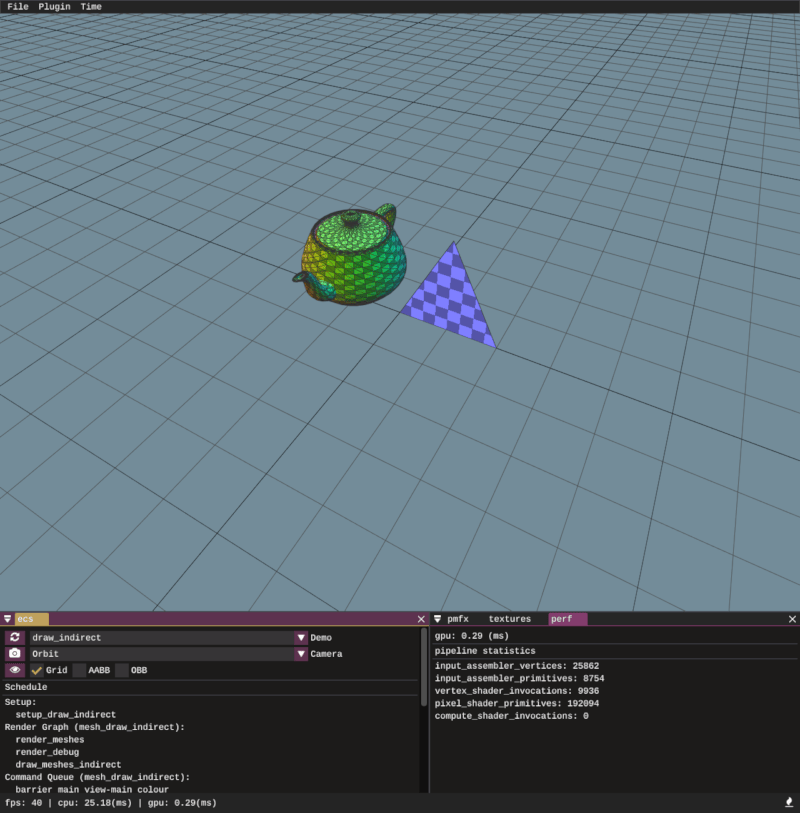
This is a very simple and not very useful example of execute_indirect; it creates 2 indirect CommandSignatures (one for Draw and one for DrawIndexed) and then the IndirectArguments are populated on the CPU. The entities are drawn by calling cmd_buf.execute_indirect. Later this functionality becomes much more powerful as command buffers can be populated on the GPU, but this is here as a very basic unit-test just to make sure everything is hooked up and indirect draws can be made.
Geometry Primitives
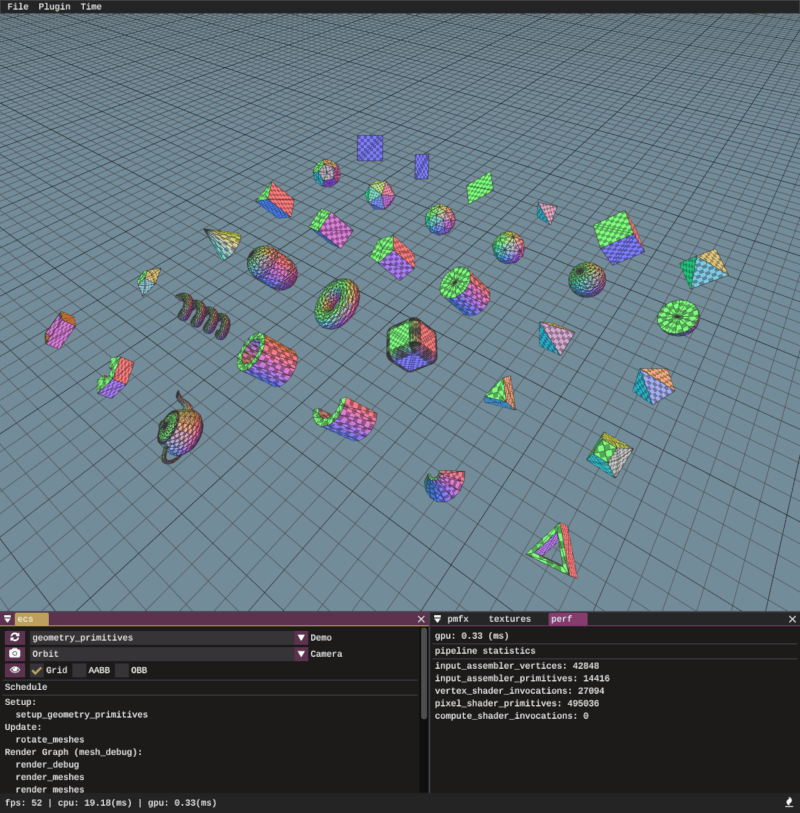
A sample showcasing all of the available procedurally generated geometry primitives.
Draw Vertex Buffer Instanced
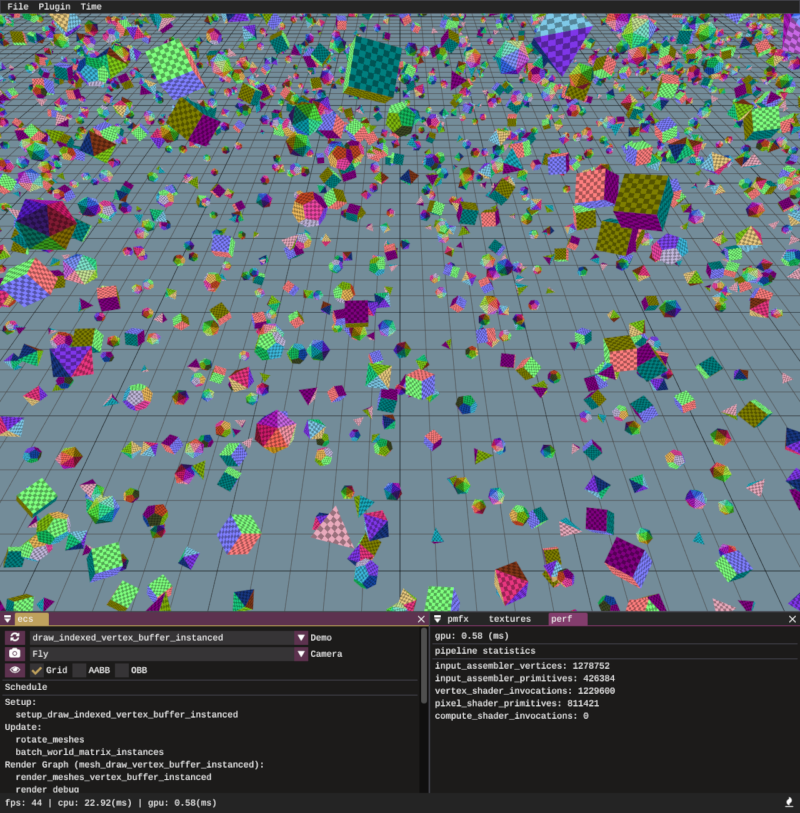
This example uses 2 vertex streams, one of which contains vertex data and the second containing a per entity world matrix. The entity world matrices are updated batched together into a single vertex buffer each frame on the CPU. Instance striding is driven by the vertex layout.
Draw cbuffer Instanced
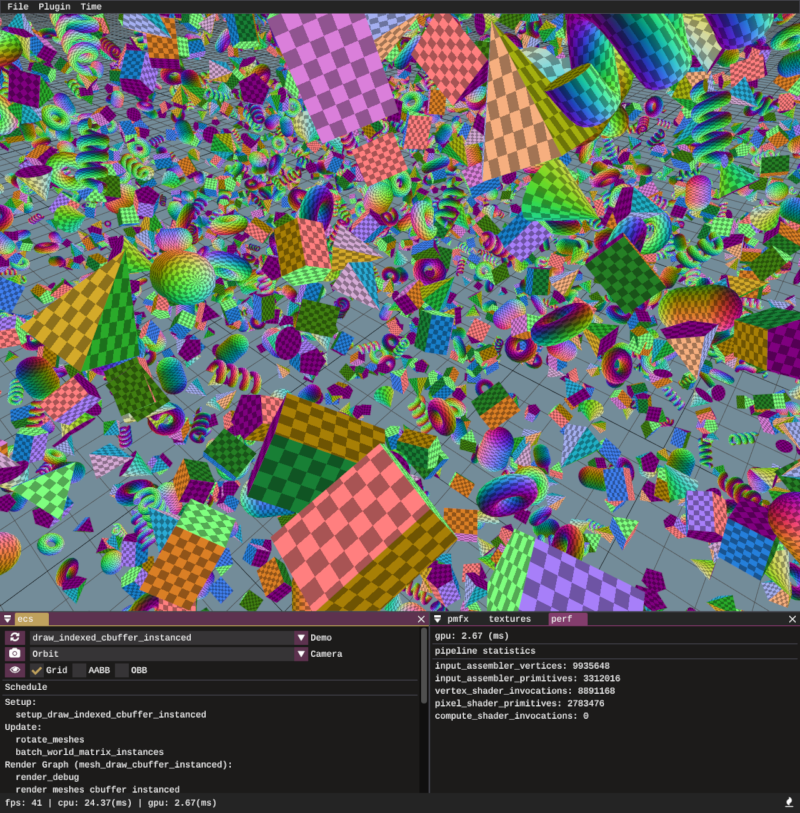
This example provides instanced draws by updating entity world matrices on the CPU and batching them into a larger constant buffer. The constant buffer is bound onto the pipeline slot and the vertex shader semantic SV_InstanceID is used to index into the constant buffer to obtain a per instance world matrix.
Bindless Texture
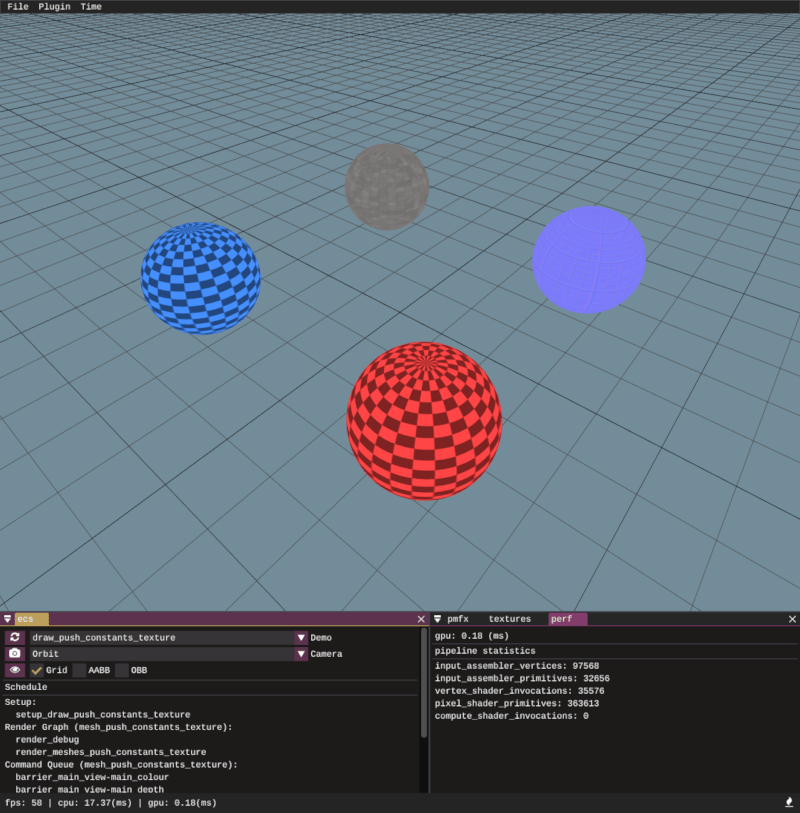
Bindless texturing example - uses push constants to push a per draw call texture id for each entity. The texture id (shader resource view index) is used to lookup the texture inside an unbounded descriptor array in the fragment shader.
Tangent Space Normal Maps

A test bed to verify the correctness of the shaders, geometry, and normal map textures performing tangent space normal map transformations.
Bindless Material
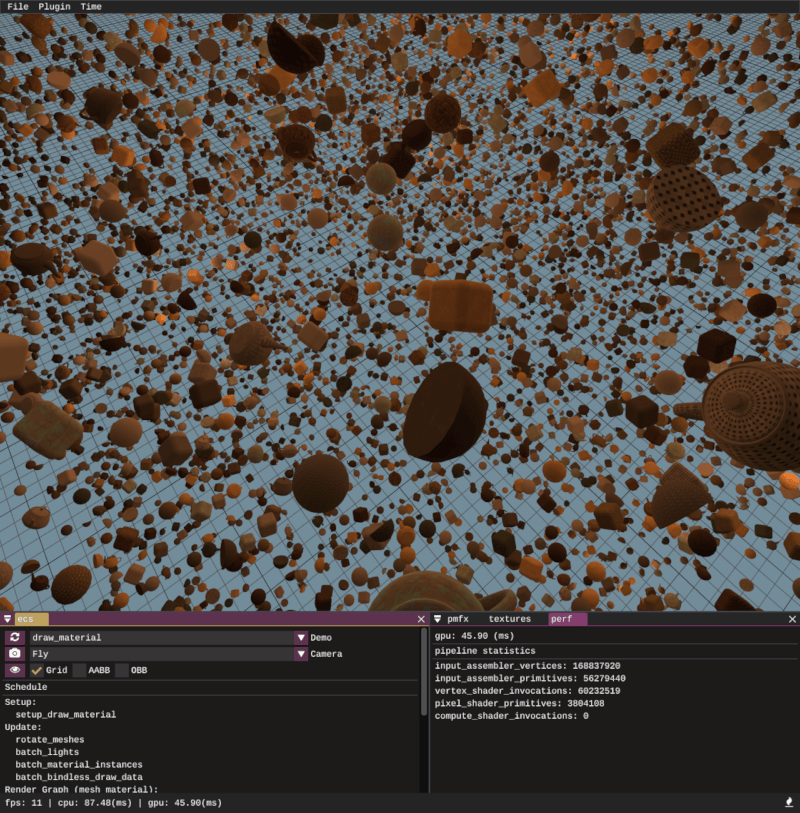
Bindless material setup example. Instance batches are created for the draw calls, the instance buffer consists of a uint4 which has packed draw id and material id for each entity. The world matrix for each entity is looked up inside an unbounded descriptor array and so is the material. The material data consists of texture ids which are passed to the fragment shader. In the fragment shader we use the texture ids to look up albedo, normal, and roughness textures again stored in unbounded descriptor arrays.
Point Lights
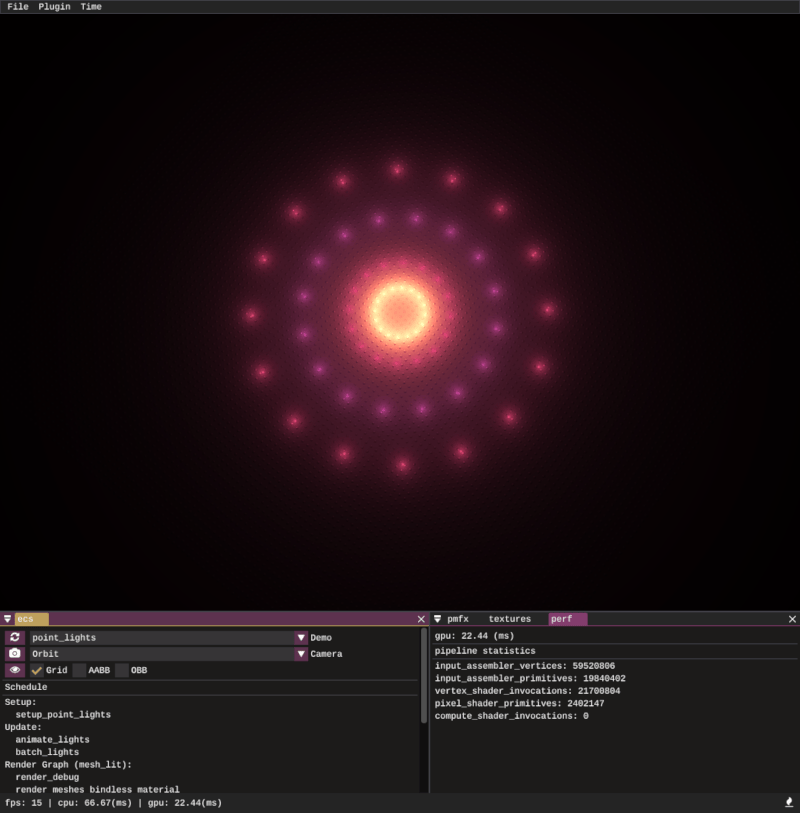
A demo and visualisation created by using point lights, spheres, and a plane. The shader applies cook-torrance specular with lambertian diffuse. It also demonstrates how light entities can be added and manipulated and how data is passed to the GPU in the form of light data, with the lookups into the light array being driven by bindless ID lookups.
Spot Lights
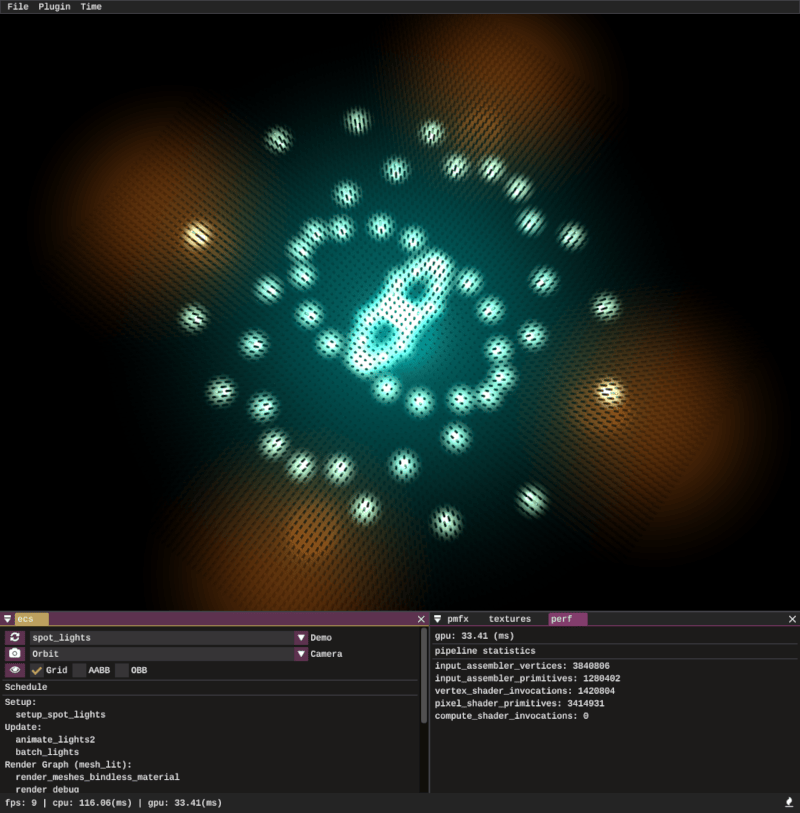
Similar to the point lights demo, this showcases spot lights, which are processed in a separate loop to point lights and have their data stored in a separate structured buffer.
Directional Lights
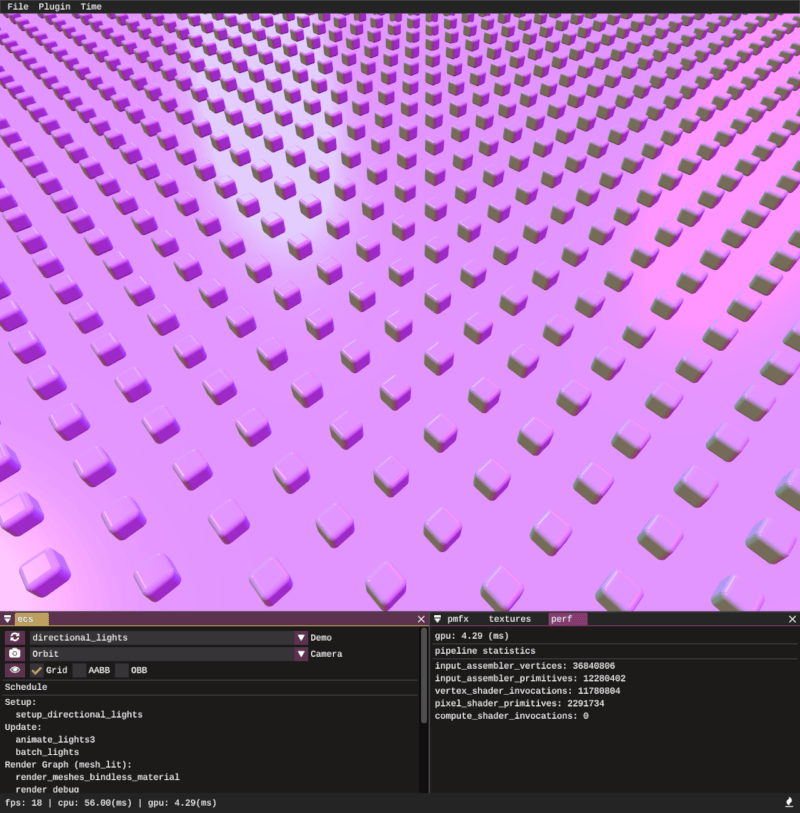
Another light type example, directional lights are processed and stored in a separate structured buffer to the point and spot lights.
GPU Frustum Culling

This sample utilises execute_indirect and a compute shader to perform AABB vs frustum culling on the GPU. A structured buffer is populated with all draw call information for the scene and a secondary structured buffer with unordered access is created with a counter and used on the GPU as an AppendStructuredBuffer. Entity extents are looked up in the compute shader and culling is performed by testing the entity AABB extents against the camera frustum planes. Entities that are inside or intersecting the frustum have their draw call data copied from the full structured buffer and appended into the draw indirect structured buffer. The draw indirect structured buffer is used to drive the execute_indirect call. The sample draws 64k entities all with unique vertex and index buffers, running at 16ms on the CPU, where making the equivalent number of draw calls via draw_indexed takes well over 80ms.
Cubemap
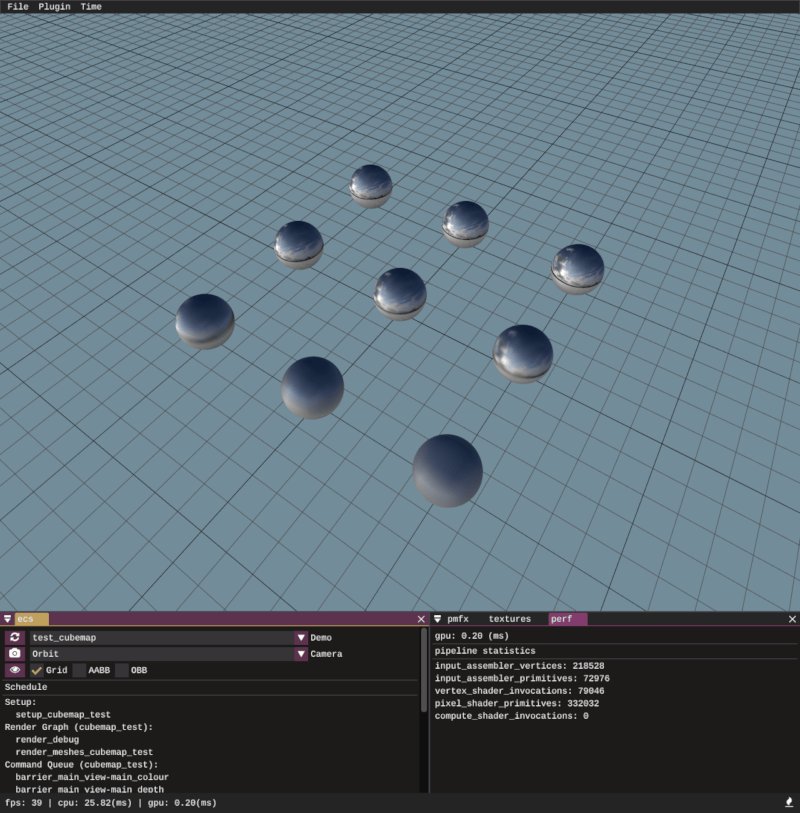
A test to verify the correctness of the texture pipeline and cubemap loading. texturec is used to take 6 input face images stored in a folder and pack them into a .dds image with convolved mip-map levels. The mip-map levels are looked up individually by the different sphere draw calls to verify the mips and faces have loaded correctly and serves as a starting point of how to use a cubemap convolution for image based lighting.
Texture2DArray
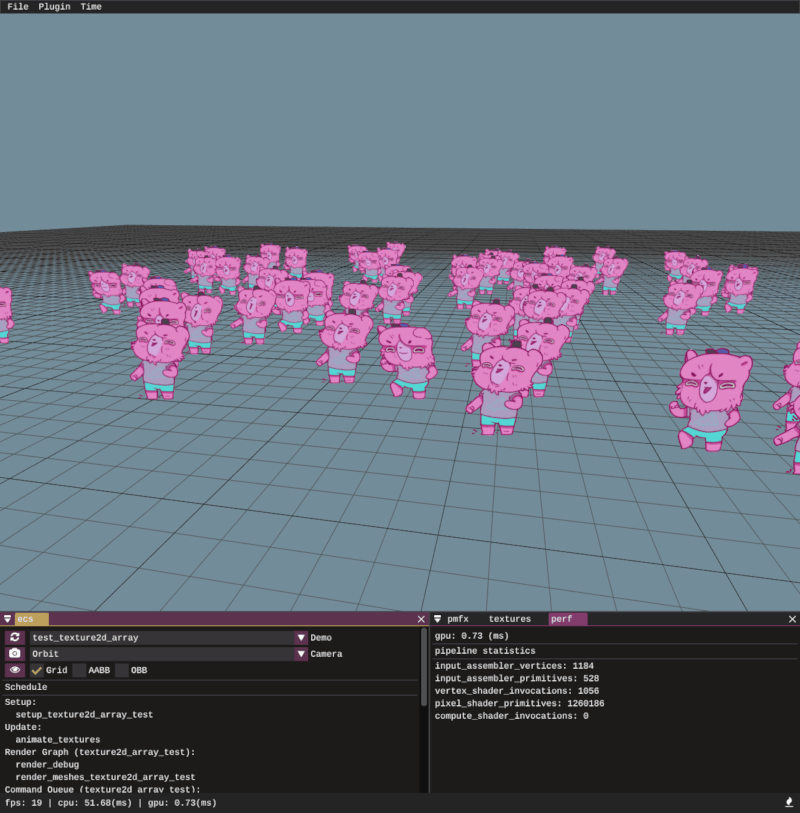
A test to verify the correctness of the data pipeline for loading 2D texture arrays. A simple animation is applied to the texture array to roll through the various array slices and the camera distance will select mip-map levels automatically based on hardware mip-map selection.
Texture3D
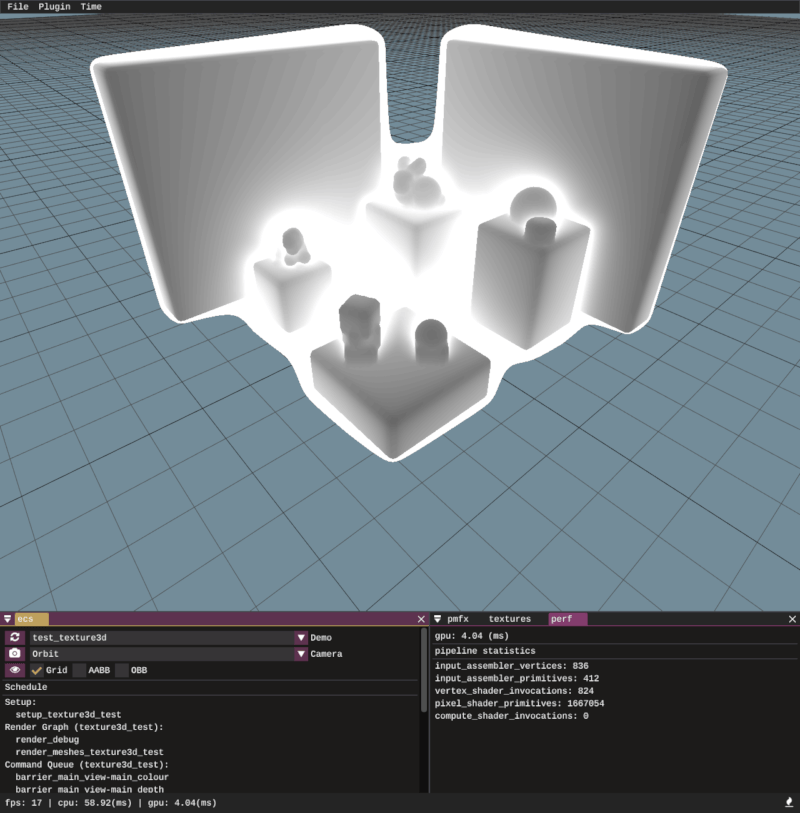
The sample loads and renders a 3D texture which contains signed distance field data. The image itself was generated in my C++ engine [pmtech] and this sample serves as a test to ensure 3D texture loading works correctly. It also provides a simple demonstration of how to visualise / ray march a signed distance field volume.
Read Write Texture
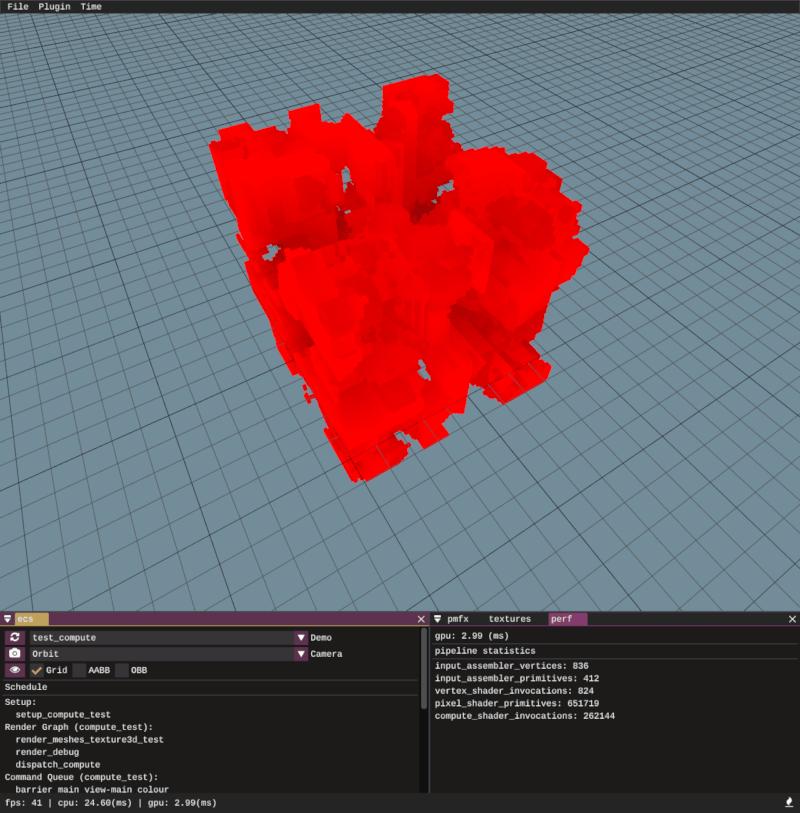
An example to showcase how to configure compute passes through the pmfx and ecs systems. We setup a basic compute pass which writes some noise into a 3D read-write texture and then use a basic 3D ray march to trace the volume in a rasterization pass.
Multiple Render Targets
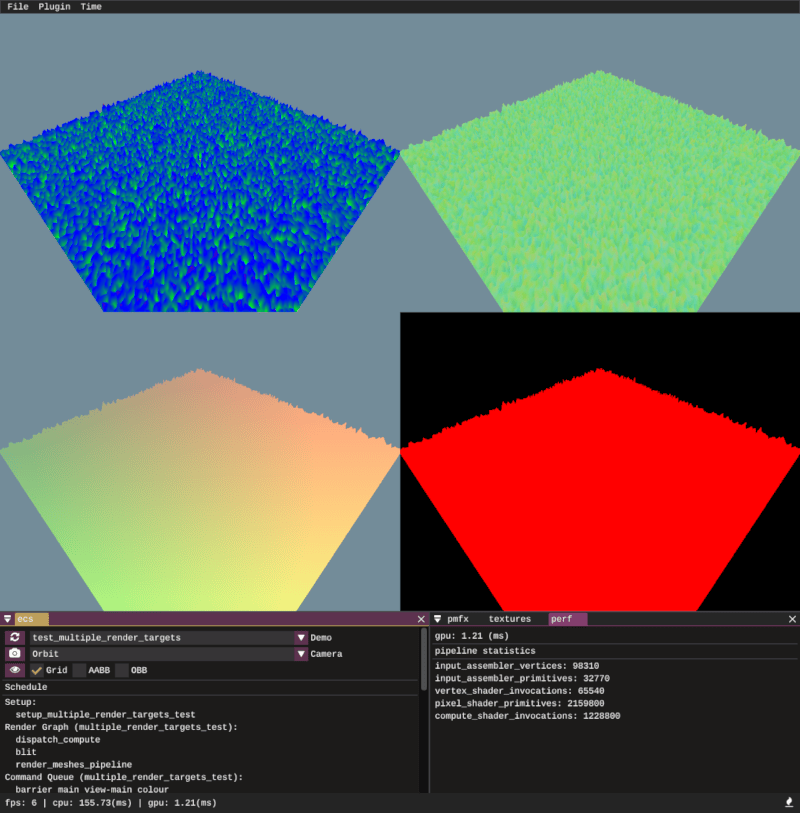
This sample demonstrates and tests multiple render target outputs. It renders to multiple textures as you would for a g-buffer deferred setup. The targets are MSAA enabled, and then in a compute shader we sample directly from the MSAA resources, outputting one of the MSAA fragments and splitting the screen into 4 quadrants to show the different outputs from the MRT setup.
Raster States
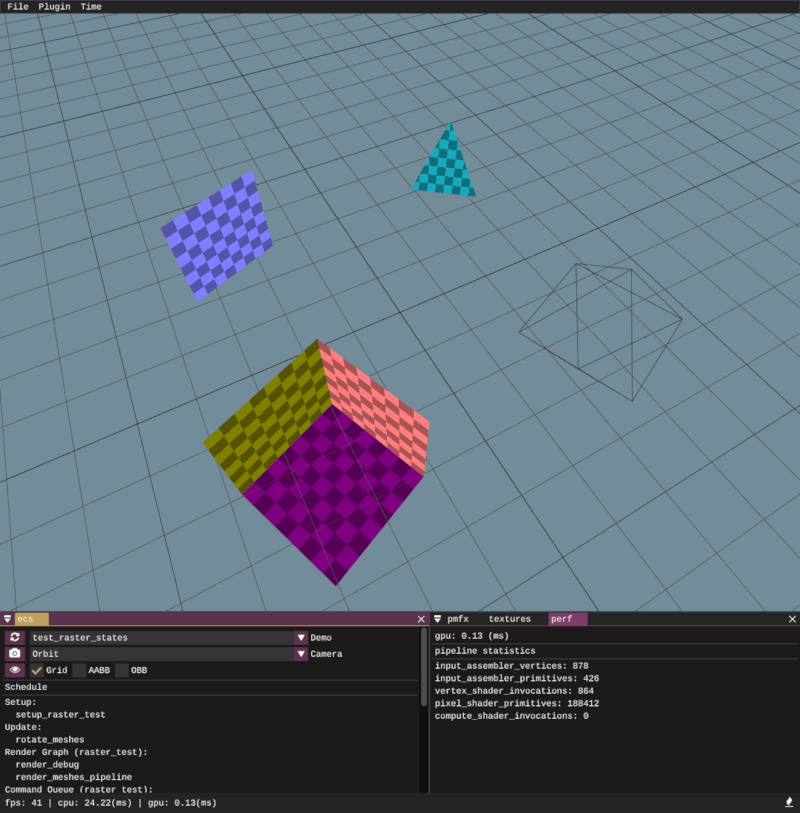
A basic test which verifies the correctness of rasterizer state data being supplied in .pmfx config files. A few primitives are rendered with front-face, back-face and no culling, and another draw call with wireframe fill mode.
Blend States
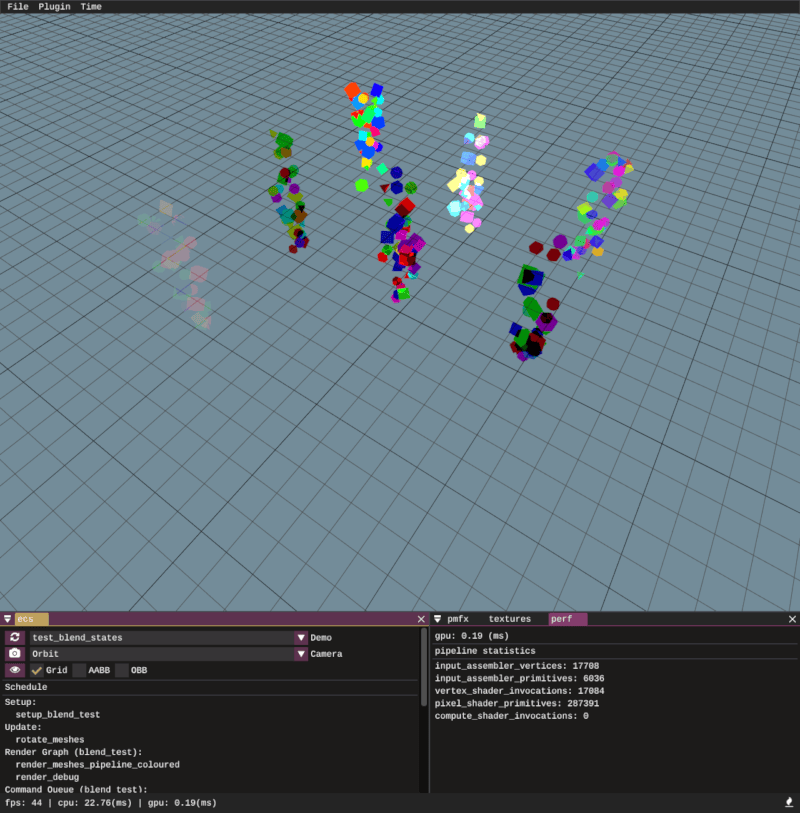
This basic test shows a variety of different blend modes. It covers the common cases: no blending, alpha blending, and additive blending, as well as some more esoteric ones such as reverse subtract and min / max blend ops.
Generate Mip Maps
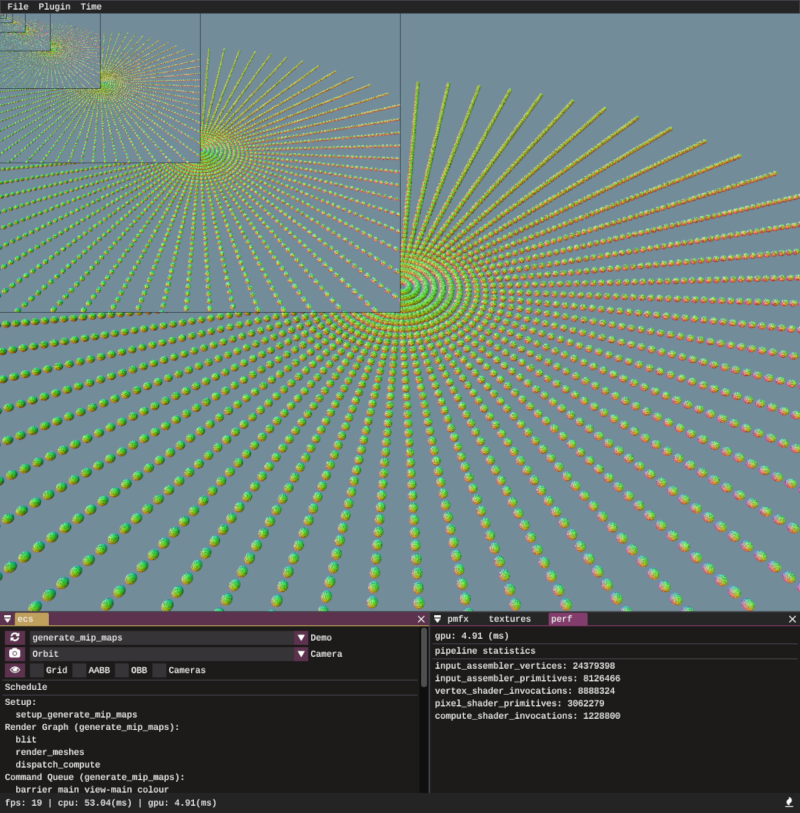
This demonstrates the functionality in the low level gfx API to generate a mip chain at run time for a render target. The pmfx system is utilised to specify ReadMipsin the uses: section of a render graph pass. After the render target is rendered into but before it is read in the shader the target is resolved and the mip chain is generated.
Shadow Map
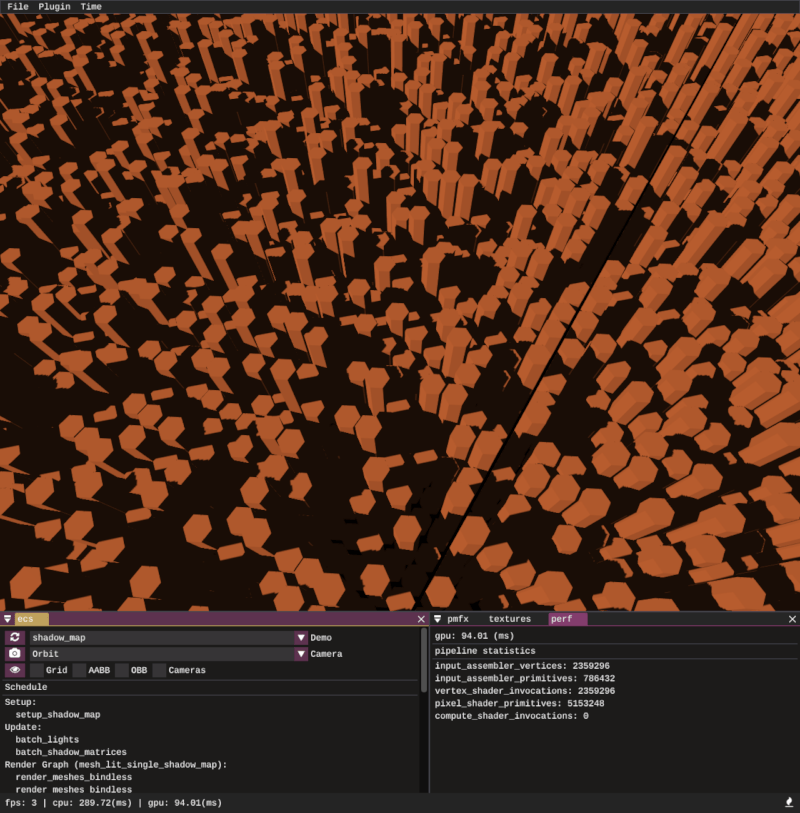
A sample to demonstrate how to configure a single shadow map with a vertex shader only render pipeline that only outputs depth to the depth stencil unit. A SamplerComparsionState is used in the lighting shader to read shadow samples and a 9-tap PCF filter is also applied.
Dynamic Cubemap
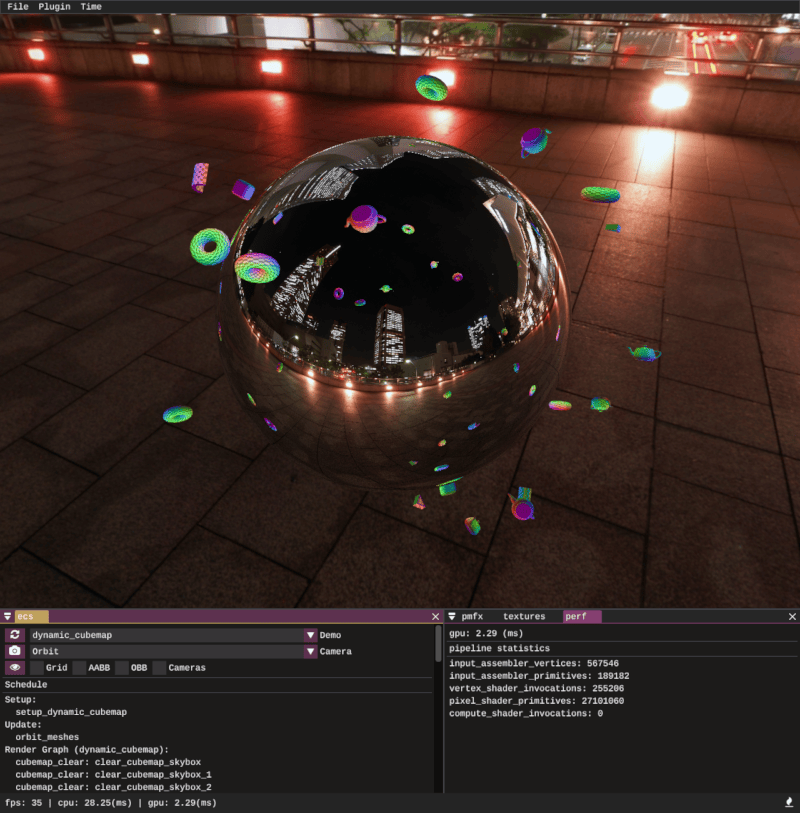
Demonstrates how multiple cubemap faces can be rendered using cubemap cameras and then sampled from to create dynamic environment mapped reflections. A single pmfx view is created with the cubemap flag set to true, this will automatically create 6 child views for each face of the cubemap.
Omni Shadow Map
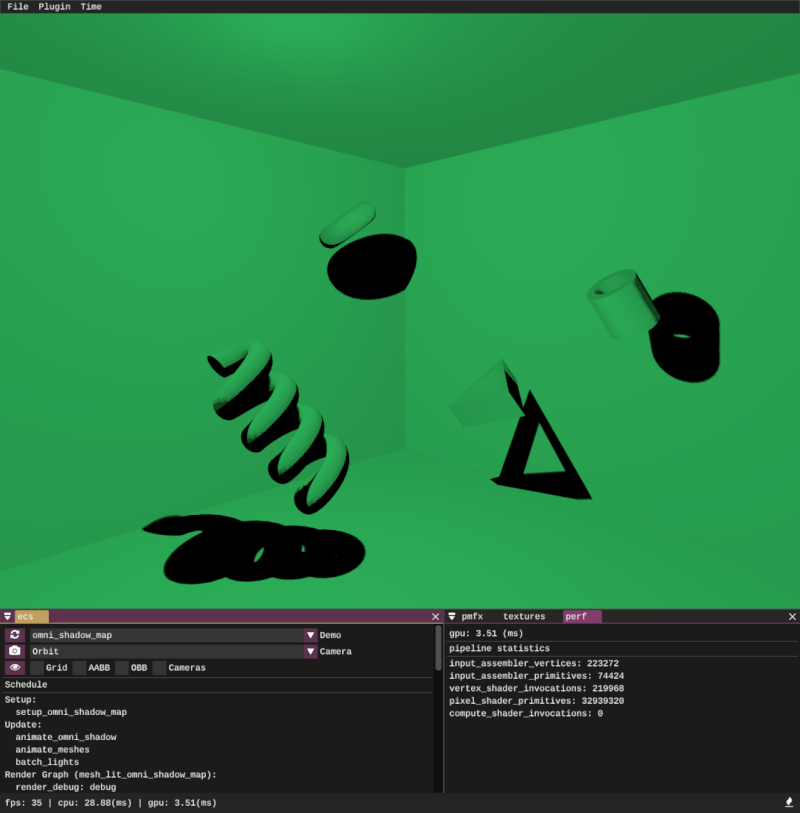
Demonstrates how multiple cubemap faces can be rendered using cubemap cameras and comparison sampled with PCF to create a point light shadow. A single pmfx depth only view is created with the cubemap flag set to true, this will automatically create 6 child views for each face of the cubemap.
PBR
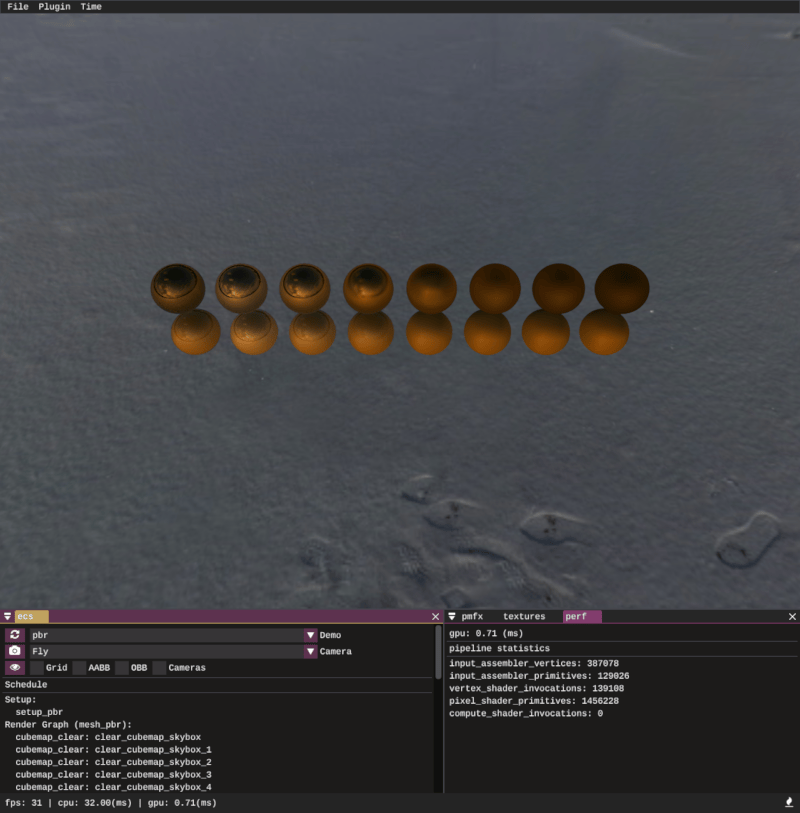
An implementation of physically based rendering with image based lighting. Note that currently the cubemap pre-filtering is just using the mip levels, in time there will be an improved pipeline to properly pre-filter.
Tests
There are standalone tests and client/plugin tests to test graphics API features. This requires a test runner which has a GPU and is not headless, so I am using my home machine as a self-hosted actions runner. You can run the tests yourself but because of the requirement of a GPU device and plugin loading the tests need to be ran single threaded.
cargo test -- --test-threads=1
This is wrapped into pmbuild so you can also run:
pmbuild test
Contributing
Contributions of all kinds are welcome, you can make a fork and send a PR if you want to submit small fixes or improvements. Anyone interested in being more involved in development I am happy to take on people to help with the project of all experience levels, especially people with more experience in Rust. You can contact me if interested via Twitter or Discord.
Dependencies
~25–64MB
~1M SLoC