9 releases (breaking)
| 0.7.0 | Jul 6, 2024 |
|---|---|
| 0.6.0 | Feb 17, 2024 |
| 0.5.0 | Dec 4, 2023 |
| 0.4.0 | Dec 2, 2023 |
| 0.1.1 | Nov 28, 2023 |
#2168 in Game dev
138 downloads per month
54KB
257 lines
Bevy nine slice/patch Material Plugin
Quick and easy auto-scaling nine slice/patch material for bevy ui nodes implemented as Fragment Shader.
Features
- Sprite sheet animation support
- Wasm support
- Blend colors / tinting
- Color lookup gradients
Making hover effects a breeze.
Compatibility
| Nince Slice | Bevy |
|---|---|
| 0.7 | 0.14 |
| 0.6 | 0.13 |
| 0.5 | 0.12 |
cargo add bevy_nine_slice_ui
Usage
It's a single component.
The plugin as has a sync_rate_ms parameter, which is the minimum time between updates in milliseconds. This is to prevent the material from updating too often. The default is 100ms.
app.add_plugin(NineSliceUiPlugin::default());
fn spawn_ui(mut cmd: Commands, server: Res<AssetServer>) {
    commands.spawn(NineSliceUiMaterialBundle {
        style: Style {
            width: Val::Percent(100.),
            height: Val::Percent(50.),
            display: Display::Flex,
            ..default()
        },
        nine_slice_texture: NineSliceTexture::from_image(server.load("panel_atlas.png")),
        ..default()
    });
}
Using an atlas instead of a single image
Also added atlas capabilities. Instead of from_image, use from_slice method and pass the texture bounds.
nine_slice_texture: NineSliceTexture::from_slice(
    server.load("panel_atlas.png"),
    Rect::new(32., 0., 32. + 48., 48.),
),
Adding a material to an existing Bundle
You can also add a nine slice material to an existing bundle, like a button. Just beware, this might not always work. Just in the recent 12.1 update, the background color component broke the material. The background color component will now be removed from elements where the material is added.
.spawn(ButtonBundle {
    style: Style {
        width: Val::Px(150.),
        height: Val::Px(50.),
        display: Display::Flex,
        justify_content: JustifyContent::Center,
        align_items: AlignItems::Center,
        ..default()
    },
    ..default()
})
.insert(NineSliceTexture::from_slice(
    server.load("panel_atlas.png"),
    Rect::new(0., 0., 32., 32.),
));
Modify the texture component
You can modify the texture component to change the texture or the texture bounds. This enables simple sheet style animations.
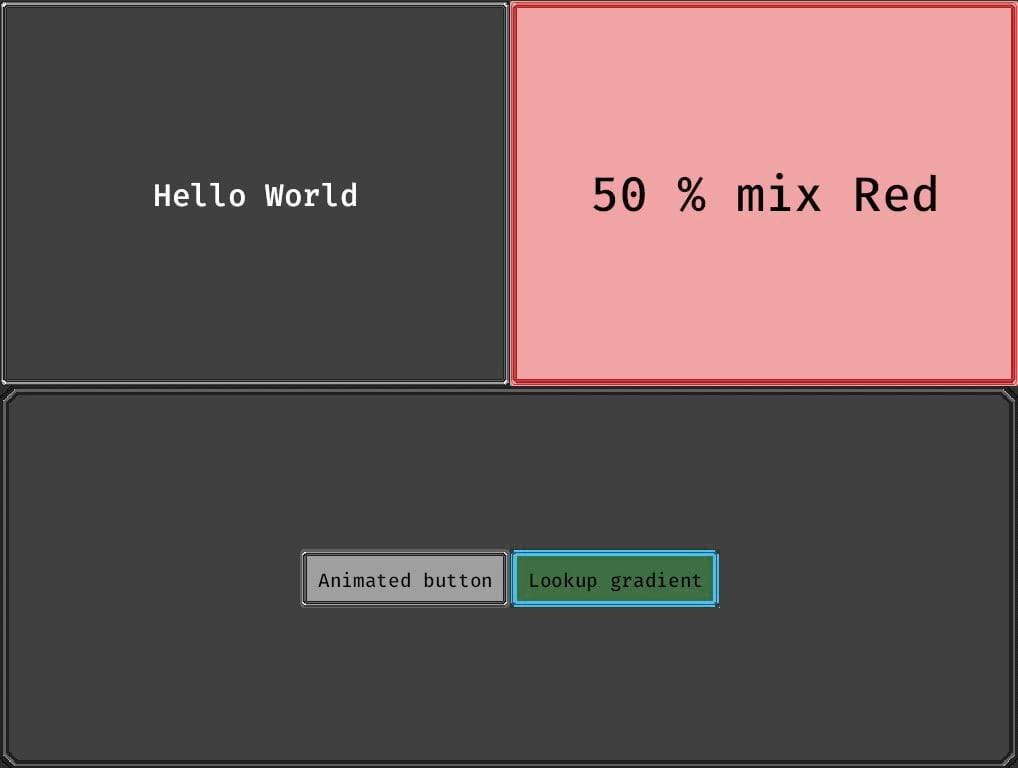
// add a blend color
NineSliceTexture::from_image(server.load("panel_atlas.png"))
    .with_blend_color(Color::RED)
    .with_blend_mix(0.5);


// or why not a whole palatte gradient?
// A 1D texture to use as color lookup, the grayscale value of the original color is used as UV
// dark to light, left to right
NineSliceTexture::from_image(server.load("panel_atlas.png"))
    .with_lookup_gradient(server.load("4-color-palette.png"))
    .with_gradient_mix(1.0);
Check out the example, there is everything you need to know.
cargo run --example ui
result:

Dependencies
~41–79MB
~1.5M SLoC