1 unstable release
| 0.8.7 | Oct 5, 2022 |
|---|
#2279 in Game dev
1,317 stars & 23 watchers
100KB
2K
SLoC
Welcome to RLTK_RS, the Rust implementation of RLTK
You can find the original C++ project here: https://github.com/thebracket/rltk.
BREAKING CHANGE ALERT: The crossterm feature is now cross_term if you are using bracket-terminal directly. It's still crossterm for bracket-lib and rltk.
IMPORTANT: If you are running the webgpu backend, you need to add resolver = 2 to your Cargo.toml file. WGPU requires it for platform selection.
Note:
rltk_rsis now a wrapper forbracket-lib. It maps all namespaces to work with the oldrltkandrltk::preludenamespaces, including renamingBTermandBTermBuilderfor you. The Roguelike tutorial compiles unchanged with it.
You can read a tutorial series on writing a Roguelike with this library at: https://bfnightly.bracketproductions.com/rustbook/
Running the examples
The examples use Cargo's built-in support for example code. E.g. To run example 1, enter: cargo run --example ex01-helloworld.
Using RLTK in your project
In your Cargo.toml file, include the following:
[dependencies]
rltk = "0.6.2"
Note: we don't do that in the example files, we use a relative path - to avoid having nested git repos.
Copy all the files from the resources directory inside RLTK into your own resources folder. RLTK needs to be able to load the font file and OpenGL shaders.
For the simplest possible Hello World, your source code (main.rs) can look like this:
extern crate rltk;
use rltk::{Rltk, GameState, Console};

struct State {}
impl GameState for State {
    fn tick(&mut self, ctx : &mut Rltk) {
        ctx.cls();
        ctx.print(1, 1, "Hello RLTK World");
    }
}

fn main() {
    let context = Rltk::init_simple8x8(80, 50, "Hello RLTK World", "resources");
    let gs = State{ };
    rltk::main_loop(context, gs);
}
Advanced Usage: multiple back-ends
RLTK supports a number of feature flags to let you use it the way you want.
- If you remove default features, it goes into "dummy" mode. The game state and rendering functions are disabled, but all of the library functions are available (and the lib becomes tiny - dropping most of its dependencies).
- By default, the
openglfeature will use WebGL or native OpenGL to render your consoles with a pseudo-terminal. - You can disable
opengland enablecursesto render toncursesorpdcurses(depending upon your platform). All of the demos are available as console-only now, viacargo run --example curses14-dwarfmap --features curses --no-default-features(substitutecursesforexin the example names, and specify the feature set). - You can disable
opengland enablecrosstermto render to the native console via thecrosstermlibrary (examples use thecrosstermprefix). For example,cargo run --example crossterm18-textsprites --no-default-features --features="crossterm" - You can disable
opengland enablewebgpu. The examples are prefixed withwgpu.For example,cargo run --example av13-textblock --no-default-features --features wgpuwill run example 13 on WebGPU (Picking Vulkan/Metal/WebGPU).
Examples
Example 1: Bouncing Hello World
Example 1 - Hello World is a small example, showing off a simple 8x8 console, and the boilerplate required to make RLTK run.
Run this example with cargo run --example 1 from the root of the cloned repository.
Run this example in your browser - requires WebGL2
Example 2: Multiple console layers
Example 2 - Sparse Layers is very similar to example 1, but it adds an additional layer - in a VGA 8x16 font, and renders the FPS and frame rate to it. This illustrates how easy it is to work with layers in RLTK.
Run this example with cargo run --example 2 from the root of the cloned repository.
Run this example in your browser - requires WebGL2
Example 3: Walking around
Example 3 - Walking Around is the first step for a lot of roguelikes: we generate a random map (very random in this case), render the player as an @, and move him/her/it around with the cursor keys or numpad. This illustrates the simple keyboard input mechanism, and also how to handle basic game state.
Run this example with cargo run --example 3 from the root of the cloned repository.
Run this example in your browser - requires WebGL2
Example 4: Field of view
Example 4 - Field of View/FOV takes example 3, and adds field-of-view. To do this, it implements some traits from the RLTK library that allow it to provide helpers such as this.
Run this example with cargo run --example 4 from the root of the cloned repository.
Run this example in your browser - requires WebGL2
Example 5: Auto-explore with Dijkstra Flow Maps
Example 5 - Auto-explore with Dijkstra Flow Maps creates a random map, with a lot more walls. It uses RLTK's Dijkstra Flow Maps (see this article) to solve an auto-explore problem for the map. I recommend compiling this one with cargo run --release - debug mode lacks a lot of optimizations and runs really slowly. (RLTK's Dijkstra implementation automatically uses a parallel algorithm for large numbers of targets).
Run this example with cargo run --example 5 --release from the root of the cloned repository. (The --release tells it to optimize the build; it's pretty slow without optimizations)
Run this example in your browser - requires WebGL2
Example 6: A-Star pathing and mouse control
Example 6 - A Star with the Mouse lets you use A-Star navigation to traverse a random map. Mouse over a destination, and your path is highlighted. Click, and the little @ runs there.
Run this example with cargo run --example 6 from the root of the cloned repository.
Run this example in your browser - requires WebGL2
Example 7: Layered Tiles
Example 7 - Tiles shows how you can use the font system for tiles. It creates two layers with the same font; the base layer is used for the map, and the second layer is drawn in "no background" mode to seamlessly overlay sprites atop the map without ugly borders. It uses the FOV code from example 4 to show how to recolor sprites, and uses a distance function to give a lighting effect.
Run this example with cargo run --example 7 from the root of the cloned repository.
Run this example in your browser - requires WebGL2
Example 8: REX Paint Support
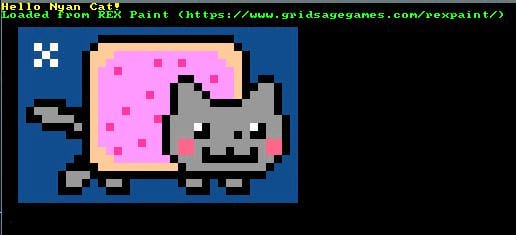
Example 8 - REX Paint Support demonstrates loading a .xp file (created with
GridSageGames' excellent REX Paint), and displaying it on the console. Thanks to Mara "Alkahest"'s hard work (see original repo here), you can load and save .xp files as you need them.
Run this example with cargo run --example 8 from the root of the cloned repository.
Run this example in your browser - requires WebGL2
Example 9: Layer Offsets
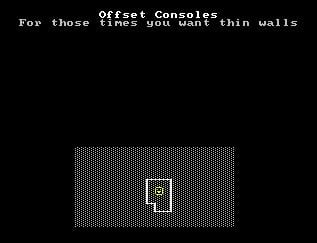
Example 9 - Offsets demonstrates the ability to call set_offset on a console layer, to nudge it in a direction. In this case, it is used to render thin walls between the major tiles.
Run this example with cargo run --example 9 from the root of the cloned repository.
Run this example in your browser - requires WebGL2
Example 10: Post Process Effects
Example 10 - Post Process shows off the post-processing system built into RLTK. Scanlines, and optional screen-burn can be enabled for the truly retro experience.
Run this example with cargo run --example 10 from the root of the cloned repository.
Run this example in your browser - requires WebGL2
Example 11: Dice Rolling
Example 11 - Random demonstrates how RLTK wraps the rand crate to give a more accessible random number generator. The demo plots the distribution of a series of 3d6 rolls.
Run this example with cargo run --example 11 from the root of the cloned repository.
Run this example in your browser - requires WebGL2
Example 12: Simplex Noise
Example 12 - Simplex Noise demonstrates the port of Auburn's FastNoise library to Rust (included in RLTK, because every Roguelike tooklit should have noise). It cycles through seeds and regenerates the terrain periodically.
Run this example with cargo run --example 12 from the root of the cloned repository.
Run this example in your browser - requires WebGL2
Example 13: Formatting blocks
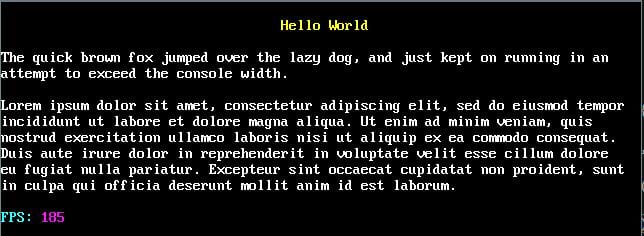
Example 13 - Text Blocks demonstrates the TextBlock functionality for easily wrapping a set of formatting commands into a command sequence,
and then rendering them together. This is useful for large amounts of text.
Run this example with cargo run --example 13 from the root of the cloned repository.
Run this example in your browser - requires WebGL2
Example 14: Dwarf Fortress-Style 3D
Example 14 - Dwarf Fortress-Style 3D uses the Algorithm3D trait to provide A* pathing in three dimensions, and implements a simple Dwarf Fortress (with DFHack "layer diving") renderer to display a noise-generated 3D map and traverse it. This also uses the noise system.
Run this example with cargo run --example 14 from the root of the cloned repository.
Run this example in your browser - requires WebGL2
Example 15: Obtaining key codes
Example 15 - Keyboard provides a handy tool to grab keyboard codes and see how to use the shift, control and alt keys as modifiers or keyboard inputs.
Run this example in your browser - requires WebGL2
Example 16 (Web Assembly Only): Binding HTML Buttons
Example 16 - External HTML Buttons demonstrates the new (as of 0.5.0) ability to add bindings to buttons on the HTML hosting the web assembly, and have them fire events in the new web_button context field.
Run this example in your browser - requires WebGL2
Example 17: Multi-Tile Sprites
Example 17 - Multi-Tile Sprites demonstrates the use of multi-tile sprites, both from REX Paint and submitted as text.
Run this example with cargo run --example ex18-textsprites from the root of the cloned repository.
Run this example in your browser - requires WebGL2
Building with WASM
RLTK newly supports web assembly (WASM). It's still rough around the edges, but it works. The build process ends up being a bit involved:
- Build the example with a specified target:
cargo build --example ex01-helloworld --target wasm32-unknown-unknown --release - Use
wasm-bindgento build bindings:wasm-bindgen .\target\wasm32-unknown-unknown\release\examples\ex01-helloworld.wasm --out-dir <YOUR WEB DIRECTORY> --no-modules --no-typescript - Include an HTML file like the one in
wasm_help/index.html. This one requires that you rename your.wasmandjsfile tomyblob_bg.wasmandmyblob.js- or adjust the HTML file to match your filenames.
I use this batch file (I'm on Windows) to build them all:
@ECHO OFF
mkdir ./wasm_help/staging
REM Build the actual WASM files and helpers
CALL :StageExample ex01-helloworld, ex01
CALL :StageExample ex02-sparse, ex02
CALL :StageExample ex03-walking, ex03
CALL :StageExample ex04-fov, ex04
CALL :StageExample ex05-dijkstra, ex05
CALL :StageExample ex06-astar-mouse, ex06
CALL :StageExample ex07-tiles, ex07
CALL :StageExample ex08-rex, ex08
CALL :StageExample ex09-offsets, ex09
CALL :StageExample ex10-postprocess, ex10
CALL :StageExample ex11-random, ex11
CALL :StageExample ex12-simplex, ex12
CALL :StageExample ex13-textblock, ex13
CALL :StageExample ex14-dwarfmap, ex14
CALL :StageExample ex15-specs, ex15

REM Duplicate example 1 into the root for compatibility with links I've already shared
copy .\wasm_help\staging\ex01\* .\wasm_help\staging

REM Submit to server
cd wasm_help\staging
REM INSERT your copy command to copy to your web server here
cd ..\..

REM Finish
EXIT /B 0

REM Usage: StageExample EXAMPLE
:StageExample
echo Building example %~1
cargo build --example %~1 --target wasm32-unknown-unknown --release
echo wasm-gc .\target\wasm32-unknown-unknown\release\examples\%~1.wasm
mkdir .\wasm_help\staging\%~2
wasm-bindgen .\target\wasm32-unknown-unknown\release\examples\%~1.wasm --out-dir .\wasm_help\staging\%~2 --no-modules --no-typescript
copy .\wasm_help\index.html .\wasm_help\staging\%~2
move .\wasm_help\staging\%~2\%~1_bg.wasm .\wasm_help\staging\%~2\myblob_bg.wasm
move .\wasm_help\staging\%~2\%~1.js .\wasm_help\staging\%~2\myblob.js
EXIT /B 0