2 releases
| 0.1.1 | May 9, 2025 |
|---|---|
| 0.1.0 | May 4, 2025 |
#84 in Value formatting
283 downloads per month
2MB
2.5K
SLoC
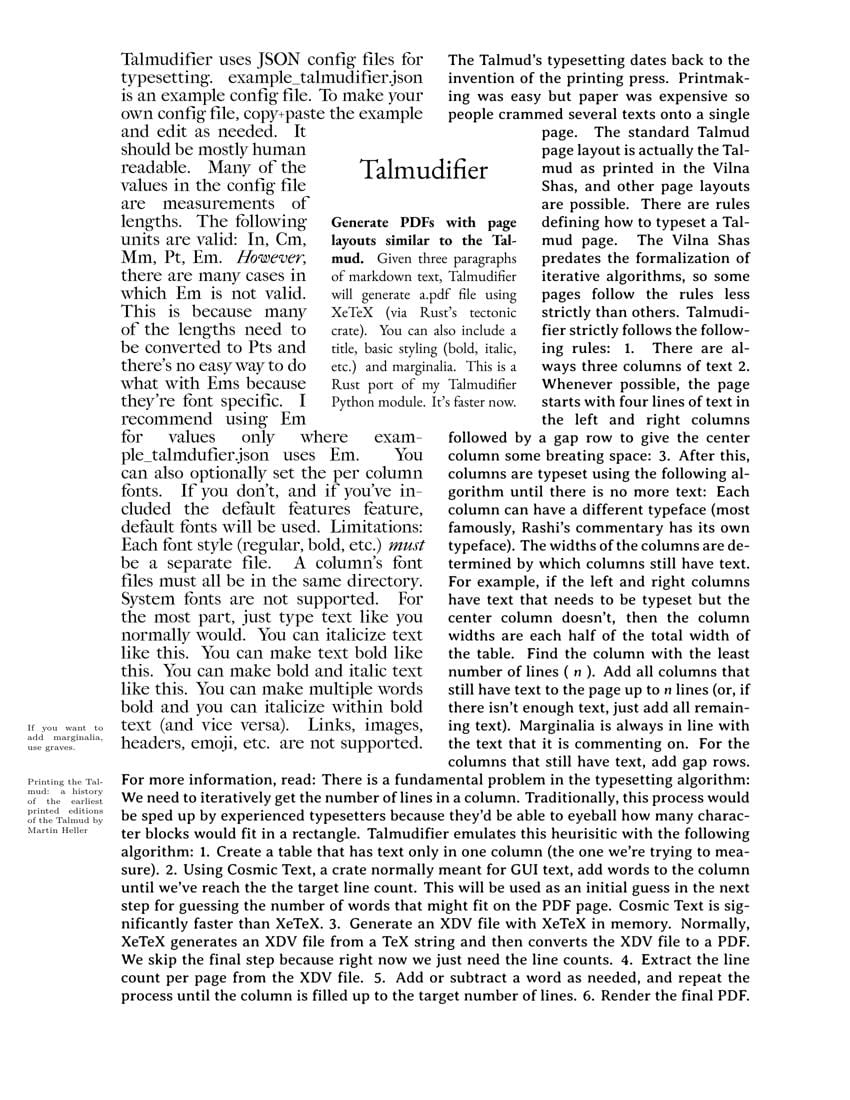
Talmudifier
Generate PDFs with page layouts similar to the Talmud.
.jpg)
Given three paragraphs of markdown text, Talmudifier will generate a .pdf file using XeTeX (via Rust's tectonic crate). You can also include a title, basic styling (bold, italic, etc.) and marginalia.
This is a Rust port of my Talmudifier Python module. It's faster now.
use std::{fs::write, path::PathBuf, str::FromStr};

use talmudifier::prelude::*;

let directory = PathBuf::from_str("example_text").unwrap();

// Load a default talmudifier.
let talmudifier = Talmudifier::default()
    // Add a title to the page.
    .title("Talmudifier")
    // Set the source text as three Markdown files.
    .source_text(SourceText::Files {
        left: directory.join("left.md"),
        center: directory.join("center.md"),
        right: directory.join("right.md")
});

// Talmudify.
let daf = talmudifier.talmudify().unwrap();

// Write the .tex. This is sometimes useful for debugging.
write("out.tex", &daf.tex).unwrap();

// Write the PDF.
write("out.pdf", &daf.pdf).unwrap();
Download talmudifier
On this webpage, there is a Releases sidebar. Click that, and download Talmudifier.
Open a terminal. You first need to change directory to Downloads (or wherever Talmudifier actually is), so:
cd ~/Downloads
MacOS: The app might not be marked as an executable. Run this in the same terminal window:
chmod +x talmudifier
MacOS: If that didn't work, move talmudifier to your home directory, and then run this:
cd ~ && chmod +x talmudifier
MacOS and Linux: Run Talmudifier:
./talmudifier
Windows: Run Talmudifier:
./talmudifier.exe
All platforms: When you run Talmudifier, you'll see a list of command line options.
You now need to actually write some words for the page, and then create a valid talmudifier.json file.
Save talmudifier.json wherever you want. Assuming that:
- The current directory is your home directory (
/home/<username>/) talmudifyis inDownloads/talmudifier.jsonis inDocuments/- You want to output the PDF to
Documents/
...Then you would do this:
./talmudify -t Documents/talmudifier.json -o Documents/out.pdf
Add Talmudifier to your project
The underlying tectonic TeX engine uses some C++ libraries which are compiled via vcpkg.
First time only:
- Download and install a C++ compiler
- Install some required packages:
- MacOS:
brew install autoconf automake autoconf-archive - Linux (Debian or Ubuntu):
sudo apt install autoconf automake autoconf-archive - Linux (something else): Same packages, different package manager, probably
- Windows: No need to download anything extra
- MacOS:
- Run:
cargo install cargo-vcpkg
First time only or whenever you cargo clean:[^1]
cargo vcpkg build
Every time you want to build your project, set the following environment flags:
Linux and MacOS:
export TECTONIC_DEP_BACKEND="vcpkg"
Windows:
$Env:TECTONIC_DEP_BACKEND="vcpkg"
$Env:RUSTFLAGS="-Ctarget-feature=+crt-static"
Then, create a talmudifier.json file.
Compile as an executable
Follow steps for adding Talmudifier to your project. Then, run:
cargo build --release --bin talmudify --features clap
Then, create a talmudifier.json file.
talmudifier.json
Talmudifier uses JSON config files for typesetting. example_talmudifier.json is an example config file. To make your own config file, copy+paste the example and edit as needed. It should be mostly human-readable.
Length values
Many of the values in the config file are measurements of lengths. The following units are valid: "In", "Cm", "Mm", "Pt", "Em". However, there are many cases in which "Em" is not valid. This is because many of the lengths need to be converted to Pts and there's no easy way to do what with Ems because they're font-specific. I recommend using Em for values only where example_talmdufier.json uses Em.
Fonts
You can also optionally set the per-column "fonts". If you don't, and if you've included the default-features feature, default fonts will be used.
Limitations:
- Each font style (regular, bold, etc.) must be a separate file.
- A column's font files must all be in the same directory.
- System fonts are not supported.
Source text
"source_text" specifies the source text that will be talmdufied. There are three options:
- File paths to three markdown files. These files must exist and must be single paragraphs (no double line breaks):
"Files": {
    "left": "left.md",
    "center": "center.md",
    "right": "right.md"
}
- Three markdown strings:
"Text": {
    "left": "This is the left column.",
    "center": "This is the center column.",
    "right": "This is the right column."
}
- A single markdown file with exactly three paragraphs:
Example JSON:
"File": "text.md"
An example file:
This is the left column.

This is the center column.

This is the right column.
A very subset of markdown is used in Talmudifier:
For the most part, just type text like you normally would. You can italicize text like *this*. You can make text bold like **this**. You can make bold and italic text like ***this***. **You can make multiple words bold and you can *italicize* within bold text** (*and **vice** versa*). `If you want to add marginalia, use graves.`
Links, images, headers, emoji, etc. are not supported.
Title
By default, "title" is set to null. Set it to something else to add a title to the page:
"title": "Chapter 1"
Logging
Set "log": true to enable logging. This will generated intermediary files per iteration that can be useful for debugging. This will also make Talmudifier run slower.
How it works
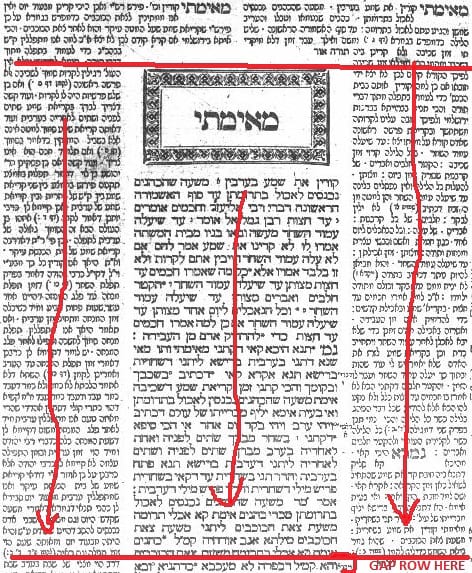
The Talmud's typesetting dates back to the invention of the printing press. Printmaking was easy but paper was expensive so people crammed several texts onto a single page. The standard "Talmud page layout" is actually the Talmud as printed in the Vilna Shas, and other page layouts are possible.
There are rules defining how to typeset a Talmud page. The Vilna Shas predates the formalization of iterative algorithms, so some pages follow the rules less strictly than others. Talmudifier strictly follows the following rules:
- There are always three columns of text
- Whenever possible, the page starts with four lines of text in the left and right columns followed by a "gap" row to give the center column some breating space:

- After this, columns are typeset using the following algorithm until there is no more text:
- Each column can have a different typeface (most famously, Rashi's commentary has its own typeface).
- The widths of the columns are determined by which columns still have text. For example, if the left and right columns have text that needs to be typeset but the center column doesn't, then the column widths are each half of the total width of the table.
- Find the column with the least number of lines (n).
- Add all columns that still have text to the page up to n lines (or, if there isn't enough text, just add all remaining text).
- Marginalia is always in-line with the text that it is commenting on.
- For the columns that still have text, add "gap" rows.
For more information, read: Printing the Talmud : a history of the earliest printed editions of the Talmud by Martin Heller
There is a fundamental problem in the typesetting algorithm: We need to iteratively get the number of lines in a column. Traditionally, this process would be sped up by experienced typesetters because they'd be able to eyeball how many character blocks would fit in a rectangle. Talmudifier emulates this heurisitic with the following algorithm:
- Create a table that has text only in one column (the one we're trying to measure).
- Using Cosmic Text, a crate normally meant for GUI text, add words to the column until we've reach the the target line count. This will be used as an initial guess in the next step for guessing the number of words that might fit on the PDF page. Cosmic Text is significantly faster than XeTeX.
- Generate an XDV file with XeTeX in-memory. Normally, XeTeX generates an XDV file from a TeX string and then converts the XDV file to a PDF. We skip the final step because right now we just need the line counts.
- Extract the line count per page from the XDV file.
- Add or subtract a word as needed, and repeat the process until the column is filled up to the target number of lines.
- Render the final PDF.
Feature flags
default-fontsembeds default fonts into the executable. You might want to remove this if you want to use other fonts because the default fonts make the binary bigger.clapis required for some of the executables. If you're using Talmudifier as a library, you can ignore this.textestis only used for thetextestbinary; it makes some extra functions and structs public.
Benchmark
To run a very rudimentary benchmark:[^2]
cargo run --bin benchmark --release
Current benchmark: 18 seconds
Other executables
To regenerate example_talmudifier.json:
cargo run --bin example_config
To convert an arbitrary .tex file into a .pdf (useful for debugging):
cargo run --bin textest --features textest -d directory/ -f filename.tex
The -d argument is optional and defaults to logs/.
You can also, optionally, add -x to create a .xdv file instead of a .pdf, which is useful for debugging line counts.
Changes from Python
This is a Rust port of my talmudifier Python module. Major differences include:
-
It's twelve times faster.[^3]
-
No external TeX engine needed. Talmudifier has its own internal TeX engine.
-
No need to manually download any TeX packages. Talmudifier will download the required packages for you.
-
Two major performance improvements to the algorithm:
- Python Talmudifier uses hard-coded values to guess the maximum number of words that can fit in a cell, and then uses that guess as the start index for finding the actual number. Rust Talmudifier also guesses the start index, but uses Cosmic Text, which is more flexible and accurate.
- When counting lines, Python Talmudifier extracted text from a pdf that was saved to disk. Rust Talmudifier parses a .xdv file in-memory.
- When trying to fill a cell with words, Python Talmudifier increments or decrements one word at a time. This always works, but there is overhead to rendering many single pages vs. a single multi-page render. Rust Talmudifier renders multiple pages of incrementing/decrementing guesses. The resulting process is roughly four times faster than it would've been if Rust Talmudifier rendered separate PDFs.
-
Default fonts are embedded in the executable
-
Simplified the config file
-
No longer supported:
- 1-1 word/character substitutions
- Colorization of specific words
[^1]: If cargo vcpkg build fails, it's probably because you've got a whitespace in the root file path. To fix: Move target/vcpkg to a directory without white spaces, such as: C:/vcpkg. Then: cd C:/vcpkg Then: vcpkg install icu on MacOS and Linux, or vcpkg install icu --triplet x64-windows-static on Windows. Then: Move vcpkg/ back to <project>/target/ The Internet implies that a newer compiler than what I'm using might fix the problem. Or maybe it won't. Sorry.
[^2]: There's no need for anything more complicated than this because Talmudifier is so slow.
[^3]: See the benchmark. With Python Talmudifier, a similar benchmark takes 216 seconds.
Dependencies
~51–87MB
~1.5M SLoC