114 releases (64 breaking)
Uses new Rust 2024
| 0.70.2 | May 15, 2025 |
|---|---|
| 0.69.2 | May 7, 2025 |
| 0.65.2 | Mar 23, 2025 |
| 0.64.1 | Dec 5, 2024 |
| 0.12.1 | Dec 31, 2020 |
#1524 in GUI
1,985 downloads per month
Used in raui
515KB
14K
SLoC
RAUI 

About
RAUI is a renderer agnostic UI system that is heavily inspired by React's declarative UI composition and the Unreal Engine Slate widget components system.
🗣 Pronunciation: RAUI is pronounced like "ra" ( the Egyptian god ) + "oui" (french for "yes" ) — Audio Example.
The main idea behind RAUI architecture is to treat UI as another data source that you transform into your target renderable data format used by your rendering engine of choice.
Architecture
Application
Application is the central point of user interest. It performs whole UI processing logic.
There you apply widget tree that wil be processed, send messages from host application to
widgets and receive signals sent from widgets to host application.
Widgets
Widgets are divided into three categories:
-
WidgetNode- used as source UI trees (variant that can be either a component, unit or none) -
WidgetComponent- you can think of them as Virtual DOM nodes, they store:- pointer to component function (that process their data)
- unique key (that is a part of widget ID and will be used to tell the system if it should carry its state to next processing run)
- boxed cloneable properties data
- listed slots (simply: widget children)
- named slots (similar to listed slots: widget children, but these ones have names assigned to them, so you can access them by name instead of by index)
-
WidgetUnit- an atomic element that renderers use to convert into target renderable data format for rendering engine of choice.
Component Function
Component functions are static functions that transforms input data (properties, state or
neither of them) into output widget tree (usually used to simply wrap another components tree
under one simple component, where at some point the simplest components returns final
WidgetUnit's). They work together as a chain of transforms - root component applies some
properties into children components using data from its own properties or state.
States
This may bring up a question: "If i use only functions and no objects to tell how to visualize UI, how do i keep some data between each render run?". For that you use states. State is a data that is stored between each processing calls as long as given widget is alive (that means: as long as widget id stays the same between two processing calls, to make sure your widget stays the same, you use keys - if no key is assigned, system will generate one for your widget but that will make it possible to die at any time if for example number of widget children changes in your common parent, your widget will change its id when key wasn't assigned). Some additional notes: While you use properties to send information down the tree and states to store widget data between processing cals, you can communicate with another widgets and host application using messages and signals! More than that, you can use hooks to listen for widget life cycle and perform actions there. It's worth noting that state uses properties to hold its data, so by that you can for example attach multiple hooks that each of them uses different data type as widget state, this opens the doors to be very creative when combining different hooks that operate on the same widget.
Hooks
Hooks are used to put common widget logic into separate functions that can be chained in widgets and another hooks (you can build a reusable dependency chain of logic with that). Usually it is used to listen for life cycle events such as mount, change and unmount, additionally you can chain hooks to be processed sequentially in order they are chained in widgets and other hooks.
What happens under the hood:
- Application calls
buttonon a nodebuttoncallsuse_buttonhookuse_buttoncallsuse_emptyhook
use_buttonlogic is executed
buttonlogic is executed
Layouting
RAUI exposes the Application::layout() API to allow
use of virtual-to-real coords mapping and custom layout engines to perform widget tree
positioning data, which is later used by custom UI renderers to specify boxes where given
widgets should be placed. Every call to perform layouting will store a layout data inside
Application, you can always access that data at any time. There is a DefaultLayoutEngine
that does this in a generic way. If you find some part of its pipeline working different than
what you've expected, feel free to create your custom layout engine!
Interactivity
RAUI allows you to ease and automate interactions with UI by use of Interactions Engine - this
is just a struct that implements perform_interactions method with reference to Application,
and all you should do there is to send user input related messages to widgets. There is
DefaultInteractionsEngine that covers widget navigation, button and input field - actions
sent from input devices such as mouse (or any single pointer), keyboard and gamepad. When it
comes to UI navigation you can send raw NavSignal messages to the default interactions
engine and despite being able to select/unselect widgets at will, you have typical navigation
actions available: up, down, left, right, previous tab/screen, next tab/screen, also being able
to focus text inputs and send text input changes to focused input widget. All interactive widget
components that are provided by RAUI handle all NavSignal actions in their hooks, so all
user has to do is to just activate navigation features for them (using NavItemActive unit
props). RAUI integrations that want to just use use default interactions engine should make use
of this struct composed in them and call its interact method with information about what
input change was made. There is an example of that feature covered in RAUI App crate
(AppInteractionsEngine struct).
NOTE: Interactions engines should use layout for pointer events so make sure that you rebuild layout before you perform interactions!
Media
-
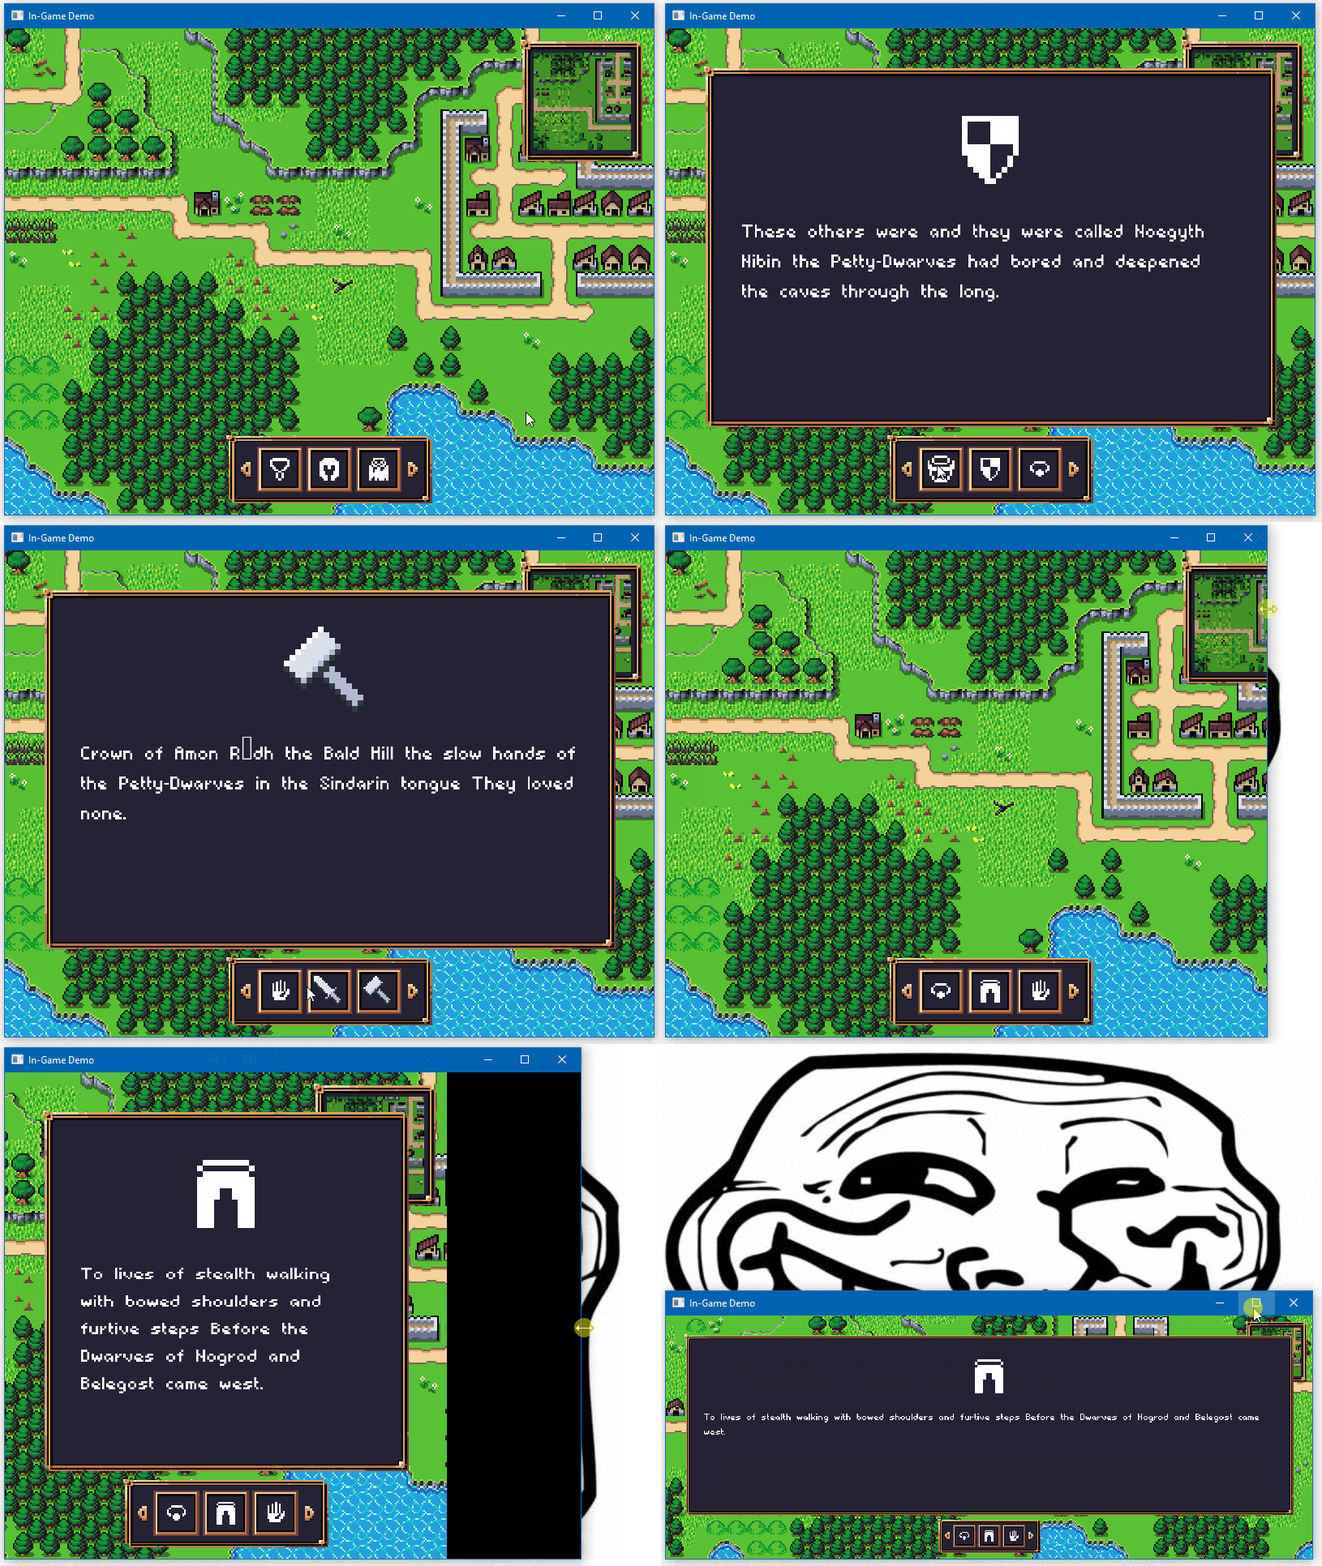
RAUI + Spitfire In-GameAn example of an In-Game integration of RAUI with custom Material theme, using Spitfire as a renderer.
-
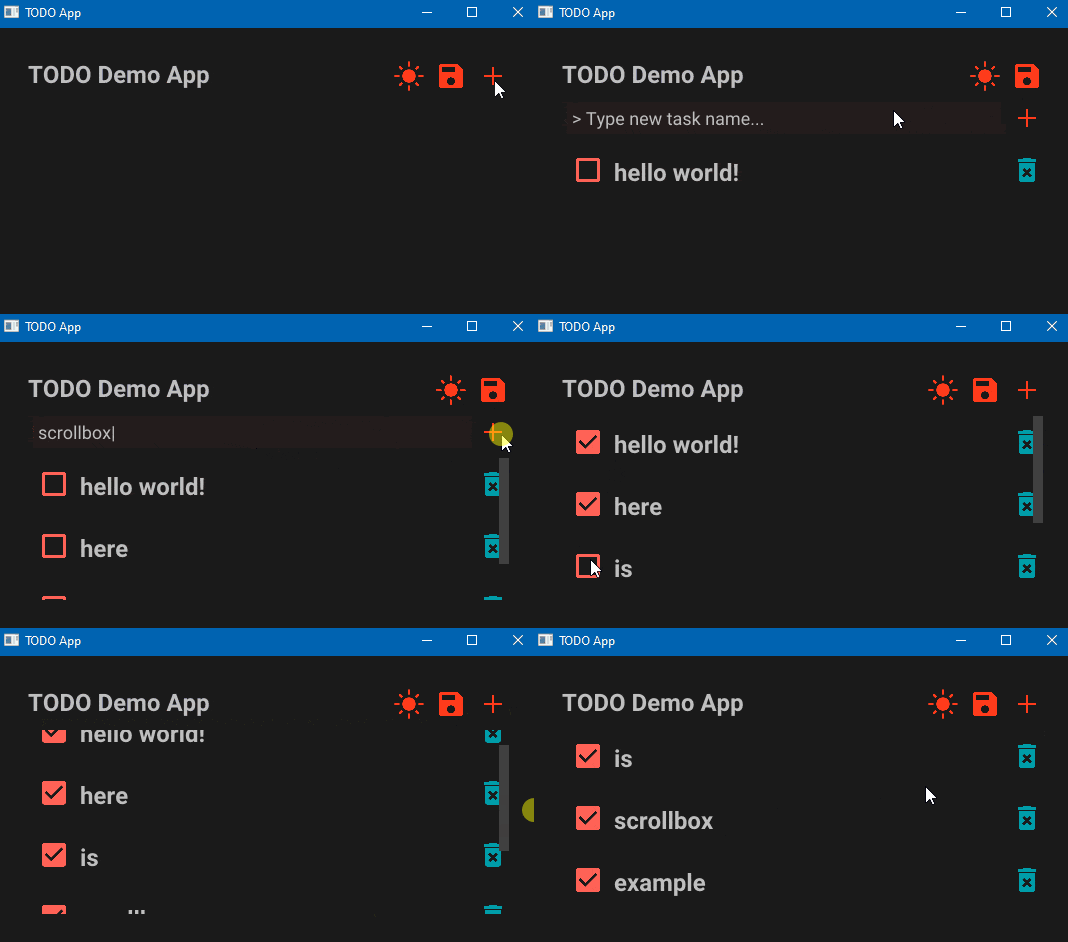
RAUI Todo AppAn example of TODO app with dark theme Material component library.
Contribute
Any contribution that improves quality of the RAUI toolset is highly appreciated.
- If you have a feature request, create an Issue post and explain the goal of the feature along with the reason why it is needed and its pros and cons.
- Whenever you would like to create na PR, please create your feature branch from
nextbranch so when it gets approved it can be simply merged using GitHub merge button - All changes are staged into
nextbranch and new versions are made out of its commits, master is considered stable/release branch. - Changes should pass tests, you run tests with:
cargo test --all --features all. - This readme file is generated from the
lib.rsdocumentation and can be re-generated by usingcargo readme.
Milestones
RAUI is still in early development phase, so prepare for these changes until v1.0:
- Integrate RAUI into one public open source Rust game.
- Write documentation.
- Write MD book about how to use RAUI properly and make UI efficient.
- Implement VDOM diffing algorithm for tree rebuilding optimizations.
- Find a solution (or make it a feature) for moving from trait objects data into strongly typed data for properties and states.
Things that now are done:
- Add suport for layouting.
- Add suport for interactions (user input).
- Create renderer for GGEZ game framework.
- Create basic user components.
- Create basic Hello World example application.
- Decouple shared props from props (don't merge them, put shared props in context).
- Create TODO app as an example.
- Create In-Game app as an example.
- Create renderer for Oxygengine game engine.
- Add complex navigation system.
- Create scroll box widget.
- Add "immediate mode UI" builder to give alternative to macros-based declarative mode UI building (with zero overhead, it is an equivalent to declarative macros used by default, immediate mode and declarative mode widgets can talk to each other without a hassle).
- Add data binding property type to easily mutate data from outside of the application.
- Create tesselation renderer that produces Vertex + Index + Batch buffers ready for mesh renderers.
- Move from
widget_component!andwidget_hook!macro rules topre_hooksandpost_hooksfunction attributes. - Add derive
PropsDataandMessageDataprocedural macros to gradually replace the need to callimplement_props_data!andimplement_message_data!macros. - Add support for portals - an easy way to "teleport" sub-tree into another tree node (useful for modals and drag & drop).
- Add support for View-Model for sharing data between host app and UI.
Dependencies
~0.9–2MB
~41K SLoC