5 releases
| 0.2.3 | Mar 12, 2024 |
|---|---|
| 0.2.2 | Mar 9, 2024 |
| 0.2.1 | Mar 8, 2024 |
| 0.2.0 | Mar 8, 2024 |
| 0.1.0 | Feb 24, 2024 |
#76 in Email
247 downloads per month
470KB
1K
SLoC
openpgp-paper-backup
openpgp-paper-backup is a CLI tool for a physical, printed on paper backup
of OpenPGP key. If you're using e.g. GnuPG, you should
take good care of backing up your private key. Ideally, the backup should be
offline. You should also think about the redundancy of the backed-up key.
E.g., if you decide to store the backup on a flash drive, you have to take into
account the fact that it might simply be a subject to bit rot(s), if the
drive has been unplugged for too long. Having to rely on remembering on
plugging it in every now and then is not ideal.
With openpgp-paper-backup you'll be able to generate a PDF with a series of
Qr Codes each one containing a portion
of the private key. Later, if need be, you can use openpgp-paper-backup to
restore the private key from a scanned PDF. The workflow is:
- Use
openpgp-paper-backup backupto convert the OpenPGP Private Key to PDF - Scan the PDF and safely store the print-out.
- If you ever lose the private key and need to rely on your backup, you scan each page of the printout into a JPEG file. Store all JPEGs in a single directory.
- use
openpgp-paper-backup restoreto restore the backup.
How is it different from paperkey
paperkey is a great and robust peace of software. It does exactly what I
need, given I'd have a reliable OCR system that would convert scanned
document (paperkey's output) back into a text file. I played a lot with
Tesseract, but the results were unpredictable. This OCR
does a perfect job with recognizing actual human language (tested only
English), but with a bunch of hexadecimals it did terrible. It simply wasn't
designed for that. That's why I've opted for creating a different solution.
Namely, instead of generating text, I've created a tool that, instead, creates
a series of Qr Codes. Each of those Qr Codes contains a portion of a
PEM-formatted key. And the tool is able to easily reconstruct the full private
key from the Qr Codes.
Real Use Case Scenario
OpenPGP is being used for various different reasons. There are tons of use cases. It's impossible to cover them all. Whatever your particular use case is, you probably still want to back up your private key securely. Anyway, let me elaborate on my use case here.
I'm a Debian Deeloper. The security of my key is really important -- whoever has an access to one of Debian Developer's OpenPGP keys is able to upload packages to the Debian Archive. Also, if the private key gets lost/damaged, the process of replacing the key without the access to the old one is really cumbersome.
So the way I use my key is:
- I have my main certification OpenPGP Key offline (backed-up offline). It's never present on my dev workstation.
- I have 3 subkeys attached to the main certification key:
- Signing Key I use this key to sign my emails and Debian package uploads
- Authentication Key I use it with SSH to log in to my various systems
- Encryption Key Use it only sometimes whenever I get an encrypted email
- I've transferred the above keys to a Hardware Key, so these are also not present on my dev workstation. Whenever I need to use them, I have to plug the key into a USB port and enter PIN when prompted. The key is never transferred back to the computer -- all cryptographic operations are performed by the key itself.
The most popular for a Hardware Key to host your subkeys is Yubikey. They're really reliable and pretty much an industry standard. So they'll just work for you. I personally prefer more open-source and open-hardware solutions if possible, so the HW key of my choice is Nitrokey.
I use my OpenPGP key primarily via GnuPG, since all the Debian Developer's tools are based on top of it.
Creating an OpenPGP Certification Key
Because later you won't be storing the certification key in your home
directory, it's best to create the key in a temporary directory, which you'll
delete after creating and backing up the main (certification) key and all 3
subkeys. So for that it's best to set GNUPGHOME env variable -- by default,
GnuPG stores the configuration, keys and web-of-trust details in ~/.gnupg
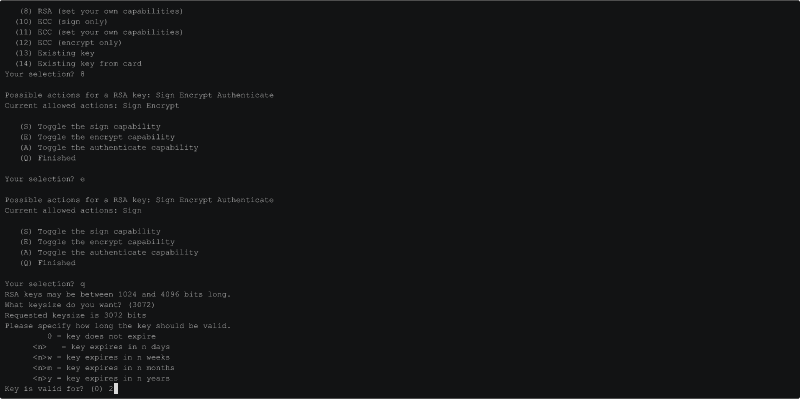
directory. Then, use gpg --expert --full-gen-key to generate:
Curve 25519Certification keyRSAsubkey for SigningRSAsubkey for AuthenticationRSAsubkey for Encryption
If your hardware key supports Elliptic Curve keys, you might, instead, create
all the subkeys using Curge 25519, instead. RSA is a pretty safe choice,
though, if you plan on experimenting with different brands -- as far as I know
most, if not all, support RSA keys of length at least 2048 bits. Here I'll
use 3072 bits, which should be a pretty safe choice for most HW Keys:
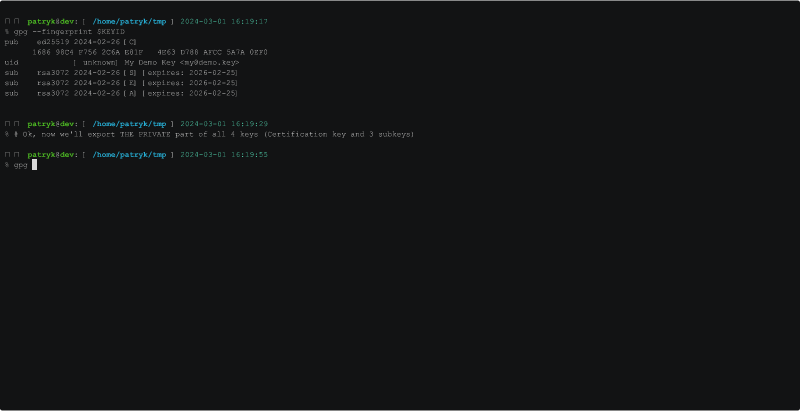
Exporting the Secret Keys
Now it's time to export the secret keys (the main Certification key and the
three subkeys) to a file. That file will then be read by openpgp-paper-backup
when preparing the printable PDF.
Again, the most important thing to understand is we have to export the private
key*. With GnuPG you do that using --export-secret-keys. If you use
--export-keys, instead, you'll back up the public portion of your keys only.
Make sure to use --export-secret-keys when exporting Private Keys!.
Following the example above:
Generate Paper Backup
Now we have the private keys saved in the file: exported_PRIVATE_keys.pgp.
We're ready to generate the printable PDF document:
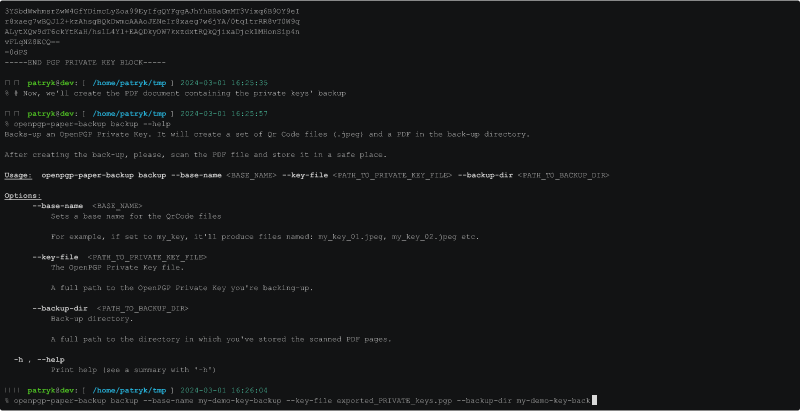
As the result we have a bunch of JPEG files and a single PDF document:
S ls my-demo-key-backup-dir/
my-demo-key-backup_00.jpeg  my-demo-key-backup_03.jpeg  my-demo-key-backup_06.jpeg  my-demo-key-backup_09.jpeg  my-demo-key-backup_12.jpeg
my-demo-key-backup_01.jpeg  my-demo-key-backup_04.jpeg  my-demo-key-backup_07.jpeg  my-demo-key-backup_10.jpeg  my-demo-key-backup.pdf
my-demo-key-backup_02.jpeg  my-demo-key-backup_05.jpeg  my-demo-key-backup_08.jpeg  my-demo-key-backup_11.jpeg
Each of those JPEGs contains a portion of the exported_PRIVATE_keys.pgp file
in a form of a Qr Code. The PDF contains all those Qr Codes. You can either:
- print all Qr Codes, or
- simply print the PDF file (here,
my-demo-key-backup-dir/my-demo-key-backup.pdf).
For the sake of this walkthrough, I'll assume, you've printed the PDF document.
Restoring from Scanned Backup
Now, to restore the backup, you have to either scan the PDF into a set of
JPEGs (each JPEG being a page from the PDF), or print all the Qr Codes into
a set of JPEGs. Put all the scanned JPEGs in a directory (the directory can't
contain ANY OTHER FILES! Just the JPEGs). Then run
openpgp-paper-backup restore ... command to restore the file back into
an OpenPGP Key file. Once restored, you can import it using
gpg --import <the_file_youve_restored>:

Dependencies
~59MB
~819K SLoC