28 releases
| 0.1.27 | Dec 2, 2024 |
|---|---|
| 0.1.26 | Nov 25, 2024 |
| 0.1.24 | Oct 27, 2024 |
| 0.1.15 | Jun 21, 2024 |
#20 in Machine learning
2,124 downloads per month
1.5MB
5K
SLoC
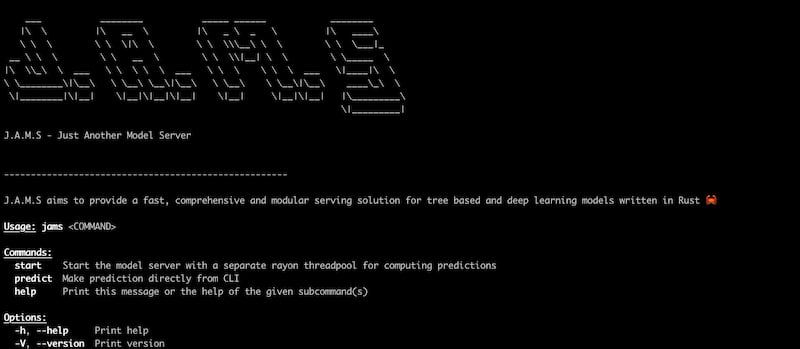
JAMS
This crate provides a CLI for interacting J.A.M.S - Just Another Model Server.
⚠️ DISCLAIMER: jams is reaching stable version but may not run properly on ARM chips. Future releases will fix this. For now use docker image or Linux x86_64 architecture. Only Pytorch 2.2.0 is supported for now due to dependencies on FFI bindings. Although you may be able to run models trained on version <= 2.2.0
Features
- Async
- Separate Rayon Threadpool for computing predictions
- Multiple Model Frameworks Supported
- Tensorflow
- Torch*
- Catboost
- LightGBM
- Multiple Model Store Backends Supported with Polling
- Local File System
- AWS S3
- Azure Blob Storage
- MinIO
- Thin & Fast API Layer
- HTTP via Axum
- gRPC via Tonic
- Ready to use clients
- Python
- Go
- Rust
- TypeScript 🚧
- JAVA 🚧
The following features are in progress 🚧
- Support XGBoost framework
- ModelSpec - Single source of information about models. This will assist in input validations
Docker Setup
J.A.M.S is hosted on DockerHub.
docker pull gagansingh894/jams
Docker Compose
Ensure that you have docker compose installed on your system. Please follow instructions here
Note: If you are on Apple Silicon, please disable Use Rosetta for x86_64/amd64 emulation on Apple Silicon option under settings
To quickly get started running with J.A.M.S, please run the following commands
- Execute bash script
The script creates a jams-playground directory with a subdirectory models, and then downloads a Docker Compose configuration file and several machine learning model files from a GitHub repository into the respective directories. It runs with superuser privileges using sudo to ensure necessary permissions for directory creation and file downloads.
sudo bash -c 'mkdir -p jams-playground/models && \
wget -q -O jams-playground/docker-compose-http-grpc-minio.yml https://raw.githubusercontent.com/gagansingh894/jams-rs/main/build/docker-compose-http-grpc-minio.yml && \
wget -q -O jams-playground/models/catboost-titanic_model.tar.gz https://github.com/gagansingh894/jams-rs/raw/main/jams-serve/tests/model_store/catboost-titanic_model.tar.gz && \
wget -q -O jams-playground/models/lightgbm-my_awesome_reg_model.tar.gz https://github.com/gagansingh894/jams-rs/raw/main/jams-serve/tests/model_store/lightgbm-my_awesome_reg_model.tar.gz && \
wget -q -O jams-playground/models/pytorch-my_awesome_californiahousing_model.tar.gz https://github.com/gagansingh894/jams-rs/raw/main/jams-serve/tests/model_store/pytorch-my_awesome_californiahousing_model.tar.gz && \
wget -q -O jams-playground/models/tensorflow-my_awesome_penguin_model.tar.gz https://github.com/gagansingh894/jams-rs/raw/main/jams-serve/tests/model_store/tensorflow-my_awesome_penguin_model.tar.gz'
- Run docker compose
docker compose -f jams-playground/docker-compose-http-grpc-minio.yml up
If everything works fine, this should start a minio server with some preloaded models as model store, J.A.M.S http and J.A.M.S grpc server for
making predictions. You can add new models by uploading them directly to minio via UI (http://0.0.0.0:9001). The models
should be of supported types and follow the naming convention <model_framework>-model_name.tar.gz.
Use the curl commands to make predictions
curl --location '0.0.0.0:3000/api/predict' \
--header 'Content-Type: application/json' \
--header 'Accept: application/json' \
--data '{
  "model_name": "my_awesome_penguin_model",
  "input": "{\"island\":[2.0,2.0,2.0,2.0,2.0],\"bill_length_mm\":[39.1,39.5,40.3,36.7,39.3],\"bill_depth_mm\":[18.7,17.4,18.0,19.3,20.6],\"flipper_length_mm\":[181.0,186.0,195.0,193.0,190.0],\"body_mass_g\":[3750.0,3800.0,3250.0,3450.0,3650.0],\"sex\":[1.0,0.0,0.0,0.0,1.0]}"
}'
curl --location '0.0.0.0:3000/api/predict' \
--header 'Content-Type: application/json' \
--header 'Accept: application/json' \
--data '{
  "model_name": "titanic_model",
  "input": "{\"adult_male\":[\"True\",\"False\"],\"age\":[22.0,23.79929292929293],\"alone\":[\"True\",\"False\"],\"class\":[\"First\",\"Third\"],\"deck\":[\"Unknown\",\"Unknown\"],\"embark_town\":[\"Southampton\",\"Cherbourg\"],\"embarked\":[\"S\",\"C\"],\"fare\":[151.55,14.4542],\"parch\":[\"0\",\"0\"],\"pclass\":[\"1\",\"3\"],\"sex\":[\"male\",\"female\"],\"sibsp\":[\"0\",\"1\"],\"who\":[\"man\",\"woman\"]}"
}'
Alternatively, you can use Postman or equivalent.
Config File
The easiest way to start J.A.M.S is by providing a config TOML file
[config]
protocol = "http"                               # Specifies the protocol to be used by the server.
                                                # Allowed values: "http", "grpc"

port = 3000                                     # Defines the port number on which the server will listen.
                                                # This should be an integer between 1 and 65535.
                                                # Example: 3000 for HTTP, 443 for HTTPS

model_store = "local"                           # Indicates the type of model store being used.
                                                # Allowed values:
                                                # - "local": Use local storage.
                                                # - "aws": Use AWS S3 for model storage.
                                                # - "azure": Use Azure Blob Storage.

model_dir = "<absolute path>"                   # Specifies the directory path where models are stored locally.
                                                # If `model_store` is set to "local", this directory is used
                                                # to store or load models.

azure_storage_container_name = "jamsmodelstore" # Specifies the name of the Azure Blob Storage container
                                                # used for storing models when `model_store` is set to "azure".
                                                # This should be a valid container name in Azure.

s3_bucket_name = "jamsmodelstore"               # Indicates the name of the S3 bucket used for storing models
                                                # when `model_store` is set to "aws".
                                                # This should be a valid bucket name in AWS S3.

poll_interval = 600                             # Defines the time interval (in seconds) for polling the model store
                                                # to check for updates.
                                                # Example: 600 means the application will poll every 10 minutes.

num_workers = 4                                 # Sets the number of Rayon threadpool worker threads
                                                # Example: 4 threads
Then Run
docker run --rm -v /your/path/to/model_store:/model_store -p 3000:3000 gagansingh894/jams start -f config.toml
There are other ways to start J.A.M.S. Please follow the following commands to start the server inside docker.
If you want to disable polling, then do not pass --poll-interval
To run HTTP server, use
docker run --rm -v /your/path/to/model_store:/model_store -p 3000:3000 gagansingh894/jams start http --model-dir local --poll-interval 3600
To run gRPC server, use
docker run --rm -v /your/path/to/model_store:/model_store -p 4000:4000 gagansingh894/jams start grpc --model-store=local --poll-interval 3600
To run with a S3/MinIo backend
- Create a S3 bucket with some models in it. Please refer to the structure of model store here.
- Set the environment variables -
AWS_REGION,AWS_ACCESS_KEY_ID,AWS_SECRET_ACCESS_KEY. Alternatively if you have multiple AWS profiles then just set theAWS_PROFILE-<profile_name>You also need to set the bucket name. This can either be set viaS3_BUCKET_NAMEenv variable or passed via--s3-bucket-nameflag - If using
minio, you will need to set these environment variables in addition to the above =MINIO_ACCESS_KEY_ID,MINIO_SECRET_ACCESS_KEYandMINIO_URL. The default values areminioadminandhttp://0.0.0.0:9000respectively - Run the command to start HTTP server with S3 model store. It assumes that bucket name is already set via
S3_BUCKET_NAME
docker run --rm -p 3000:3000 gagansingh894/jams start http --model-store=<aws|minio> --poll-interval 3600
- For gRPC server, use
docker run --rm -p 4000:4000 gagansingh894/jams start grpc --model-store=<aws|minio> --poll-interval 3600
- If you want to pass bucket name, use
docker run --rm -p 3000:3000 gagansingh894/jams start http --model-store=<aws|minio> --s3-bucket-name=<bucket_name>
To run with a Azure Blob Storage backend
- Create a Azure Storage container with some models in it. Please refer to the structure of model store here.
- Set the environment variables -
STORAGE_ACCOUNT,STORAGE_ACCESS_KEY. You also need to set the azure container name. This can either be set viaAZURE_STORAGE_CONTAINER_NAMEenv variable or passed via--azure-storage-container-nameflag - Run the command to start HTTP server with Azure model store. It assumes that container name is already set via
AZURE_STORAGE_CONTAINER_NAME
docker run --rm -p 3000:3000 gagansingh894/jams start http --model-store=azure --poll-interval 3600
- For gRPC server, use
docker run --rm -p 4000:4000 gagansingh894/jams start grpc --model-store=azure --poll-interval 3600
- If you want to pass container name, use
docker run --rm -p 3000:3000 gagansingh894/jams start http --model-store=azure --azure-storage-container-name=<container_name> --poll-interval 3600
Please refer to OpenAPI Spec for API endpoints. Alternatively, you can also refer to the proto definition.
Local Setup
Ensure that Cargo and Rust compiler are installed. Follow instructions here if not installed
This project relies on a couple of shared libraries. To easily set up, please follow the steps below
Mac - Apple Silicon
- Install Homebrew if not already installed
- Install Rust if not already installed. The MSRV is 1.81.
- Run the following command to install bazel, lightgbm, pytorch and tensorflow
brew install bazel lightgbm tensorflow
- Download Pytorch 2.2.0 from Pytorch website and set it to path
sudo sh -c '
    echo "Downloading libtorch for macOS (ARM64)...";
    wget https://download.pytorch.org/libtorch/cpu/libtorch-macos-arm64-2.2.0.zip -O /usr/local/lib/libtorch-macos-arm64-2.2.0.zip;

    echo "Unzipping libtorch into /usr/local/lib/libtorch2_2_0...";
    mkdir -p /usr/local/lib/libtorch2_2_0;
    unzip /usr/local/lib/libtorch-macos-arm64-2.2.0.zip -d /usr/local/lib/libtorch2_2_0;

    echo "Cleaning up by deleting the zip file...";
    rm /usr/local/lib/libtorch-macos-arm64-2.2.0.zip;

    echo "Please add the following to your .bashrc/.zshrc and restart terminal...";
    COMMON_LIBS_PATH=/usr/local/lib
    LIBTORCH=$COMMON_LIBS_PATH/libtorch2_2_0/libtorch
    LIBTORCH_INCLUDE=$COMMON_LIBS_PATH/libtorch2_2_0/libtorch
    LIBTORCH_LIB=$COMMON_LIBS_PATH/libtorch2_2_0/libtorch
    DYLD_LIBRARY_PATH=$COMMON_LIBS_PATH:$COMMON_LIBS_PATH/libtorch2_2_0/libtorch

    echo "Libtorch installed in /usr/local/lib/libtorch2_2_0 and zip file deleted.";
'
- Download catboost library(.dylib) directly from Github
sudo wget -q https://github.com/catboost/catboost/releases/download/v1.2.5/libcatboostmodel-darwin-universal2-1.2.5.dylib -O /usr/local/lib/libcatboostmodel.dylib
- Copy lightGBM library(.dylib) and libomp library to usr/local/lib
sudo cp /opt/homebrew/Cellar/lightgbm/$(brew list --versions lightgbm | awk '{print $2}')/lib/lib_lightgbm.dylib /usr/local/lib/ && sudo cp /opt/homebrew/Cellar/libomp/$(brew list --versions libomp | awk '{print $2}')/lib/libomp.dylib /usr/local/lib/
- Add the following environment variables to .bashrc/.zshrc
export COMMON_LIBS_PATH=/usr/local/lib
export LIBTORCH=$COMMON_LIBS_PATH/libtorch2_2_0/libtorch
export LIBTORCH_INCLUDE=$COMMON_LIBS_PATH/libtorch2_2_0/libtorch
export LIBTORCH_LIB=$COMMON_LIBS_PATH/libtorch2_2_0/libtorch
export DYLD_LIBRARY_PATH=$COMMON_LIBS_PATH:$COMMON_LIBS_PATH/libtorch2_2_0/libtorch/lib
- Run the following command to install jams
cargo install jams
Linux
-
Use the bash script here based on your system architecture
-
Run the following commands or add them to shell profile
# add environment variables
export COMMON_LIBS_PATH=/usr/local/lib
export LIGHTGBM_LIB_DIR=$COMMON_LIBS_PATH
export LIBTORCH=$COMMON_LIBS_PATH/libtorch
export LIBTORCH_INCLUDE=$COMMON_LIBS_PATH/libtorch
export LIBTORCH_LIB=$COMMON_LIBS_PATH/libtorch
export LD_LIBRARY_PATH=$COMMON_LIBS_PATH:$COMMON_LIBS_PATH/libtorch/lib
export LIBRARY_PATH=$LIBRARY_PATH:$COMMON_LIBS_PATH/libtensorflow
export LD_LIBRARY_PATH=$LD_LIBRARY_PATH:$COMMON_LIBS_PATH/libtensorflow/lib
- Run the following command to install J.A.M.S
cargo install jams
API Endpoints
Once J.A.M.S is up and running, these endpoints will help you interact with the server.
Please refer to OpenAPI Spec for details.
/healthcheck: Endpoint for health checks
/api/predict: Endpoint for making predictions
/api/models: Endpoint for managing models
Alternatively, you can refer also refer to the proto definition. It provides the following RPCs
HealthCheckPredictGetModelsAddModelUpdateModelDeleteModel
Usage
The CLI provides the following commands
- jams start
- jams predict
start
Use this command to start either the HTTP/gRPC model server on 0.0.0.0:3000/0.0.0.0:4000 with separate rayon threadpool for computing predictions
The server expects a model directory containing the models. This can be either passed using the
--model-dir flag
To start HTTP server
jams start http --model-dir path/to/model_dir
To start gRPC server
jams start grpc --model-dir path/to/model_dir
Alternatively, you can set the MODEL_STORE_DIR env variable pointing to the model directory
and run jams start http or jams start grpc
export MODEL_STORE_DIR=path/to/model_dir
By default, the server runs on port 3000 and 2 workers in the rayon threadpool.You can override using
the --port and --num-workers flags respectively. The log level can also be changed to
DEBUG level using --use-debug-level=true.
Model Store
Below is the expected structure of model stores.
- Notice the model naming convention <model_framework>-model_name.tar.gz.
- The server unpacks and loads the model files.
- The server will warn about the unsupported formats and continue to load other models
└── model_store
    ├── catboost-my_awesome_binary_model.tar.gz
    ├── catboost-my_awesome_multiclass_model.tar.gz
    ├── catboost-my_awesome_regressor_model.tar.gz
    ├── catboost-titanic_model.tar.gz
    ├── lightgbm-my_awesome_binary_model_2.tar.gz
    ├── lightgbm-my_awesome_reg_model.tar.gz
    ├── lightgbm-my_awesome_xen_binary_model.tar.gz
    ├── lightgbm-my_awesome_xen_prob_model.tar.gz
    ├── pytorch-my_awesome_californiahousing_model.tar.gz
    ├── tensorflow-my_awesome_autompg_model.tar.gz
    ├── tensorflow-my_awesome_penguin_model.tar.gz
    ├── tensorflow-my_awesome_sequential_model.tar.gz
    └── torch-my_awesome_penguin_model.tar.gz
predict
Use this command for making predictions via CLI for making predictions for the following models
- Tensorflow
- Torch
- Catboost
- LightGBM
Refer below for some examples of the predict command.
There are multiple python scripts in examples folder which would allow you to generate different models and their corresponding sample json input. Below are some examples
Tensorflow
- Run tensorflow_penguin_multiclass_classification_model.py
- This will create two files- a model file and input json file
- Run the following command and pass in the path for model file and input file
jams predict tensorflow --model-path=tensorflow_penguin_functional --input-path=tensorflow_input.json
Torch
- Run torch_penguin_multiclass_classification_model.py
- This will create two files- a model file and input json file
- Run the following command and pass in the path for model file and input file
jams predict torch --model-path=torch_penguin.pt --input-path=torch_input.json
Catboost
- Run catboost_titanic_binary_classification_model.py
- This will create two files- a model file and input json file
- Run the following command and pass in the path for model file and input file
jams predict catboost --model-path=catboost_titanic --input-path=catboost_input.json
LightGBM
- Run lightgbm_iris_binary_classification_model.py
- This will create two files- a model file and input json file
- Run the following command(example) and pass in the path for model file and input file
jams predict lightgbm --model-path=lightgbm_iris.txt --input-path=lightgbm_input.json
Dependencies
~99MB
~1.5M SLoC